Creating your own DIY outdoor furniture isn’t just a way to save money—it’s an opportunity to craft pieces that perfectly match your style and space. Whether you’re looking to outfit a small balcony or a sprawling backyard, building your own outdoor furniture brings a sense of accomplishment that store-bought pieces simply can’t match. In this guide, we’ll review seven popular DIY outdoor furniture projects, breaking down what makes each one special, what skills you’ll need, and exactly what materials to gather before you begin.
This Website contains affiliate links. That means I may earn a small commission if you purchase through my links, at no extra cost to you.
Why Build Your Own Outdoor Furniture?
Before diving into specific projects, let’s talk about why DIY outdoor furniture has become so popular on Pinterest and beyond:
Cost Savings
Building your own outdoor furniture can save you hundreds or even thousands of dollars compared to purchasing pre-made pieces. A DIY cedar Adirondack chair might cost $50-75 in materials, while a comparable store-bought version could run $200-300.
Customization
When you build it yourself, you control every aspect—dimensions, colors, finishes, and features. Want an extra-wide armrest for your coffee mug? No problem. Need a specific size to fit your small patio? You can adjust any plan to suit your space.
Quality Control
Many store-bought outdoor furniture pieces use lower-quality materials to cut costs. When you DIY, you can choose weather-resistant woods like cedar or teak and select hardware that won’t rust after one season.
Personal Satisfaction
There’s something deeply rewarding about relaxing on furniture you built with your own hands. Each time you use your DIY pieces, you’ll feel a sense of pride and accomplishment that store-bought furniture simply can’t provide.
Choosing the right materials is crucial for creating outdoor furniture that will withstand the elements year after year. Here are the top options to consider:
Material
Durability
Cost
Maintenance
Best For
Cedar
High – naturally resistant to rot and insects
Medium-High
Low – annual cleaning and sealing
Long-lasting furniture with natural beauty
Redwood
Very High – contains natural oils that repel insects
High
Low – annual cleaning
Premium projects with rich color
Pressure-Treated Pine
Medium – chemically treated to resist rot
Low
Medium – requires sealing and more frequent maintenance
Budget-friendly projects
Teak
Extremely High – weather-resistant
Very High
Very Low – natural oils protect the wood
Heirloom-quality furniture
Cypress
High – resistant to moisture and decay
Medium
Low – annual sealing recommended
Humid climates
Essential Tools for DIY Outdoor Furniture
Before starting any DIY furniture project, make sure you have these basic tools on hand:
Measuring Tape – For accurate measurements
Circular Saw – For cutting lumber to size
Drill/Driver – For drilling holes and driving screws
Sander – For smooth finishes (orbital sanders work best)
Level – To ensure your furniture is properly aligned
Square – For marking accurate 90-degree angles
Clamps – To hold pieces together while working
Waterproof Wood Glue – For stronger joints
Safety Equipment – Safety glasses, hearing protection, and dust mask
Need to stock up on tools?
Find quality tools for your DIY outdoor furniture projects:
Pallet sofas have become one of the most popular DIY outdoor furniture projects on Pinterest, and for good reason. They’re incredibly cost-effective (pallets can often be found for free), customizable to any size, and require minimal woodworking skills. The basic concept involves stacking and securing pallets to create a base, then adding comfortable cushions for a stylish outdoor seating area.
Pros
Very low material cost (pallets are often free)
Highly customizable dimensions
Minimal cutting required
Rustic, on-trend aesthetic
Can be completed in a single weekend
Cons
Finding quality, safe pallets can be challenging
May require significant sanding to avoid splinters
Not as durable as furniture made from solid lumber
Cushions may cost more than the wood structure
Materials & Tools
Materials Needed:
4-6 wooden pallets (look for HT stamp for heat-treated)
2½” deck screws
Sandpaper (80, 120, and 220 grit)
Exterior wood stain or paint
Waterproof sealant
Outdoor cushions (sized to fit your design)
Tools Required:
Pry bar (for disassembling pallets if needed)
Drill/driver
Sander
Saw (circular or jigsaw)
Measuring tape
Safety equipment
Where to Find Materials
While pallets can often be sourced for free from local businesses, you’ll need to purchase other materials to complete your project:
Outdoor Cushions
The right cushions will make your pallet sofa comfortable and stylish. Look for weather-resistant fabrics with UV protection.
Weather-Resistant Stain
Protect your pallet sofa from the elements with a quality outdoor stain that enhances the wood’s natural beauty.
Deck Screws
Use corrosion-resistant deck screws to ensure your furniture stays sturdy through changing weather conditions.
Pin this pallet sofa idea for later! Create a Pinterest image showing the finished sofa alongside the materials needed for a quick reference when you’re ready to build.
2. Classic Adirondack Chairs
Intermediate
Weekend Project
Project Overview
The Adirondack chair is an American classic, known for its comfortable reclined seating position and wide armrests. While this project requires more precise cutting than the pallet sofa, the results are well worth the effort. These chairs are perfect for creating a relaxing backyard retreat and can last for decades when built with the right materials.
Pros
Exceptionally comfortable design
Timeless aesthetic that complements any outdoor space
Durable construction when built with quality materials
Wide armrests perfect for holding drinks
No cushions required (though can be added)
Cons
Requires more precise cuts than simpler projects
Can be challenging to get in and out of for some people
Takes more time to build than basic furniture designs
Requires more lumber than some other chair designs
Materials & Tools
Materials Needed:
5-6 cedar 1×6 boards (8 ft length)
1 cedar 2×6 board (8 ft length)
1 cedar 2×4 board (8 ft length)
1½” and 2½” exterior screws
Waterproof wood glue
Exterior wood stain or paint
Waterproof sealant
Tools Required:
Circular saw or jigsaw
Drill/driver
Sander
Measuring tape
Square
Clamps
Safety equipment
Where to Find Materials
Quality materials will ensure your Adirondack chairs last for years to come:
Cedar Lumber
Cedar is ideal for outdoor furniture due to its natural resistance to rot and insects. It’s worth the investment for long-lasting chairs.
Exterior Screws
Stainless steel or coated exterior screws will prevent rust and ensure your chairs remain sturdy for years.
Outdoor Sealant
A quality sealant will protect your chairs from UV damage, moisture, and temperature changes.
Pin this Adirondack chair idea for later! Create a Pinterest image showing the finished chair alongside a cutting diagram for easy reference when you’re ready to build.
3. Cinder Block Bench
Beginner Friendly
One-Day Project
Project Overview
For those seeking an ultra-simple project with industrial flair, the cinder block bench delivers impressive results with minimal effort. This project requires almost no tools and can be completed in just a few hours. The combination of concrete blocks and wooden beams creates a sturdy, modern seating option that’s perfect for garden edges or fire pit areas.
Pros
Extremely simple construction
Very low cost compared to other seating options
No cutting required if using pre-cut lumber
Modern, industrial aesthetic
Can be disassembled and reconfigured easily
Cons
Less comfortable than other seating options without cushions
Heavy components make it difficult to move once assembled
Limited design flexibility
Cinder blocks may absorb moisture in wet conditions
Materials & Tools
Materials Needed:
8-12 standard cinder blocks
3-4 cedar or pressure-treated 4×4 posts (6-8 ft length)
Exterior wood stain or paint
Waterproof sealant
Outdoor cushions (optional)
Construction adhesive (optional for more permanent assembly)
Tools Required:
Measuring tape
Level
Saw (only if cutting 4x4s to custom length)
Sander
Paintbrush or stain applicator
Where to Find Materials
This project uses simple materials that can be found at any home improvement store:
Cinder Blocks
Standard cinder blocks are inexpensive and readily available. Consider decorative blocks for a more finished look.
4×4 Lumber
Cedar or pressure-treated 4×4 posts provide the perfect seating surface for your bench. Most stores will cut them to length for you.
Bench Cushions
Add comfort to your cinder block bench with weather-resistant cushions that tie or strap into place.
Pin this cinder block bench idea for later! Create a Pinterest image showing the finished bench with and without cushions, plus a simple diagram of the block arrangement.
4. DIY Outdoor Daybed
Intermediate
Weekend Project
Project Overview
An outdoor daybed creates the ultimate relaxation spot in your backyard or on your deck. This project is slightly more complex than some others on our list, but the payoff is a luxurious lounging space that rivals expensive store-bought versions. With the addition of a canopy, you can create a shaded retreat perfect for afternoon naps or reading your favorite book.
Pros
Creates a luxurious outdoor lounging space
Can accommodate multiple people
Optional canopy provides shade
Makes a striking focal point in your outdoor space
Costs significantly less than store-bought versions
Cons
Requires more materials than smaller furniture pieces
More complex construction than basic benches or chairs
Needs a larger space to accommodate its size
Mattress and cushions add significant cost
Materials & Tools
Materials Needed:
8-10 cedar or pressure-treated 2x4s (8 ft length)
4-6 cedar or pressure-treated 2x6s (8 ft length)
2½” and 3½” exterior screws
Waterproof wood glue
Exterior wood stain or paint
Waterproof sealant
Twin or full mattress (outdoor-rated)
Weather-resistant fabric for canopy (optional)
Decorative outdoor pillows
Tools Required:
Circular saw
Drill/driver
Kreg jig (helpful but optional)
Sander
Measuring tape
Square
Clamps
Safety equipment
Where to Find Materials
Creating a comfortable daybed requires quality materials:
Outdoor Mattress
Look for mattresses specifically designed for outdoor use, with water-resistant covers and quick-drying foam.
Weather-Resistant Fabric
If adding a canopy, choose UV-resistant, waterproof fabric that will stand up to the elements.
Outdoor Pillows
Complete your daybed with decorative pillows made from weather-resistant materials.
Pin this outdoor daybed idea for later! Create a Pinterest image showing the finished daybed with and without the canopy, plus close-up details of the construction.
5. Wooden Picnic Table
Intermediate
Weekend Project
Project Overview
A classic wooden picnic table is the perfect addition to any backyard, providing a dedicated space for outdoor meals and gatherings. This timeless design features attached benches and a sturdy construction that can withstand years of use. While building a picnic table requires some woodworking skills, the straightforward design makes it accessible to intermediate DIYers.
Pros
Provides both table and seating in one project
Classic design fits any outdoor setting
Extremely durable when built with quality materials
Can accommodate 6-8 people
No cushions required
Cons
Heavier and more difficult to move than separate pieces
Requires more lumber than some other projects
Fixed bench spacing may not be comfortable for everyone
More complex joinery than basic furniture designs
Materials & Tools
Materials Needed:
5-6 pressure-treated or cedar 2x6s (8 ft length)
4-5 pressure-treated or cedar 2x4s (8 ft length)
2 pressure-treated or cedar 4x4s (8 ft length)
3″ and 3½” exterior screws
½” carriage bolts with washers and nuts
Waterproof wood glue
Exterior wood stain or paint
Waterproof sealant
Tools Required:
Circular saw
Drill/driver
Drill bits for pilot holes
Sander
Measuring tape
Square
Clamps
Wrench for tightening bolts
Safety equipment
Where to Find Materials
Building a sturdy picnic table requires quality hardware and finishes:
Exterior Screws & Bolts
Use hot-dipped galvanized or stainless steel fasteners to prevent rust and ensure long-term durability.
Outdoor Wood Stain
Enhance and protect your picnic table with a quality exterior stain that blocks UV rays and repels water.
Table Umbrella
Consider adding an umbrella hole and a patio umbrella to provide shade for comfortable dining.
Pin this picnic table idea for later! Create a Pinterest image showing the finished table with measurements and a simplified cutting diagram.
6. Modern Planter Box Bench
Intermediate
Weekend Project
Project Overview
Combine seating and greenery with this clever planter box bench design. This multi-functional piece adds both seating and visual interest to your outdoor space, with built-in planters on one or both ends. The modern, clean lines of this design make it perfect for contemporary outdoor spaces, while the addition of plants softens the look and adds natural beauty.
Pros
Combines seating and planters in one piece
Modern, designer look at a fraction of retail cost
Customizable dimensions to fit your space
Plants create natural beauty and privacy
Makes efficient use of limited space
Cons
Requires more complex construction than basic benches
Planters need proper drainage and maintenance
Heavier and more difficult to move once planted
Requires more materials than a simple bench
Materials & Tools
Materials Needed:
Cedar or pressure-treated 2x4s (quantity depends on bench size)
Cedar or pressure-treated 1x6s for bench seat
Cedar or pressure-treated 1x8s for planter boxes
Landscape fabric for planter lining
2½” and 1½” exterior screws
Waterproof wood glue
Exterior wood stain or paint
Waterproof sealant
Potting soil and plants
Tools Required:
Circular saw or miter saw
Drill/driver
Kreg jig (helpful but optional)
Sander
Measuring tape
Square
Clamps
Safety equipment
Where to Find Materials
Complete your planter bench with these essential supplies:
Landscape Fabric
Line your planter boxes with permeable landscape fabric to allow drainage while containing soil.
Potting Soil
Use high-quality potting mix specifically formulated for container plants to ensure healthy growth.
Bench Cushion
Add comfort to your bench with a weather-resistant cushion sized to fit your design.
Pin this planter bench idea for later! Create a Pinterest image showing the finished bench with thriving plants and a comfortable cushion.
7. Rope Hammock Chair
Intermediate
Weekend Project
Project Overview
For a unique outdoor seating option that combines comfort with a touch of bohemian style, try creating your own rope hammock chair. This suspended seat creates a cozy spot for reading or relaxing, and can be hung from a sturdy tree branch, pergola, or dedicated stand. While this project involves some knot-tying skills, the result is a distinctive piece that adds character to any outdoor space.
Pros
Creates a unique, eye-catching seating option
Comfortable suspended seating experience
Takes up minimal ground space
Can be moved and repositioned easily
Adds bohemian charm to your outdoor area
Cons
Requires knowledge of knots and macramé techniques
Needs a sturdy hanging point rated for weight
More time-consuming than some other projects
May not be suitable for all users
Materials & Tools
Materials Needed:
100-150 feet of 1/4″ or 3/8″ cotton or polyester rope
1 wooden dowel or spreader bar (1-2″ diameter, 24-30″ long)
1 strong metal ring (2-3″ diameter)
Heavy-duty swivel hook
Cushions or pillows
Hanging hardware rated for 300+ pounds
Tools Required:
Scissors or rope cutting tool
Measuring tape
Lighter (to seal rope ends)
Drill (if creating your own wooden spreader bar)
Where to Find Materials
Gather quality materials for a safe and comfortable hammock chair:
Macramé Rope
Choose soft, strong rope that’s comfortable against skin and rated for the appropriate weight capacity.
Hanging Hardware
Invest in quality hardware with an appropriate weight rating for safety and peace of mind.
Chair Cushions
Add comfort to your hammock chair with weather-resistant cushions or pillows.
Pin this hammock chair idea for later! Create a Pinterest image showing the finished chair with detailed views of the knot patterns.
Tips for Sharing Your DIY Outdoor Furniture on Pinterest
Once you’ve completed your DIY outdoor furniture project, share your success with the Pinterest community! Here are some tips for creating pins that will inspire others:
Capture multiple angles – Take photos of your finished piece from different perspectives to show all its features.
Include in-progress shots – Document key steps in the building process to help others visualize the construction.
Create before-and-after pins – If you’re replacing store-bought furniture, show the comparison and highlight the cost savings.
Add text overlays – Include the project name, difficulty level, and approximate cost directly on your pin images.
Create detailed pin descriptions – List materials, tools, and any modifications you made to the original plans.
Use relevant hashtags – #DIYOutdoorFurniture #PalletFurniture #AdirondackChair #BackyardDIY
Ready to get started?
Find all the tools you need for your DIY outdoor furniture projects:
DIY outdoor furniture projects offer the perfect blend of creativity, practicality, and cost savings. Whether you’re a beginner looking to start with a simple cinder block bench or an experienced woodworker ready to tackle an Adirondack chair, there’s a project on this list that’s perfect for your skill level and outdoor space.
Remember that the beauty of DIY is in the customization—adjust dimensions to fit your space, choose finishes that complement your home’s exterior, and add personal touches that make each piece uniquely yours. With some basic tools, quality materials, and a free weekend, you can create beautiful outdoor furniture that will serve you for years to come while saving hundreds or even thousands of dollars compared to store-bought alternatives.
Which project will you build first? Pin your favorites for later and get ready to transform your outdoor space one DIY project at a time!
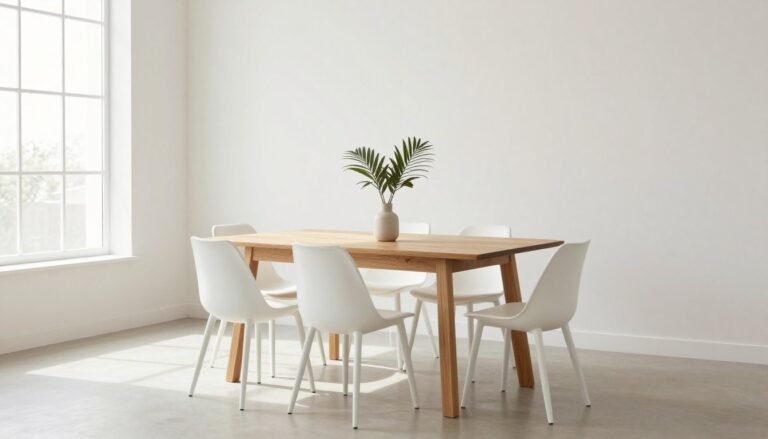
A minimalist dining room creates a serene sanctuary where meals become meaningful moments of connection. By embracing clean lines, thoughtful furniture…
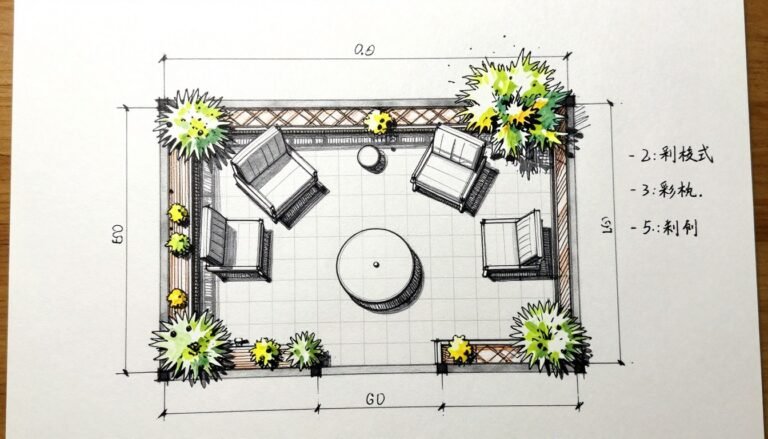
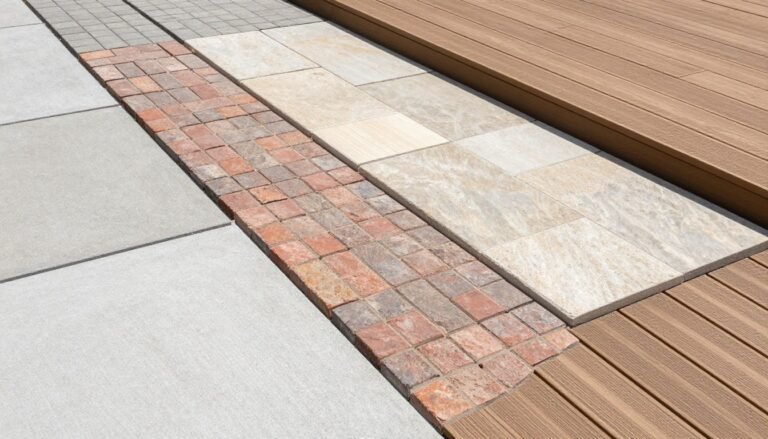
A well-designed backyard patio creates an inviting extension of your home, offering a personal retreat for relaxation, entertainment, and connection with…