Looking to transform your bedroom into a space that truly reflects who you are? You don’t need to spend a fortune to create a room that feels uniquely yours. With some creativity, basic supplies, and a free weekend, you can craft amazing DIY room decor for teens that will make your space Instagram-worthy!
This Website contains affiliate links. That means I may earn a small commission if you purchase through my links, at no extra cost to you.
As a teen, your bedroom is more than just a place to sleep—it’s your sanctuary, creative studio, and personal hangout spot all in one. These DIY projects range from super simple afternoon crafts to more ambitious weekend projects, all designed to help you express your personality through your space.
Transform your space with these creative DIY projects that won’t break the bank!
Magical DIY Lighting Ideas
Lighting can completely transform the mood of your room. These DIY lighting projects create a cozy, dreamy atmosphere that’s perfect for relaxing, studying, or hanging out with friends.
1. String Light Photo Display
Turn your favorite memories into a glowing display! This project combines lighting and photo display in one stunning decoration.
String lights (you can find warm white string lights on Amazon)
Mini wooden clips or clothespins
Your favorite printed photos
Command hooks or clear thumbtacks
Hang your string lights in a zigzag or straight line pattern on your wall. Clip your photos along the string, spacing them evenly. For an extra touch, add small artificial vines or paper stars between photos!
These magical light jars create the perfect ambient lighting for your nightstand or bookshelf. They’re super easy to make but look incredibly impressive!
To create these magical light jars:
Clean your mason jars thoroughly and let them dry completely
Optional: Paint the outside with frosted glass paint or add designs with glass paint markers
Insert battery-operated fairy lights into each jar (find them on Amazon)
Secure the battery pack to the lid or let it hang outside the jar
Place around your room for an enchanting glow!
3. Cloud Light DIY
Create a dreamy atmosphere with this floating cloud light that adds whimsy and soft illumination to your space.
This project takes a bit more time but creates a stunning focal point for your room!
Paper lanterns (round shape works best)
Polyester fiberfill or cotton batting
String lights
Hot glue gun and glue sticks
Fishing line for hanging
Expand your paper lanterns and insert string lights. Attach cotton batting or fiberfill all around using hot glue until it resembles a fluffy cloud. Hang from your ceiling using fishing line for a floating effect!
Express Yourself with DIY Wall Art
Your walls are the perfect canvas to showcase your personality. These DIY wall art projects are affordable ways to add color and style to your teen room decor.
4. Washi Tape Geometric Wall Design
Create stunning wall art without paint or nails! Washi tape comes in countless colors and patterns, making it perfect for temporary wall designs that won’t damage your walls.
Various colors and patterns of washi tape (find a huge selection on Amazon)
Ruler or measuring tape
Pencil for marking (optional)
Scissors
Plan your design first—triangles, diamonds, and straight lines work well. Apply tape directly to your wall, pressing firmly as you go. The best part? When you’re ready for a change, washi tape peels off cleanly without damaging paint!
5. DIY String Art
String art creates a stunning 3D effect and can be customized with your initial, favorite shape, or meaningful symbol.
To create your own string art masterpiece:
Find or create a template of your desired shape
Trace it onto a wooden board (pre-painted or stained if desired)
Hammer small nails along the outline, spacing them evenly about 1/2 inch apart
Wrap colorful embroidery thread or thin yarn around the nails in patterns
Secure the ends with small knots and hang on your wall!
Create your own string art masterpiece!
Find all the supplies you need to make this eye-catching wall art:
Create custom wall art that reflects your interests, favorite quotes, or aesthetic. This project lets you be the artist!
For this project, you’ll need:
Blank canvas (available in various sizes on Amazon)
Acrylic paints in your favorite colors
Paintbrushes in various sizes
Stencils (optional)
Painter’s tape for creating clean lines
Let your creativity flow! Paint abstract designs, your favorite quote, or recreate an image that inspires you. Don’t worry about perfection—the handmade quality makes it uniquely yours!
Stylish Organization for Teen Bedrooms
Keep your space tidy while adding style with these organization projects that double as decor. These DIY room decor ideas for teens combine function and fashion!
7. Hanging Macramé Organizer
This boho-inspired organizer keeps small items accessible while adding texture and style to your walls.
Macramé cord or thick cotton rope
Wooden dowel or branch
Scissors
Wooden beads (optional)
Basic macramé knot knowledge (tons of tutorials online!)
Create a basic macramé wall hanging, adding small pockets throughout to hold items like air plants, pens, or small accessories. Hang it near your desk or vanity for both function and style!
8. Upcycled Storage Crates
Transform ordinary wooden crates into stylish storage that can be stacked, mounted on walls, or placed under your bed.
Paint or stain in colors that match your room’s palette
Once dry, arrange as shelving, nightstands, or under-bed storage
Add casters to the bottom for easy mobility if desired
9. DIY Desk Organizer from Recycled Materials
Keep your study space tidy with this eco-friendly organizer made from items you probably already have at home.
For this eco-friendly organizer, gather:
Empty toilet paper or paper towel tubes
Clean tin cans (remove any sharp edges)
Small cardboard boxes
Acrylic paint or decorative paper
Strong glue or hot glue gun
Decorative washi tape or ribbon
Paint or cover your recycled items in coordinating colors or patterns. Once dry, arrange and glue them together to create compartments for different supplies. Add labels if desired!
Ready to get organized?
Find all the craft supplies you need to create these storage solutions:
Add warmth and personality to your space with these DIY textile projects that make your room feel cozy and inviting.
10. No-Sew Pillow Covers
Update your bed or reading nook with custom pillow covers—no sewing machine required!
Fabric in your choice of patterns and colors (check out options on Amazon)
Fabric scissors
Fabric glue or iron-on hem tape
Existing pillows to cover
Decorative elements like pom-poms or tassels (optional)
Measure your pillow and cut fabric with extra allowance for seams. Use fabric glue or iron-on hem tape to create a pocket, leaving one side open to insert your pillow. Add decorative elements around the edges for extra flair!
11. DIY Woven Wall Hanging
Create a boho-inspired wall hanging that adds texture and warmth to your space.
For this trendy textile art, you’ll need:
Wooden dowel or branch
Various yarns in different colors and textures
Large-eye needle or small cardboard loom
Scissors
Comb for pressing down rows
Create a simple loom with your dowel and start weaving different colored yarns in patterns you like. Add tassels or fringe at the bottom for extra texture. This project is perfect for beginners—there’s no wrong way to create your unique design!
12. Custom Fabric Pinboard
Create a functional and stylish pinboard to display photos, notes, and mementos.
Cork board or foam board
Fabric in your chosen pattern
Staple gun or strong glue
Ribbon, buttons, or other decorative elements
Pushpins (decorative ones add extra style!)
Wrap your board with fabric, securing it on the back with staples or glue. Add a ribbon border or other decorative elements if desired. Hang on your wall and use to display photos, concert tickets, artwork, and other mementos!
DIY Furniture Makeovers for Teen Bedrooms
Transform old or basic furniture into custom pieces that reflect your style without spending a fortune on new items.
13. Ombré Dresser Transformation
Give an old dresser new life with this stunning ombré paint technique that creates a gradient effect.
Dresser in need of updating
Sandpaper (medium and fine grit)
Primer
Acrylic or latex paint in 3-4 shades of the same color
Clear sealer
New hardware (optional)
Sand your dresser, apply primer, then paint each drawer a slightly different shade, creating a gradient effect from light to dark. Seal with clear coat when dry and add new hardware for a completely custom piece!
Transform a basic desk chair into a bohemian statement piece with this simple technique.
Basic desk chair
Thick cotton rope
Hot glue gun and plenty of glue sticks
Scissors
Decorative tassels (optional)
Starting at the bottom of one chair leg, apply hot glue in small sections and wrap the rope around, pressing firmly as you go. Continue until the entire frame is covered. Add decorative tassels at the corners for extra boho flair!
15. Painted Nightstand with Custom Knobs
Update a basic nightstand with paint and unique drawer pulls for a piece that’s totally you.
Clean your nightstand thoroughly and remove any hardware
Sand lightly and apply primer
Paint in your chosen color (consider adding stenciled designs!)
Replace standard knobs with unique ones that reflect your style
Seal with clear coat for durability
Look for unique knobs on Amazon – there are endless options from crystal to ceramic to themed shapes that can completely transform your furniture!
Quick DIY Room Accents
These fast and easy projects add personality to your space without requiring lots of time or supplies.
16. Custom Photo Collage Letters
Spell out your name or an inspiring word with these personalized photo collage letters.
Cardboard or wooden letters (find them at craft stores or Amazon)
Photos, magazine cutouts, or decorative paper
Mod Podge or white glue
Foam brush
Scissors
Cut your photos or paper to fit the letters. Apply Mod Podge to a small section of the letter, place your cutouts, then seal with another layer of Mod Podge on top. Continue until the entire letter is covered. Let dry completely before hanging!
17. DIY Dreamcatcher
Create a personalized dreamcatcher that adds boho style to your space while supposedly catching bad dreams!
For this dreamy decoration, gather:
Embroidery hoop or metal ring
String, yarn, or embroidery floss
Beads, feathers, and other decorative elements
Scissors
Hot glue gun
Wrap your hoop with yarn or ribbon. Create a web pattern in the center using string. Add hanging elements like feathers, beads, or tassels from the bottom of the hoop. Hang near your bed or window!
18. Personalized Door Sign
Create a custom sign for your bedroom door that reflects your personality and style.
Wooden plaque or canvas
Acrylic paint or markers
Stencils (optional)
Decorative elements like buttons or small charms
Ribbon or string for hanging
Paint your base in your favorite color. Add your name, a favorite quote, or even “Do Not Disturb” in creative lettering. Decorate with additional elements that reflect your interests. Hang on your door with ribbon or string!
Make your room uniquely yours!
Find all the craft supplies you need for these quick projects:
Keep your space fresh by rotating these seasonal decorations throughout the year.
19. Fairy Light Photo Garland
String of fairy lights
Mini clothespins or clips
Seasonal photos or small decorative cards
Clip seasonal photos, cards, or small decorations to a string of fairy lights. Change them out for different holidays or seasons for an ever-evolving display!
20. Seasonal Pillow Covers
Create interchangeable pillow covers that you can swap out as seasons change.
Choose fabrics that reflect different seasons
Create simple envelope-style covers using the no-sew method described earlier
Store unused covers flat in a drawer until needed
Swap them out to instantly refresh your space!
21. Window Clings and Decals
Create removable window decorations that add color and pattern without permanent changes.
Cut decorative shapes from window cling film and apply to clean windows using a spray of water. These can be easily removed and changed with the seasons or your mood!
Advanced DIY Room Decor Projects for Teens
Ready for a challenge? These more involved projects create major impact in your space.
22. Hanging Macramé Chair
Create the ultimate reading nook with this statement piece that adds boho flair to any room.
Thick macramé rope
Metal ring
Wooden dowel or rod
Round cushion
Ceiling hook rated for weight
This project requires more advanced macramé skills, but many tutorials are available online. Make sure to install the ceiling hook securely into a joist for safety!
23. Pallet Wood Headboard
Create a rustic-chic headboard from reclaimed pallet wood for a major room transformation.
Disassemble clean pallets (ask for help with this!)
Sand thoroughly to remove splinters
Arrange boards in desired pattern
Secure to backing board with screws
Stain or paint as desired
Mount securely to wall
This project requires adult supervision and power tools, but creates a stunning focal point for your room!
24. DIY Room Divider/Privacy Screen
Create a functional piece that defines spaces within your room while adding style.
Wooden frames or old shutters
Hinges
Decorative elements like fabric panels, photos, or fairy lights
Paint or stain
Connect three or more frames with hinges to create a folding screen. Customize each panel with fabric, photos, or other decorative elements that reflect your style.
Budget-Friendly DIY Room Decor Under $10
Transform your space without emptying your wallet with these super affordable projects.
25. Washi Tape Picture Frames
Create instant “frames” for your photos with colorful washi tape designs.
Photos or art prints
Various colors/patterns of washi tape
Removable mounting squares
Mount your photos to the wall using removable mounting squares. Create frame designs around each photo using washi tape. The possibilities are endless—try geometric patterns, simple borders, or even 3D effects!
26. Painted Rock Bookends
Create functional bookends from rocks found in nature and transformed with paint.
Find smooth, flat-bottomed rocks
Clean thoroughly and let dry
Paint with acrylic paints in designs you love
Seal with clear coat for durability
Use in pairs to hold books upright on shelves
27. Recycled Tin Can Organizers
Transform empty food cans into stylish desk organizers with just paint and creativity.
Clean, empty tin cans with labels removed
Sandpaper to smooth any sharp edges
Acrylic paint or spray paint
Decorative elements like washi tape or ribbon
Clear sealer
Remove labels and sand any sharp edges. Paint cans in coordinating colors or patterns. Add decorative elements like washi tape bands or ribbon. Group together on your desk to hold pens, pencils, and other supplies!
Start creating your dream room today!
Find all the supplies you need for these budget-friendly projects:
Your bedroom should be a reflection of who you are, and these DIY room decor ideas for teens give you the perfect opportunity to express your personality without breaking the bank. The best part about DIY decorating is that you can customize every project to match your unique style and preferences.
Remember that your room will evolve as you do—don’t be afraid to try new projects, swap out decorations, and continue to make your space truly yours. Which project will you try first? Tag us in your creations on social media—we’d love to see how you’ve transformed your space!
Ready to transform your space?
Pin these ideas for later and start planning your DIY room makeover!
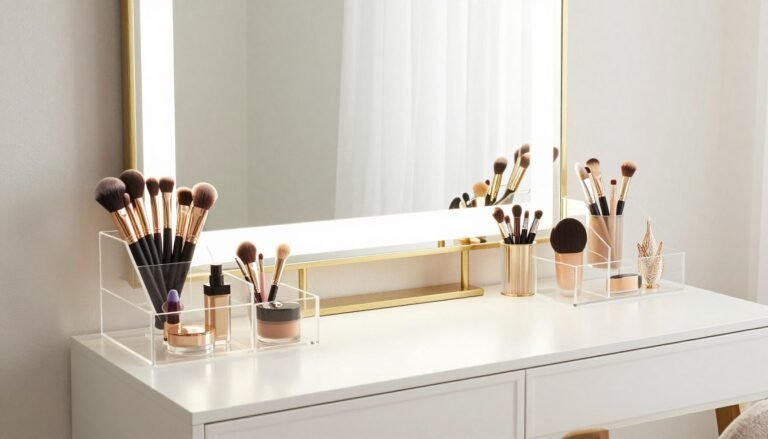
A well-organized vanity isn’t just visually pleasing—it transforms your entire beauty routine. When makeup brushes stand neatly in their holders, skincare…