There’s something magical about gathering around a fire under the stars. A backyard fire pit creates an instant focal point for your outdoor space, transforming ordinary evenings into memorable experiences. The crackling flames, the warm glow, and the conversations that flow—all centered around a feature you built with your own hands. The best part? Creating your own DIY backyard fire pit is both affordable and deeply satisfying, allowing you to customize every aspect to match your style and space.
This Website contains affiliate links. That means I may earn a small commission if you purchase through my links, at no extra cost to you.
Planning Your Backyard Fire Pit: Safety First
Before you grab your shovel and start digging, proper planning ensures both safety and success. A well-designed fire pit becomes the heart of outdoor gatherings, but it requires thoughtful preparation.
Location Considerations
Choosing the right spot for your fire pit is crucial. Look for a level area at least 10-25 feet away from any structures, overhanging trees, or flammable materials. Many municipalities have specific regulations regarding outdoor fire features, so check your local codes before beginning construction.
Essential Safety Equipment
Safety should always be your priority when enjoying your fire pit. Keep these items nearby whenever your fire pit is in use:
Fire extinguisher rated for outdoor fires
Garden hose with easy access to water
Fire-resistant gloves for handling wood
Metal poker for safely adjusting logs
Spark screen to contain embers
Essential Fire Safety Equipment
Ensure your outdoor gatherings stay safe with proper fire safety equipment. A quality fire extinguisher and spark screen are must-haves for any backyard fire pit.
The beauty of creating your own fire pit is the ability to customize it to your aesthetic preferences and backyard style. From rustic to modern, here are some popular design approaches to inspire your project.
Timeless and natural, a circular stone fire pit blends beautifully with any landscape. Using landscape blocks or natural stones creates a rustic, permanent fixture that can withstand the elements for years.
Modern Metal Ring
For a sleek, contemporary look, consider a metal fire ring as your pit’s foundation. These ready-made rings can be surrounded by stone, concrete, or pavers to create a clean, minimalist aesthetic that complements modern outdoor spaces.
Sunken Fire Pit
A sunken design creates an intimate gathering space and helps contain the fire. By digging deeper into the ground and surrounding the pit with built-in seating, you create a cozy conversation area that naturally draws people in.
Upcycled Fire Pit
Get creative with repurposed materials like an old washing machine drum, wheel rim, or metal planter. These upcycled options add character while being environmentally friendly and often more budget-conscious.
Find Your Perfect Fire Pit Style
Looking for inspiration? Browse a variety of fire pit designs and materials to find the perfect match for your backyard aesthetic.
Gathering the right materials before you begin ensures a smooth building process. The specific materials will vary depending on your chosen design, but here are the essentials for a classic stone fire pit.
Base Materials
Gravel: Creates drainage and a stable foundation (½-¾ inch)
Sand: Provides a level base and helps with drainage
Landscape fabric: Prevents weed growth under your fire pit
Foundation Materials
A solid foundation ensures your fire pit will last for years. Quality gravel and sand are essential for proper drainage and stability.
Fire bricks: Heat-resistant bricks for the inner wall
Landscape blocks/stones: For the outer structure (trapezoidal shapes work well for circular designs)
Steel fire ring: Optional inner liner that protects the stones and contains the fire
Construction adhesive: Heat-resistant adhesive to secure the stones
Fire-Resistant Materials
Using proper fire-resistant materials is crucial for safety and longevity. Fire bricks and heat-resistant adhesive ensure your fire pit can withstand high temperatures.
String and stake: For marking the circular outline
Marking paint: For outlining the fire pit area
Caulk gun: For applying adhesive
Essential DIY Tools
Having the right tools makes your fire pit project much easier. A good level and rubber mallet are particularly important for creating a stable structure.
Step-by-Step Building Guide for Your Backyard Fire Pit
Now that you’ve gathered your materials and chosen your location, it’s time to build your fire pit. Follow these steps for a classic circular stone fire pit that will become the centerpiece of your outdoor gatherings.
Mark Your Layout
Drive a stake into the center of your chosen location. Attach a string to the stake, extending it to half the desired diameter of your fire pit (typically 18-24 inches). Hold a can of marking paint at the end of the string and walk in a circle to mark the outline. For the outer edge, extend the string by the width of your stones and mark a second circle.
Excavate the Area
Dig out the area between your marked circles to a depth of about 6-8 inches. Remove all grass, roots, and debris to create a clean foundation. Make sure the bottom is as level as possible. For added stability, dig a few inches wider than your outer circle.
Add Drainage Materials
Place landscape fabric at the bottom of your excavated area to prevent weed growth. Add a 2-3 inch layer of gravel, spreading it evenly across the base. Tamp it down firmly to create a solid foundation. This layer ensures proper drainage when rain enters your fire pit.
Add Sand Layer
Pour a 1-2 inch layer of sand over the gravel and level it carefully. This creates a smooth, even surface for placing your first layer of stones. Use a long, straight board to screed the sand, ensuring it’s perfectly level.
Place the First Course of Stones
Arrange your first layer of stones or blocks on the sand base, following your marked circle. Use a level to ensure each stone is perfectly horizontal and at the same height as its neighbors. This first course is critical—if it’s not level, your entire fire pit will be unstable.
Build Additional Courses
Once your first course is level and stable, apply construction adhesive to the top of the stones before adding the second course. Stagger the joints between stones in each course for greater stability, similar to brick laying. Continue adding courses until you reach your desired height (typically 3-4 courses or about 12-16 inches tall).
Install Fire Ring (Optional)
If you’re using a metal fire ring, place it inside your stone circle. The ring protects the stones from direct heat and creates a more finished look. Make sure it’s centered and sitting level within your stone structure.
Add Fire Pit Floor
Fill the bottom of your fire pit with a layer of gravel for drainage, followed by a layer of sand. This creates a base that will help contain the fire and make cleanup easier. Leave a few inches of space below the top of your fire pit for the actual fire.
Final Touches
Clean any excess adhesive from between the stones. You may want to add a capstone layer around the top edge for a more finished look and comfortable seating. Allow the adhesive to cure completely (usually 24-48 hours) before lighting your first fire.
Important Safety Note: Always allow your fire pit to cure completely before use. The moisture in fresh adhesive can expand when heated, potentially causing stones to crack or shift. Wait at least 48 hours after construction before lighting your first fire.
Creating the Perfect Fire Pit Ambiance
Your fire pit is built, but the project isn’t complete until you’ve created the perfect surrounding area for gathering and relaxation. These finishing touches transform a simple fire feature into a complete outdoor experience.
Comfortable Seating Options
The right seating makes all the difference in how often your fire pit gets used. Consider these popular options:
Adirondack chairs: Classic, comfortable, and weather-resistant
Built-in benches: Space-efficient and can be made from the same materials as your fire pit
Outdoor sofas: For a more luxurious lounge experience
Portable camp chairs: Flexible seating that can be stored when not in use
Comfortable Outdoor Seating
Complete your fire pit area with comfortable, weather-resistant seating that invites long conversations under the stars.
While your fire pit provides beautiful light, additional ambient lighting extends the usability of your space and creates magical atmosphere:
String lights: Hung overhead for a starry effect
Solar path lights: Mark walkways safely
Lanterns: Portable light sources that add character
Tiki torches: Add tropical flair and help repel insects
Create Magical Evenings
The right lighting transforms your fire pit area into an enchanting nighttime retreat. String lights create the perfect ambiance for evening gatherings.
With proper care, your backyard fire pit will provide years of enjoyment. Follow these simple maintenance tips to keep it looking great and functioning safely.
Regular Cleaning
Remove ashes after each use once completely cool
Brush stones occasionally to remove soot buildup
Clear drainage holes of debris to prevent water accumulation
Inspect for and remove any plant growth between stones
Seasonal Care
Cover your fire pit during extended periods of non-use
Check for and repair any loose or damaged stones before fire season
Clean thoroughly at the beginning of each season
Apply a stone sealer every 1-2 years if desired
Protect Your Investment
A quality fire pit cover extends the life of your DIY creation by protecting it from the elements when not in use.
Your DIY backyard fire pit is more than just a construction project—it’s an investment in countless future memories. From family marshmallow roasting sessions to deep conversations with friends under the stars, your handcrafted fire feature will become the heart of your outdoor living space.
The satisfaction of building something with your own hands adds special meaning to every gathering. As you sit back in your comfortable chair, watching the flames dance while surrounded by loved ones, you’ll know that your effort was well worth it.
Ready to transform your backyard? Gather your materials, set aside a weekend, and create a fire pit that perfectly matches your vision. Your outdoor oasis awaits!
Start Your Fire Pit Journey Today
Ready to create your own backyard gathering space? Find everything you need to build the perfect DIY fire pit that will bring warmth and joy for years to come.
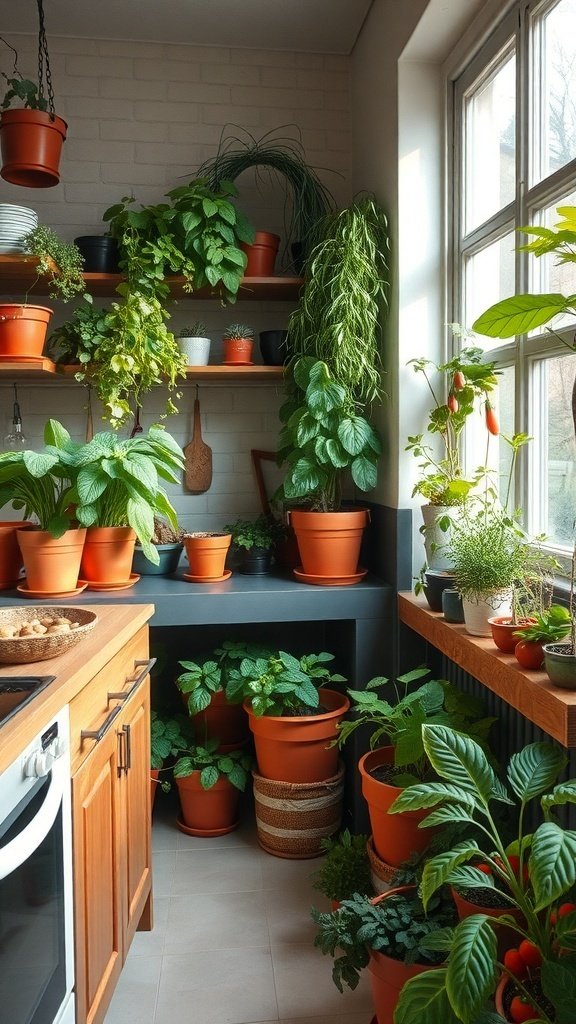
Green kitchen designs blend sustainability with style, creating spaces that are both functional and environmentally friendly. From energy-efficient appliances to materials…