There’s something magical about having a dedicated space for your beauty routine. A DIY makeup vanity isn’t just about storage—it’s about creating a personal sanctuary where you can prepare for your day or a night out. It’s a space that reflects your style while keeping your beauty essentials organized and accessible. The best part? You don’t need to spend a fortune to create something beautiful and functional.
This Website contains affiliate links. That means I may earn a small commission if you purchase through my links, at no extra cost to you.
Whether you’re working with a tiny corner in your bedroom or have a whole wall to dedicate to your beauty station, these DIY makeup vanity ideas will inspire you to create a space that’s uniquely yours. From simple weekend projects to more ambitious builds, there’s something here for every skill level and budget.
DIY Makeup Vanity Inspiration Gallery
Before diving into specific projects, let’s explore some different vanity styles to help you find the perfect aesthetic for your space. Each of these styles can be adapted to fit your available space, budget, and personal preferences.
Modern Minimalist Vanity
The modern minimalist vanity is all about clean lines, hidden storage, and a clutter-free aesthetic. This style works beautifully in contemporary spaces and smaller rooms where you want to maximize functionality without visual overwhelm.
Key Features:
Clean, straight lines with minimal ornamentation
Hidden storage to maintain a clutter-free surface
Neutral color palette (whites, grays, light wood tones)
Simple, geometric mirror shapes
Thoughtful, minimal styling with just a few decorative elements
Core Materials Needed:
Pre-made drawer units (like IKEA Alex drawers)
Tabletop or desk surface
Simple round or rectangular mirror
LED lighting strips
Minimal hardware in matte black or brushed nickel
Looking for the perfect lighting to complete your minimalist vanity? Find LED vanity light strips on Amazon that can be easily installed for that perfect glow.
Channel your inner star with a Hollywood-inspired vanity that brings drama and glamour to your space. This style is perfect for makeup enthusiasts who want that professional lighting setup and a touch of luxury.
Key Features:
Large mirror with surrounding light bulbs
Luxe materials like velvet, gold accents, and glossy finishes
Dramatic lighting for perfect makeup application
Plush, comfortable seating
Display areas for favorite perfumes and beauty products
Core Materials Needed:
Large frameless mirror or mirror with frame
Vanity light bulbs or LED strip
Desk or table (new or upcycled)
Gold spray paint for accents
Velvet or other luxurious fabric for stool covering
Create that perfect Hollywood lighting with vanity mirror lights from Amazon that will give you the perfect lighting for flawless makeup application.
Skill Level & Time Commitment:
Intermediate | 2-3 days
Vintage Vanity with a Modern Twist
This style combines the charm of vintage furniture with modern functionality. It’s perfect for those who love character and history in their furniture but still want a practical makeup station.
Key Features:
Repurposed vintage desk, dresser, or vanity as the base
Updated with fresh paint or new hardware
Mix of vintage elements with modern organization solutions
Antique or vintage-inspired mirror
Combination of old and new decorative elements
Core Materials Needed:
Vintage desk, dresser, or vanity (thrift stores, flea markets)
Chalk paint or furniture paint
New hardware (optional)
Vintage or vintage-style mirror
Modern organizers that complement the vintage aesthetic
Intermediate | 3-5 days (including paint drying time)
IKEA Hack Vanity
IKEA furniture provides the perfect foundation for creating a custom makeup vanity. This approach is incredibly popular because it’s affordable, customizable, and requires minimal DIY skills to achieve professional-looking results.
Key Features:
Combination of ready-made IKEA components
Customized with paint, hardware, or other personal touches
Clean, Scandinavian-inspired aesthetic
Excellent storage capacity with drawers and compartments
Adaptable to different space requirements
Core Materials Needed:
IKEA Alex drawer units (1-2 depending on desired width)
IKEA tabletop (Linnmon, Lagkapten, etc.)
Mirror of choice
Lighting solution (LED strips, vanity lights)
Optional: paint, contact paper, or new hardware for customization
Let’s walk through a step-by-step guide to creating the popular IKEA hack makeup vanity that has taken social media by storm. This project combines pre-made components with simple customizations for a professional-looking result that’s both beautiful and functional.
Materials & Tools List
Materials:
2 IKEA Alex drawer units (white or color of choice)
1 IKEA tabletop (Linnmon or Lagkapten, 59″ x 29½” recommended)
Mirror of your choice (wall-mounted or tabletop)
LED strip lights or vanity bulbs
Optional: Contact paper, paint, or new drawer pulls for customization
4-8 rubber bumpers (often included with Alex units)
Follow the IKEA instructions to assemble both Alex drawer units. Take your time with this step to ensure everything is properly aligned and secured. The Alex units will serve as the base of your vanity and provide ample storage for all your makeup and beauty supplies.
Step 2: Determine Placement and Spacing
Decide where you want to position your vanity in your room. Measure the space to ensure everything will fit properly. Position the two Alex units where you want them, leaving enough space between them for comfortable seating (typically 19-24 inches).
Step 3: Add Rubber Bumpers
Place the included rubber bumpers on top of each Alex unit (one in each corner). These will prevent the tabletop from sliding and provide some grip without permanently attaching the pieces together, allowing for future adjustments if needed.
Step 4: Place the Tabletop
Carefully place your chosen IKEA tabletop on top of the Alex units, ensuring it’s centered and properly positioned. The rubber bumpers should keep it in place, but be gentle when first using your vanity until you’re confident in its stability.
Step 5: Install Your Mirror
Depending on your preference, either:
Mount a mirror on the wall behind your vanity using appropriate wall anchors
Place a standing vanity mirror on top of your new desk surface
Make sure your mirror is at a comfortable height for seated makeup application.
Step 6: Add Lighting
Good lighting is essential for a functional makeup vanity. Options include:
Adhesive LED strip lights around or behind your mirror
A dedicated vanity mirror with built-in lighting
Clip-on or standing vanity lights positioned to eliminate shadows
Make your vanity uniquely yours with these optional customizations:
Replace the standard drawer pulls with decorative knobs
Apply contact paper to the tabletop for a marble or wood-grain look
Paint the drawer fronts in your favorite color
Add a glass top protector to keep your surface pristine
Step 8: Organize Your Beauty Products
The final step is to organize your makeup and beauty supplies in a way that makes sense for your routine. Use drawer dividers inside the Alex units and consider acrylic organizers for items you use daily on the tabletop.
This IKEA hack vanity is popular for good reason—it’s affordable (typically under $200 for all the IKEA components), requires minimal DIY skills, and provides both a beautiful surface for applying makeup and ample storage for all your products.
Repurposed Furniture Vanity
One of the most sustainable and character-filled approaches to creating a DIY makeup vanity is to repurpose existing furniture. This method gives new life to old pieces while creating a unique vanity that has history and personality.
Key Features:
Converted desk, dresser, console table, or nightstand
Unique character and details not found in new furniture
Often more solid construction than budget new furniture
Eco-friendly approach to creating a vanity
Potential for hidden storage or unique configurations
Intermediate | 3-7 days (including paint drying time)
Organization & Decorative Touches
Once you’ve built the foundation of your DIY makeup vanity, it’s time to focus on organization and those finishing touches that will make the space truly yours. A well-organized vanity not only looks beautiful but also makes your beauty routine more efficient and enjoyable.
Smart Storage Solutions
The key to a functional makeup vanity is having the right storage solutions for your specific collection. Consider these options for keeping everything organized:
Drawer Organization:
Acrylic drawer dividers to separate different product categories
Small containers or cups for brushes and tools
Expandable drawer organizers that maximize every inch
Rotating makeup organizers for frequently used items
Tiered stands to maximize vertical space
Pretty jars or cups for brushes and applicators
Decorative trays to corral smaller items
Magnetic boards for metal pans and tools
Decorative Elements
The finishing touches are what transform a functional space into one that inspires you every day. Consider these decorative elements to personalize your vanity:
Small framed art or inspirational quotes
A petite vase with fresh or faux flowers
Decorative perfume trays or vintage perfume bottles
Proper lighting is essential for a functional makeup vanity. Consider these options:
Natural light: Position your vanity near a window if possible
LED vanity lights: Provide even, shadow-free illumination
Adjustable lighting: Dimmable options let you match different environments
Color temperature: Look for “daylight” bulbs (5000-6500K) for true color representation
Portable options: Rechargeable lighted mirrors for flexibility
Create Your Perfect DIY Makeup Vanity
Creating your own DIY makeup vanity is more than just a home improvement project—it’s an investment in your daily routine and self-care ritual. Whether you’ve opted for a simple IKEA hack, a repurposed vintage piece, or built something entirely from scratch, your new vanity will be a space that’s perfectly tailored to your needs and aesthetic preferences.
Remember that your vanity can evolve over time as your collection and needs change. Start with the basics and add organizational elements and decorative touches as you go. The most important thing is creating a space that makes you feel good and helps streamline your beauty routine.
Free Makeup Vanity Organization Printable
Get our free printable makeup inventory and organization guide to help you keep track of your products and create the perfect organization system for your new vanity!
The best lighting for a makeup vanity is even, shadow-free lighting that mimics natural daylight. LED lights with a color temperature between 5000-6500K (daylight) provide the most accurate color representation. Ideally, position lights around your mirror rather than only above or below to eliminate shadows. If possible, combining natural light with adjustable artificial lighting gives you the most flexibility.
What’s the easiest DIY vanity for a beginner?
The IKEA hack vanity (using Alex drawer units and a tabletop) is by far the easiest option for beginners. It requires minimal tools and DIY skills—mostly just assembly of pre-made components. Another beginner-friendly option is adding a mirror and lighting to an existing desk or table you already own.
How much does it cost to build a DIY makeup vanity?
The cost varies widely depending on your approach. An IKEA hack vanity typically costs $150-300 for all components. Repurposing furniture can cost as little as $50-100 (if you already own the piece) plus the cost of paint and new hardware. Building from scratch can range from $100-500+ depending on materials. The most significant variables are the quality of materials and the lighting solution you choose.
What’s the ideal height for a makeup vanity?
The standard height for a makeup vanity is 30 inches (the same as a standard desk). However, the ideal height depends on your own height and the chair you’ll be using. When seated, your arms should rest comfortably on the vanity surface without hunching or stretching. The mirror should be positioned so that your face is centered when sitting with good posture.
How can I make my DIY vanity look more expensive?
To give your DIY vanity a more luxurious look: use high-quality hardware (drawer pulls, knobs), add a glass top over wood surfaces, incorporate metallic accents (gold, brass, or chrome), use high-quality paint with proper preparation and finishing, and keep the styling minimal and intentional. Good lighting also dramatically improves the overall look of your vanity space.
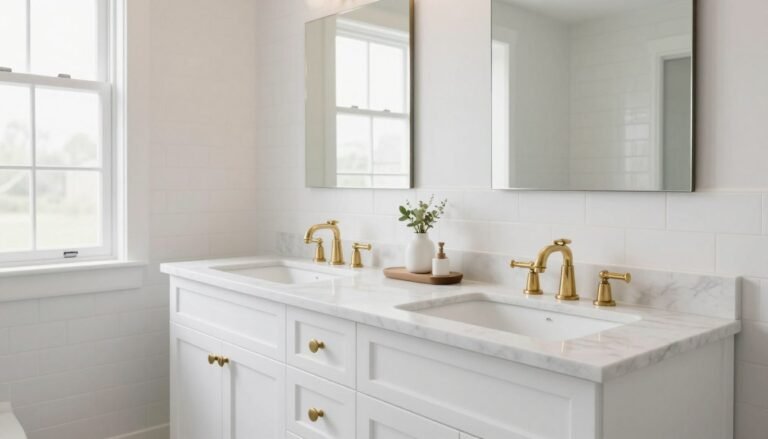
There’s something undeniably captivating about a white bathroom vanity. It stands as the centerpiece of countless Pinterest-worthy bathrooms, creating an atmosphere…