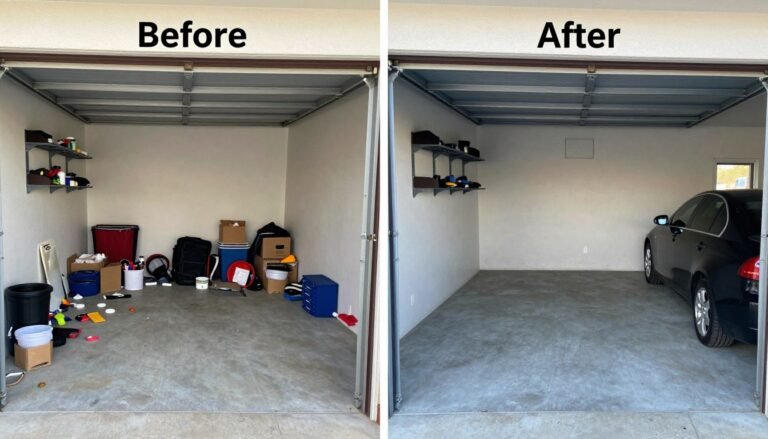
Is your garage currently serving as a dumping ground for random household items, seasonal decorations, and tools you can never find? Imagine walking into a beautifully organized, functional space that not only houses your vehicles but also serves as a workshop, gym, or even an extension of your living area. A garage makeover doesn’t have to break the bank or require professional help—with some planning, creativity, and elbow grease, you can transform this overlooked space into one of the most valuable areas in your home.
This Website contains affiliate links. That means I may earn a small commission if you purchase through my links, at no extra cost to you.
Phase 1: Creating Your Garage Makeover Vision
Before diving into your garage renovation project, take time to envision what you want this space to become. The most successful garage makeovers start with a clear plan that addresses your specific needs and lifestyle.
Define Your Garage’s Primary Functions
Ask yourself what you need from your garage. Do you need storage for tools and seasonal items? A dedicated workspace for DIY projects? A home gym? Or simply a clean, organized space to park your vehicles? Understanding your priorities will guide every decision in your garage makeover journey.
Set a Realistic Budget
Garage renovations can range from simple DIY projects costing a few hundred dollars to professional overhauls costing thousands. Determine how much you’re willing to invest in your garage makeover, and prioritize projects accordingly. Remember that even small improvements can make a significant impact on functionality and appearance.
Create a Simple Floor Plan
Measure your garage dimensions and sketch a basic floor plan. This will help you visualize the space and plan for storage solutions, workbenches, and activity zones. Consider traffic flow, door clearances, and access to electrical outlets when designing your layout.
Having a clear vision before you begin will save you time, money, and frustration as you work through your garage makeover. Take photos of your current space from multiple angles to help you track your progress and celebrate the transformation.
Phase 2: The Great Garage Declutter
The foundation of any successful garage makeover is decluttering. This crucial step creates the clean slate you need to reimagine your space and implement new organizational systems.
Empty Everything Out
Choose a day with good weather and completely empty your garage. This might seem overwhelming, but it’s essential to see everything you’ve accumulated and properly assess the space. Place items on your driveway or lawn, grouped by category.
Sort Into Categories
Create four distinct areas for sorting: Keep, Donate/Sell, Recycle, and Trash. Be ruthless in your decisions—if you haven’t used something in over a year and it doesn’t have significant sentimental value, it probably doesn’t deserve valuable garage space.
Organize What Remains
Once you’ve decided what to keep, further categorize items by how frequently you use them and how they’ll be stored. Group similar items together: gardening tools, sports equipment, automotive supplies, seasonal decorations, etc.
For seasonal decorations and rarely-used items, heavy-duty clear storage bins are perfect for keeping contents visible while protecting from dust and pests. Label each container clearly for easy identification later.
Phase 3: Deep Clean and Preparation
With your garage emptied and items sorted, now is the perfect time to give this space a thorough cleaning before implementing your garage makeover plans.
Sweep and Wash Floors
Start by sweeping out all debris, then use a degreaser to remove oil stains from the concrete floor. For stubborn stains, a pressure washer can be extremely effective. Allow the floor to dry completely before moving on to the next steps.
Clean Walls and Ceiling
Dust and cobwebs accumulate quickly in garages. Use a broom or vacuum with extension attachments to clean the ceiling and corners, then wipe down walls with a mild detergent solution. This is also a good time to check for any water damage or pest issues that might need addressing.
Make Necessary Repairs
Inspect your garage for any needed repairs: patch holes in drywall, fix loose electrical outlets, repair damaged trim, or seal cracks in the concrete floor. Addressing these issues now will give you a solid foundation for your garage makeover.
For filling concrete cracks, concrete crack filler creates a durable repair that will prevent further damage and provide a smooth surface for any floor coating you might apply later.
Phase 4: Implementing Smart Storage Solutions
The key to a successful garage makeover is maximizing every inch of available space with strategic storage solutions. Vertical storage is particularly valuable in garages, keeping items accessible while freeing up floor space.
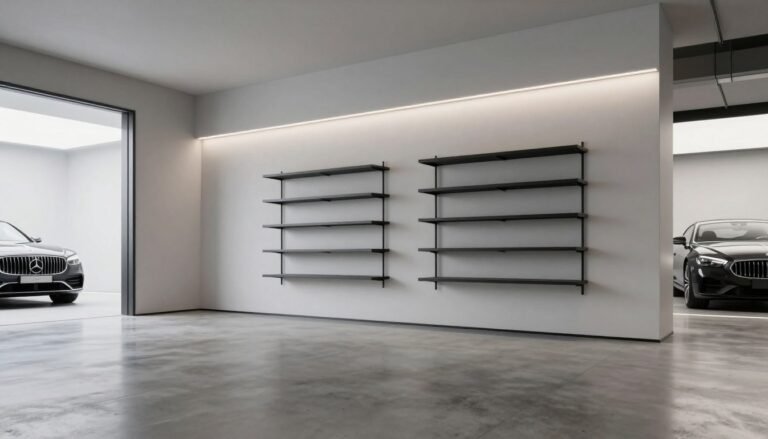
Wall-Mounted Storage Systems
Wall storage systems transform blank walls into organized storage powerhouses. Slatwall panels or pegboard systems allow you to customize your storage with hooks, baskets, and shelves that can be reconfigured as your needs change.
A garage slatwall storage system offers incredible versatility and strength, supporting everything from heavy power tools to bicycles while maintaining a clean, streamlined appearance.
Overhead Storage Racks
Don’t forget about the ceiling! Overhead storage racks utilize this often-overlooked space for storing seasonal items, holiday decorations, or camping gear that you don’t need to access frequently.
Look for adjustable ceiling storage racks that can be installed directly into ceiling joists for maximum stability and weight capacity. These systems typically hold 300-600 pounds when properly installed.
Cabinets and Shelving Units
For items you want to keep dust-free or out of sight, cabinets provide enclosed storage with a clean appearance. Free-standing or wall-mounted shelving units offer flexible, accessible storage for frequently used items.
Consider heavy-duty garage storage cabinets with adjustable shelving to accommodate items of various sizes. Metal cabinets offer durability and a sleek, professional appearance that elevates your garage’s look.
Specialized Storage Solutions
Think about the specific items you need to store and look for specialized solutions. Bike hooks, sports equipment organizers, and tool storage systems keep awkwardly shaped items neatly contained and easily accessible.
For active families, a garage sports equipment organizer keeps balls, bats, rackets, and other gear neatly contained and easy to find when you’re heading out to practice or a game.
Phase 4: Flooring Upgrades for Your Garage Makeover
The floor is the largest surface in your garage and has a tremendous impact on both appearance and functionality. Upgrading your garage flooring transforms the entire space while providing practical benefits like easier cleaning and increased durability.
Epoxy Floor Coating
Epoxy coating is one of the most popular garage floor upgrades, creating a smooth, glossy surface that resists stains, chemicals, and moisture. Available in various colors and finishes, epoxy can dramatically enhance your garage’s appearance while making it easier to maintain.
DIY garage floor epoxy kits include everything you need for application, though proper floor preparation is crucial for adhesion and longevity. For best results, thoroughly clean, degrease, and etch the concrete before applying epoxy.
Interlocking Floor Tiles
For a quicker installation option, interlocking floor tiles provide immediate improvement without the curing time required for epoxy. These durable plastic or rubber tiles snap together and can be installed in a single afternoon.
Interlocking garage floor tiles come in various colors and patterns, allowing you to create custom designs. They provide cushioning underfoot, insulation from cold concrete, and can be easily removed if needed.
Stain-Resistant Concrete Paint
For a budget-friendly option, concrete floor paint specifically formulated for garages offers improved appearance and some protection against stains and moisture. While not as durable as epoxy, it’s an accessible DIY project that makes a noticeable difference.
Choose garage floor paint specifically designed for high-traffic areas, and consider adding anti-slip additives for improved safety, especially in regions with snow or rain that might be tracked into the garage.
Phase 4: Lighting and Wall Improvements
Proper lighting transforms a garage from a dim, uninviting space to a bright, functional area where you can easily find items and work on projects. Updating your walls with fresh paint or organizational systems further enhances the space.
Upgrade Lighting Fixtures
Many garages are equipped with minimal lighting that creates shadows and dark corners. Replacing outdated fixtures with bright, energy-efficient LED shop lights dramatically improves visibility and the overall feel of your garage.
Consider LED shop lights that link together for continuous illumination across your garage ceiling. These fixtures use less electricity than fluorescent lights while providing brighter, more consistent lighting.
Add Task Lighting
In addition to overhead lighting, task lighting for specific work areas ensures you have proper illumination where you need it most. Under-cabinet lights, adjustable work lamps, or track lighting can be positioned to eliminate shadows on workbenches or storage areas.
Flexible under-cabinet LED lighting can be installed quickly and provides focused illumination exactly where you need it for detailed work or finding items on shelves.
Paint Walls and Ceiling
A fresh coat of bright white or light-colored paint on walls and ceiling dramatically increases light reflection, making your garage feel larger and brighter. Semi-gloss or satin finishes are ideal for garages as they resist moisture and are easier to clean than flat paints.
Use moisture-resistant paint specifically formulated for garage environments to ensure durability against temperature fluctuations and occasional dampness. Proper preparation with cleaning and priming will ensure the best adhesion and longevity.
Phase 4: Creating Functional Zones
One of the most effective strategies in a garage makeover is establishing dedicated zones for different activities and storage needs. This approach maximizes functionality while keeping related items together and easily accessible.
Workshop Zone
If you enjoy DIY projects or home repairs, a dedicated workshop area is essential. Position your workbench against a wall with good lighting and access to electrical outlets. Install pegboard or tool organizers above the bench to keep tools visible and within reach.
A quality garage workbench with storage serves as the centerpiece of your workshop zone. Look for sturdy construction with a weight capacity appropriate for your projects and integrated storage for tools and supplies.
Sports and Recreation Zone
Create a designated area for sports equipment, outdoor toys, and recreational gear. Wall-mounted racks and specialized holders keep items organized and easily accessible while freeing up valuable floor space.
A versatile wall-mounted sports organizer can accommodate balls, bats, rackets, and other equipment in a compact footprint, making it perfect for active families who need quick access to gear.
Garden and Lawn Care Zone
Group your gardening tools, lawn equipment, and plant supplies together in a dedicated zone. Long-handled tools can be stored on wall-mounted racks, while smaller hand tools and supplies are best kept in labeled bins or drawers.
Consider adding a garden tool organizer that keeps shovels, rakes, and other long-handled tools securely mounted to the wall, preventing them from falling over and creating clutter.
Automotive Maintenance Zone
If you perform basic car maintenance, create a zone with your automotive fluids, tools, and supplies. A rolling cart or cabinet keeps everything mobile so you can position it near your vehicle when needed.
A rolling tool cabinet with multiple drawers allows you to organize automotive tools by type and function while providing a mobile work surface that can be positioned wherever you need it.
Phase 5: Final Touches and Personalization
The finishing details of your garage makeover transform it from merely functional to truly personalized. These final touches add comfort, style, and personality to your newly organized space.
Durable Area Rugs or Mats
Strategic placement of durable mats or area rugs adds comfort underfoot in work areas and helps define different zones. Look for options specifically designed for garage environments that can withstand moisture and heavy use.
Consider anti-fatigue mats for areas where you’ll be standing for extended periods. These provide cushioning that reduces back and joint strain during long projects.
Wall Art and Decor
Don’t overlook the opportunity to add personality with appropriate wall art or decor. Vintage signs, automotive memorabilia, or framed prints related to your hobbies can transform your garage from utilitarian to inviting.
Look for vintage-style metal signs that add character while withstanding the temperature fluctuations and occasional humidity of garage environments.
Comfort and Convenience Features
Small additions like a bluetooth speaker, mini-refrigerator, or fan can make your garage more comfortable for extended projects. Consider your climate and how you use the space when selecting these convenience features.
A compact garage-ready mini refrigerator keeps beverages cold and can store temperature-sensitive materials for projects. Look for models specifically rated for garage environments that can handle temperature fluctuations.
Finishing Organizational Details
Complete your garage makeover with consistent labeling of bins, cabinets, and zones. Clear, readable labels ensure that items return to their proper places and help family members maintain the organization system.
A quality label maker allows you to create professional-looking, durable labels that resist moisture and fading in the garage environment. Consistent labeling is the key to maintaining your organization long-term.
Your Garage Makeover Journey: From Vision to Reality
Transforming your garage from a cluttered catchall to an organized, functional space is a rewarding project that adds value to your home and quality to your daily life. By following the phases outlined in this guide—planning, decluttering, cleaning, implementing storage solutions, upgrading surfaces, and adding personal touches—you’ve created a space that works for your specific needs and reflects your personal style.
Remember that garage organization is an ongoing process. Set aside time quarterly to reassess your storage systems and make adjustments as your needs change. The effort you’ve invested in your garage makeover will continue to pay dividends in time saved looking for items, space gained for activities, and satisfaction every time you enter your beautifully organized garage.
What started as a simple garage makeover has created a versatile space that enhances your home and supports your lifestyle. Whether you’re parking vehicles, pursuing hobbies, or simply appreciating the calm of an organized space, your transformed garage is now truly an asset to your home and daily life.
Ready to Start Your Garage Makeover?
Begin your transformation with quality storage solutions that will organize your space and make everything easily accessible.