A DIY mud kitchen is more than just a messy play area – it’s a magical outdoor space where children develop creativity, fine motor skills, and a connection with nature. Creating your own mud kitchen doesn’t have to be complicated or expensive. With some basic materials and a little imagination, you can build an engaging outdoor play area that will provide hours of fun and valuable learning experiences for your children. Let’s explore how to create the perfect mud kitchen for your backyard, patio, or garden space!
This Website contains affiliate links. That means I may earn a small commission if you purchase through my links, at no extra cost to you.
Why Every Child Needs a Mud Kitchen
A mud kitchen provides endless opportunities for creative play and learning
Mud kitchens offer incredible benefits for child development. When children play with mud, they engage all their senses while developing crucial skills. The tactile experience of mixing mud and water helps develop fine motor skills, while measuring and pouring builds early math concepts.
Playing in a mud kitchen also boosts creativity and imagination as children create their own “recipes” and engage in pretend play. Studies show that exposure to soil microorganisms can actually strengthen children’s immune systems, making mud play beneficial for physical health too!
Perhaps most importantly, mud kitchens encourage children to spend more time outdoors, connecting with nature in our increasingly digital world. They learn to appreciate natural materials and develop environmental awareness through hands-on exploration.
“Letting children play outdoors, away from the hustle and bustle of everyday life, provides respite. It allows them to rewind and recharge. Even simply looking at nature is calming for children.”
– Angela Hanscom, Balanced and Barefoot
Essential Materials for Your DIY Mud Kitchen
Before diving into construction, gather the materials you’ll need. The beauty of a DIY mud kitchen is that you can customize it based on what you have available and your budget. Here are the essentials:
Basic Structure Materials
Wood pallets (2-3 depending on design)
Wooden crates or boxes
Pressure-treated lumber (2x4s)
Plywood for countertop
Weather-resistant stain or paint
Screws and nails
Plastic tub for sink
Tools You’ll Need
Drill and drill bits
Saw (circular, jigsaw, or handsaw)
Sander
Measuring tape
Screwdriver
Hammer
Safety equipment (gloves, goggles)
Gather all your materials before starting your mud kitchen project
Looking for Quality Tools?
Find everything you need to build your mud kitchen with these essential tools on Amazon.
From ultra-simple setups to more elaborate constructions, here are eight inspiring mud kitchen designs to suit different spaces, budgets, and skill levels:
1. Simple Pallet Mud Kitchen
This beginner-friendly design uses just one pallet stood upright with a plastic tub inserted as a sink. Add a small shelf for work space and hooks for hanging utensils. Perfect for small spaces and can be completed in under two hours with minimal tools.
2. L-Shaped Corner Mud Kitchen
Maximize a corner space in your yard with this L-shaped design. Using two pallets at right angles creates plenty of workspace and storage. Add a backsplash with hooks for hanging tools and a lower shelf for storing pots and containers.
3. Repurposed Furniture Mud Kitchen
Transform an old desk, dresser, or nightstand into a charming mud kitchen. Simply add a plastic tub for the sink, some hooks for utensils, and weather-proof it with outdoor paint or stain. This option is perfect for upcycling furniture that would otherwise be discarded.
4. Portable Mud Kitchen Station
Create a mobile mud kitchen by adding wheels to a small table or cart. This design is perfect for small spaces or rental properties where you might need to move or store the kitchen. Use plastic storage bins that can be removed for easy cleaning.
5. Deluxe Multi-Level Mud Kitchen
For those with more space and DIY experience, this design features multiple levels for different activities. Include a lower level for younger children, an upper workspace for older kids, multiple sinks, and plenty of storage shelves.
6. Mud Kitchen with Running Water
Take your mud kitchen to the next level by adding running water! Install a simple faucet connected to a garden hose for real water flow. This feature makes the play experience more realistic and eliminates the need for constant water refills.
7. Natural Materials Mud Kitchen
Create a rustic, natural look using tree stumps, logs, and branches. Use a large stump as the base, attach a flat piece of wood for the countertop, and hollow out a section for the sink. This design blends beautifully into natural garden settings.
8. Miniature Balcony Mud Kitchen
Even without a yard, you can create a small mud kitchen for a balcony or tiny patio. Use a single wooden crate or small table with a plastic tub, and provide containers of soil, water, and natural materials for mixing and creating.
Save These Ideas for Later!
Love these mud kitchen designs? Pin this article to your Pinterest board for when you’re ready to start building!
Step-by-Step Guide: Building a Basic Pallet Mud Kitchen
Let’s walk through the process of building a simple yet sturdy mud kitchen using pallets. This design can be completed in a weekend and costs under $100 if you source pallets for free.
Prepare your pallets: Clean pallets thoroughly and check for any protruding nails or splinters. Sand rough surfaces to prevent injuries. Look for pallets marked “HT” (heat-treated) which are safer than chemically treated ones.
Create the base structure: Stand one pallet upright for the back of your kitchen. If needed, cut it to your desired height (typically 24-28 inches for children).
Add the countertop: Attach a piece of plywood or additional pallet boards horizontally to create the countertop. Make sure it’s securely fastened with screws.
Install the sink: Measure and cut a hole in the countertop for your plastic tub sink. The sink should fit snugly but be removable for emptying and cleaning.
Add a lower shelf: Attach additional pallet boards or a second pallet below the countertop to create storage space for pots, pans, and other accessories.
Create a backsplash: Attach vertical boards or another section of pallet to the back to create a backsplash. Add hooks for hanging utensils.
Sand all surfaces: Thoroughly sand all surfaces, paying special attention to edges and corners to prevent splinters.
Apply weather protection: Treat the wood with child-safe, weather-resistant stain or paint to protect it from the elements and extend its lifespan.
Add finishing touches: Draw or paint “burners” on the countertop, add knobs for controlling the imaginary stove, and install hooks or containers for utensils and ingredients.
Stock your kitchen: Add pots, pans, utensils, and natural materials to complete your mud kitchen.
Safety Tip: Always check for splinters and protruding nails before allowing children to play. Sand all surfaces thoroughly and consider rounding sharp corners for added safety.
Need Weather Protection?
Protect your mud kitchen from the elements with child-safe outdoor stains and sealants.
The right accessories transform a simple structure into an engaging play space. Here are must-have items to stock your mud kitchen:
Cooking Equipment
Metal pots and pans
Muffin tins
Plastic bowls
Old teapots
Measuring cups
Ice cream scoops
Utensils
Wooden spoons
Spatulas
Whisks
Ladles
Tongs
Sieves and colanders
Creative Additions
Small chalkboard for menus
Plastic jars for “ingredients”
Watering can
Funnels
Mortar and pestle
Small table and chairs
The best part about mud kitchen accessories is that you don’t need to buy everything new. Check thrift stores, dollar stores, and your own kitchen for items you no longer use. Just make sure everything is sturdy enough for outdoor play.
Stock Your Mud Kitchen
Find affordable kitchen play sets specifically designed for outdoor use.
Once your mud kitchen is built and stocked, inspire endless hours of play with these creative activity ideas:
Nature Recipes
Mud Pies: The classic activity! Mix soil and water to create moldable mud for pies and cakes.
Flower Soup: Collect flower petals, leaves, and grass to create colorful “soups” and potions.
Potion Making: Provide small bottles for creating magical potions with natural ingredients.
Herb Garden: Plant a small herb garden nearby so children can harvest fresh ingredients.
Imaginative Play
Mud Restaurant: Create menus and take orders from “customers.”
Nature Bakery: Use muffin tins and cake molds to create a bakery.
Science Lab: Experiment with mixing different natural materials.
Seasonal Specials: Create themed activities based on the seasons (autumn leaf stew, spring flower tea).
How do I keep the mess contained?
Designate a specific area for mud play and consider adding a small water basin for hand washing nearby. Have towels ready and establish simple clean-up routines. You might also want to keep a basket of old clothes or aprons specifically for mud kitchen play.
What’s the best age for a mud kitchen?
Mud kitchens are suitable for children from about 2 years old through elementary school age. Younger children enjoy simple sensory play with mud and water, while older children create elaborate recipes and engage in complex imaginative play scenarios.
How do I maintain a mud kitchen?
Regularly check for loose screws or splinters and re-sand or re-stain as needed (usually once a year). Empty the sink after play and occasionally rinse the entire kitchen with a garden hose. In harsh winter climates, consider covering or storing the kitchen indoors during the off-season.
Enhance Creative Play
Find child-sized gardening tools perfect for digging and collecting natural materials for your mud kitchen.
Building a DIY mud kitchen is a rewarding project that creates a space for countless hours of creative, sensory-rich play. Whether you opt for a simple design using materials you already have or create an elaborate outdoor play kitchen, the benefits for your child’s development are immense.
Remember, the most important element isn’t perfection – it’s creating a space where children feel free to explore, create, and connect with nature. Your mud kitchen will likely become a favorite play spot for years to come, evolving as your child grows and finding new uses with each season.
We’d love to see your DIY mud kitchen creations! Share your photos on Pinterest and tag us in your mud kitchen adventures. Happy building and even happier playing!
Save This Guide for Later!
Pin this comprehensive DIY mud kitchen guide to your Pinterest board for easy reference when you’re ready to build.
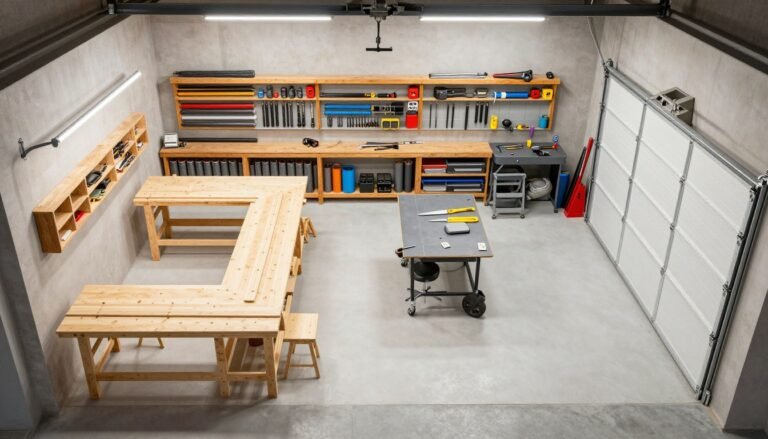
Transforming your garage into a functional workshop requires thoughtful planning and strategic organization. Whether you’re a weekend DIY enthusiast or a…