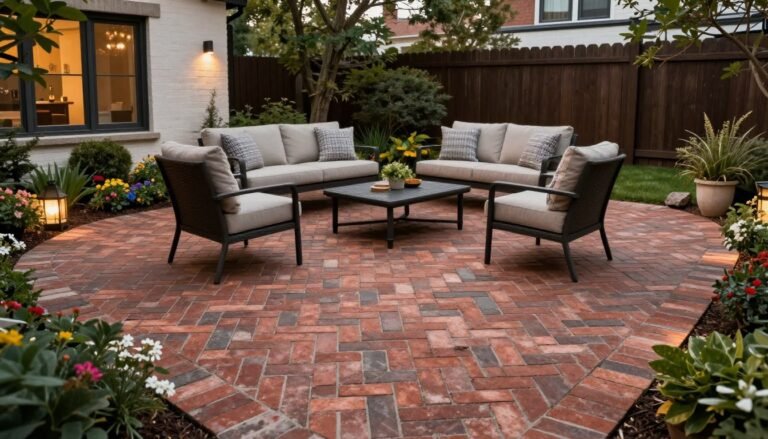
Building your own DIY outdoor kitchen can transform an ordinary backyard into an extraordinary entertainment space. It’s where summer memories are made, where the aroma of grilled foods mingles with fresh air, and where friends and family naturally gather. The best part? Creating this outdoor oasis doesn’t require professional contractors or a massive budget – just your creativity, some basic skills, and a weekend or two of dedicated work.
This Website contains affiliate links. That means I may earn a small commission if you purchase through my links, at no extra cost to you.
Whether you’re dreaming of a simple grill station or an elaborate cooking area complete with countertops, storage, and appliances, this guide will walk you through everything you need to know. We’ll cover planning considerations, material options, step-by-step building instructions, and creative ideas to make your DIY outdoor kitchen uniquely yours. Ready to bring your Pinterest-worthy outdoor kitchen dreams to life? Let’s get started!
A well-designed DIY outdoor kitchen can become the centerpiece of your backyard entertaining space
Planning Your DIY Outdoor Kitchen
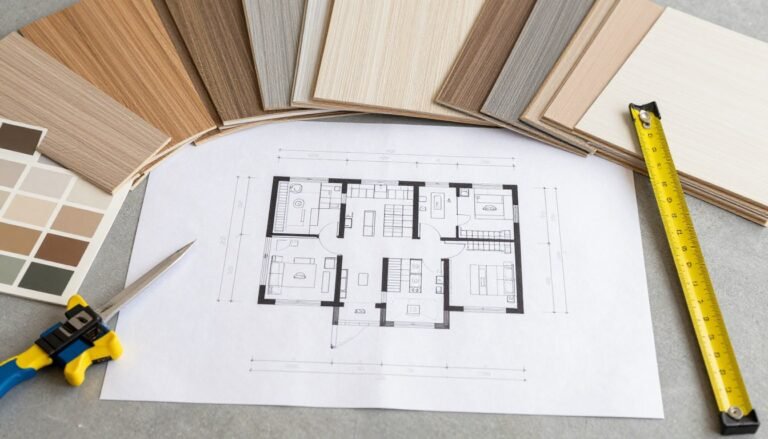
Before grabbing your tools, take time to plan your outdoor kitchen project thoroughly. Proper planning will save you time, money, and frustration down the road. Here are the key considerations to address before breaking ground on your DIY outdoor kitchen.

Related Posts:


Start with a detailed sketch of your outdoor kitchen layout
Location and Layout
The perfect location for your outdoor kitchen balances convenience, comfort, and practicality. Consider these factors when choosing where to build:
- Proximity to your indoor kitchen for easy access to supplies
- Protection from excessive wind that could affect cooking
- Shade availability during peak cooking hours
- Views from the cooking and dining areas
- Traffic flow between cooking, dining, and entertaining spaces
- Distance from combustible structures (check local codes)
Most outdoor kitchens follow one of these basic layouts:

Straight Line
The simplest design with all elements in a row. Perfect for smaller spaces or when placed against a wall.

L-Shape
Creates a defined cooking area with separate zones for prep and cooking. Great for corner spaces.

U-Shape
Offers maximum counter space and creates a dedicated outdoor room feel. Best for larger spaces.
Budget Considerations
A DIY outdoor kitchen can range from a few hundred dollars for a simple setup to several thousand for a more elaborate design. Creating a realistic budget helps you prioritize features and materials.
Cost-Saving Tips:
- Use reclaimed or repurposed materials
- Build in phases, starting with essentials
- Choose less expensive countertop options like concrete
- Incorporate existing structures when possible
- Look for end-of-season sales on appliances
Where to Invest:
- Quality grill or cooking appliances
- Weather-resistant materials
- Proper foundation and structure
- Adequate lighting for evening cooking
- Durable countertops that can withstand elements
Essential Planning Tools
Get started with the right measuring and planning tools to ensure your outdoor kitchen project goes smoothly.
Permits and Regulations
Before starting your DIY outdoor kitchen project, check with your local building department about required permits. Depending on your location and project scope, you may need permits for:
- Construction (especially for permanent structures)
- Electrical work for lighting or appliances
- Plumbing if including a sink or water line
- Gas line installation for natural gas appliances
- HOA approval if you live in a managed community
Pinterest Tip: Create a dedicated board for your DIY outdoor kitchen project! Save inspiration photos, material ideas, and layout options to help visualize your perfect outdoor cooking space.
Essential Components for Your DIY Outdoor Kitchen
Every outdoor kitchen, from simple to elaborate, consists of several key components. Understanding these elements will help you prioritize what’s most important for your needs and budget.
Key components to consider for your outdoor kitchen design
Cooking Appliances
The heart of any outdoor kitchen is its cooking appliances. Your choice will depend on your cooking style, budget, and available space.

Gas Grill
The most popular choice for outdoor kitchens. Offers convenience, temperature control, and quick heating. Available in natural gas or propane models.

Charcoal Grill/Smoker
Provides authentic smoky flavor. Requires more time and attention but delivers exceptional taste for barbecue enthusiasts.

Pizza Oven
A specialty addition for pizza lovers. Can be built from kits or purchased pre-made in various sizes and styles.
Find Your Perfect Outdoor Cooking Appliance
Browse a wide selection of grills and outdoor cooking appliances to find the perfect centerpiece for your DIY kitchen.
Countertops and Work Surfaces
Adequate counter space is essential for food prep, serving, and placing cooking tools. When selecting countertop materials, consider durability, maintenance, and weather resistance.
| Material | Pros | Cons | Maintenance |
| Concrete | Affordable, customizable, DIY-friendly | Can crack, requires sealing | Reseal annually, clean with mild soap |
| Granite | Durable, heat-resistant, variety of colors | Expensive, heavy, requires professional cutting | Seal every 1-3 years, clean with stone cleaner |
| Tile | Affordable, DIY-friendly, many design options | Grout can stain, uneven surface | Seal grout annually, clean with appropriate cleaner |
| Stainless Steel | Extremely durable, heat-resistant, easy to clean | Can get hot in sun, shows fingerprints | Wipe with stainless cleaner, no sealing needed |
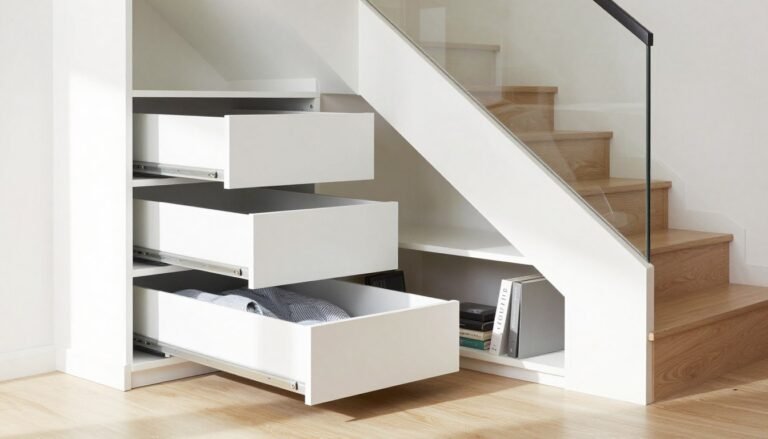
Storage Solutions
Outdoor kitchen storage keeps utensils, tools, and supplies organized and protected from the elements. Consider these options:
- Weather-resistant cabinets with sealed doors
- Pull-out drawers for utensils and smaller items
- Open shelving for frequently used items
- Purpose-built storage for propane tanks or firewood
- Hooks and racks for hanging tools

Weather-resistant storage keeps your outdoor cooking essentials organized and protected
Optional Features
Depending on your budget and needs, consider these additional components to enhance your outdoor kitchen:
Functional Additions:
- Sink with running water
- Refrigerator or cooler
- Ice maker
- Side burner for pots and pans
- Warming drawer
Comfort Enhancements:
- Overhead covering or pergola
- Built-in seating area
- Lighting for evening cooking
- Outdoor speakers
- Ceiling fan for air circulation
When planning these features, consider how they’ll be used and whether they require additional utilities like water, electricity, or gas lines. Each addition increases both the complexity and cost of your project.
Choosing Materials for Your DIY Outdoor Kitchen
Selecting the right materials is crucial for creating an outdoor kitchen that withstands the elements while complementing your home’s exterior. The materials you choose will impact both aesthetics and longevity.

Select materials that can withstand your local climate conditions
Framing Materials
The frame provides the structural support for your outdoor kitchen. These are the most common options:

Pressure-Treated Wood
Affordable and easy to work with. Requires proper sealing and maintenance. Best for covered areas or drier climates.

Metal Framing
Durable and resistant to rot and insects. Requires specific tools and skills. Excellent for all climates.

Concrete Block
Extremely durable and fire-resistant. Heavier and requires masonry skills. Perfect for permanent installations.
Quality Framing Materials
Find the right structural materials to build a solid foundation for your outdoor kitchen project.
Exterior Finishing Materials
The exterior finish of your outdoor kitchen should be both attractive and weather-resistant. Popular options include:

Stone Veneer
Natural appearance with excellent durability. Available in natural or manufactured options. Requires a solid backing surface.

Stucco
Smooth, customizable finish. Relatively affordable and can be colored. Works well in many architectural styles.

Tile
Endless design possibilities. Requires proper installation to prevent moisture issues. Good for expressing personal style.
Weather Considerations
Your local climate should heavily influence your material choices:
| Climate Type | Material Recommendations | Special Considerations |
| Hot, Dry | Stone, concrete, stucco | Provide shade, avoid materials that absorb heat |
| Hot, Humid | Stainless steel, marine-grade materials | Mold/mildew resistance, good ventilation |
| Cold, Snowy | Concrete, natural stone, metal | Freeze/thaw durability, snow load on coverings |
| Coastal | Marine-grade stainless, sealed concrete | Salt corrosion resistance, wind durability |
Pinterest Tip: When searching for outdoor kitchen ideas on Pinterest, filter by your climate type or region to find designs that will work best in your specific conditions.
DIY Outdoor Kitchen Building Methods
There are several approaches to building an outdoor kitchen, each with different skill requirements, time investments, and results. Choose the method that best matches your abilities and goals.

Select a building method that matches your skill level and available time
Method 1: Built from Scratch
Building from scratch gives you complete control over every aspect of your outdoor kitchen. This method involves constructing the frame, adding a surface for cladding, applying finish materials, and installing appliances and countertops.
Key Steps:
- Create a detailed plan with measurements
- Build the frame using wood, metal, or concrete blocks
- Install any required utility lines (with professional help if needed)
- Cover the frame with cement board or similar material
- Apply a scratch coat for stone or tile adhesion
- Install countertops
- Apply exterior finishing materials
- Install appliances and fixtures
Advantages
- Complete customization
- Potentially lower material costs
- Can be built in phases
- Satisfaction of building from ground up
Challenges
- Requires advanced DIY skills
- Time-intensive process
- More potential for mistakes
- Needs specialized tools
Method 2: Ready-to-Finish (RTF) Kits
RTF kits provide the frame structure with cement board already attached. You’ll still need to cut openings for appliances, add finishing materials, and install countertops and appliances.

RTF kits provide the basic structure, saving time on framing
Key Steps:
- Assemble the pre-made frame components
- Cut openings for appliances
- Install support brackets for countertops and appliances
- Apply exterior finishing materials
- Install countertops
- Add appliances and fixtures
Essential Tools for Your Build
Get the right tools for your outdoor kitchen project, from measuring and cutting to finishing and installation.
Method 3: Ready-to-Assemble (RTA) Kits
RTA kits are the easiest option, arriving about 95% complete. These modular systems include finished panels, countertops, and pre-cut openings for appliances. Assembly is similar to putting together furniture.
Key Steps:
- Unpack and organize components
- Assemble the panels according to instructions
- Install countertops
- Add appliances and fixtures
- Connect any utility lines
Pinterest Tip: Search for “modular outdoor kitchen ideas” on Pinterest to see how others have personalized their RTA kits with accessories, plantings, and decor.
Step-by-Step Guide to Building a DIY Outdoor Kitchen
For those choosing to build from scratch, here’s a detailed walkthrough of the construction process. Even if you opt for a kit, understanding these steps will help you appreciate the construction process and make informed decisions.

The progression from frame to finished outdoor kitchen
Step 1: Prepare the Site
Start with a solid, level foundation for your outdoor kitchen. This could be an existing patio, a concrete slab, or a deck reinforced to handle the additional weight.
- Clear and clean the area
- Ensure the surface is level
- Mark the kitchen footprint with chalk or tape
- Plan for utility access points

Carefully mark your kitchen footprint and utility access points
Step 2: Build the Frame
The frame provides the structure for your outdoor kitchen. For a wood frame kitchen:
- Cut 2×4 or 2×6 pressure-treated lumber to create the vertical posts
- Create a base frame with horizontal supports
- Attach vertical studs at 16″ intervals
- Add a top plate to complete the frame
- Create openings for appliances according to manufacturer specifications
- Add cross supports for structural integrity

Build a sturdy frame with openings sized for your specific appliances
Quality Construction Hardware
Find weather-resistant screws, brackets, and fasteners designed to withstand outdoor conditions.
Step 3: Install Utilities
If your outdoor kitchen includes electricity, water, or gas, now is the time to install these utilities. This is often best left to licensed professionals.
Safety First: Always hire licensed professionals for gas, electrical, and plumbing work to ensure safety and code compliance. Improper installation can lead to serious hazards.
- Run electrical conduit and wiring for outlets and lighting
- Install water lines and drainage for sinks
- Set up gas lines for grills or other cooking appliances
- Have all utility work inspected before proceeding
Step 4: Apply Cement Board
Cover the frame with cement board to create a surface for applying exterior finishes:
- Cut cement board panels to fit the frame dimensions
- Attach the boards to the frame using exterior screws
- Cut openings for appliances and utilities
- Apply self-adhesive mesh tape to seams
- Create ventilation openings as required by appliance specifications

Cement board provides a durable surface for applying finishing materials
Step 5: Apply Scratch Coat
For stone, brick, or tile finishes, apply a scratch coat to create a rough surface for better adhesion:
- Mix mortar according to package directions
- Apply a ½-inch layer of mortar over the cement board
- Use a notched trowel to create horizontal grooves in the mortar
- Allow the scratch coat to cure for 24-48 hours
Step 6: Install Countertops
Countertops can be installed before or after the exterior finish, depending on your preference and materials:
- Measure and cut countertops to size (or have them professionally fabricated)
- Create cutouts for sinks or built-in appliances
- Apply construction adhesive to the top of the frame
- Set the countertop in place and ensure it’s level
- Seal seams and edges as appropriate for the material

Countertop installation often requires two people due to weight
Step 7: Apply Exterior Finish
Now it’s time to add the exterior finish that will give your outdoor kitchen its final appearance:
For Stone or Brick Veneer:
- Start at the bottom and work upward
- Apply mortar to the back of each stone
- Press firmly onto the scratch coat
- Use spacers for consistent gaps
- Fill joints with mortar after stones are set
For Stucco:
- Apply a base coat over the cement board
- Add metal lath for reinforcement
- Apply the finish coat in your chosen color
- Texture as desired while still wet
Finishing Materials
Find the perfect exterior finishing materials to give your outdoor kitchen a professional look.
Step 8: Install Appliances and Fixtures
The final step is installing your appliances, doors, drawers, and other fixtures:
- Follow manufacturer instructions for each appliance
- Install insulated jackets for combustible construction
- Connect utilities to each appliance
- Add cabinet doors and hardware
- Install any lighting fixtures
- Test all components before final finishing touches

Installing appliances is the rewarding final step in your outdoor kitchen build
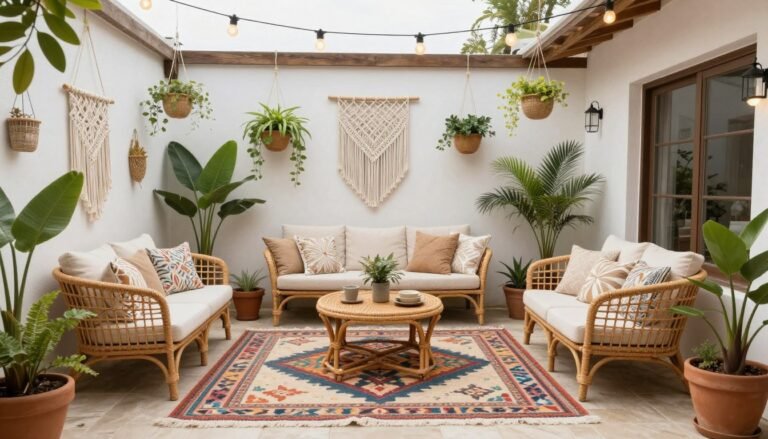
Creative DIY Outdoor Kitchen Ideas
Looking for inspiration? Here are some creative approaches to outdoor kitchen designs that can be adapted to various budgets and spaces.

Draw inspiration from various styles to create your perfect outdoor cooking space
Budget-Friendly Options

Repurposed Furniture
Transform old dressers, sideboards, or cabinets into outdoor kitchen stations with weather-resistant paint and some modifications.

Cinder Block Construction
Create a simple, durable structure using cinder blocks stacked and secured with construction adhesive. Add a wood or concrete countertop.

Rolling Cart System
Use weather-resistant rolling carts to create a modular kitchen that can be reconfigured or moved as needed. Perfect for renters.
Pinterest Tip: Search for “upcycled outdoor kitchen” on Pinterest to find creative ways to repurpose existing items into functional cooking spaces.
Specialized Cooking Stations

Pizza Oven Station
Create a dedicated area for a wood-fired pizza oven with prep space and storage for wood and tools.

Smoker & BBQ Station
Design a space specifically for smoking and barbecuing with proper ventilation and storage for wood chips and tools.

Cocktail & Beverage Station
Build a dedicated area for drinks with a refrigerator, ice maker, and storage for glasses and bottles.
Specialty Outdoor Cooking Equipment
Explore specialty cooking equipment to create a unique outdoor culinary experience.
Style Inspirations

Rustic Farmhouse
Incorporate reclaimed wood, natural stone, and vintage accessories for a warm, lived-in feel.

Modern Minimalist
Focus on clean lines, concrete surfaces, and stainless steel for a contemporary, sleek appearance.

Tropical Paradise
Use bright colors, thatched elements, and natural materials for a vacation-inspired cooking space.
Maintaining Your DIY Outdoor Kitchen
Proper maintenance ensures your outdoor kitchen remains functional and attractive for years to come. Create a maintenance schedule based on your climate and usage patterns.

Regular maintenance keeps your outdoor kitchen looking great and functioning properly
Seasonal Maintenance Checklist
Spring:
- Deep clean all surfaces and appliances
- Check for winter damage to structures
- Inspect and clean gas lines and connections
- Reseal countertops if needed
- Check and replace weatherstripping
Fall:
- Clean and cover appliances for winter
- Drain water lines if freezing is possible
- Store removable accessories indoors
- Check for cracks or damage to repair
- Apply protective treatments to wood
Material-Specific Care
| Material | Cleaning Method | Maintenance Needs | Frequency |
| Stainless Steel | Stainless cleaner, microfiber cloth | Polish, check for rust spots | Monthly |
| Stone/Concrete | Mild soap, soft brush | Reseal surfaces | Annually |
| Wood | Wood-specific cleaner | Sand and reseal/stain | Every 1-2 years |
| Tile | Tile cleaner, avoid acidic products | Regrout, seal grout lines | Every 1-2 years |
Maintenance Supplies
Keep your outdoor kitchen looking great with the right cleaning and maintenance products.
Appliance Care
- Follow manufacturer’s cleaning and maintenance instructions
- Cover appliances when not in use
- Regularly check gas connections for leaks
- Clean grills and smokers after each use
- Winterize appliances according to manufacturer guidelines
Pinterest Tip: Create a dedicated maintenance board on Pinterest to save cleaning tips, seasonal checklists, and product recommendations for your outdoor kitchen.
Ready to Build Your DIY Outdoor Kitchen?
Creating your own outdoor kitchen is a rewarding project that enhances your home’s value and your quality of life. Whether you choose to build from scratch, use a kit, or something in between, the result will be a personalized space for cooking, entertaining, and making memories.

Your DIY outdoor kitchen will become a gathering place for family and friends
Remember that your outdoor kitchen can evolve over time. You might start with a basic grill station and add features as your skills and budget allow. The most important thing is to create a space that works for your cooking style and entertaining needs.
We hope this guide has inspired you to take on this exciting project. With careful planning, quality materials, and attention to detail, your DIY outdoor kitchen will provide years of enjoyment and countless delicious meals under the open sky.
Start Your Outdoor Kitchen Project Today
Find everything you need to begin building your dream outdoor cooking space.
Don’t forget to pin this guide to your Pinterest boards for future reference! Share your completed DIY outdoor kitchen projects with us – we’d love to see what you create!