Starting your woodworking journey doesn’t require fancy tools or years of experience. Small wood projects offer the perfect way to learn basic skills while creating beautiful, functional pieces for your home.
This Website contains affiliate links. That means I may earn a small commission if you purchase through my links, at no extra cost to you.
Whether you have leftover scrap wood from previous projects or you’re buying your first boards, these easy diy ideas will help you build confidence. Each project takes just a couple of hours and uses simple techniques that beginners can master quickly.
The beauty of diy wood projects lies in their versatility. You can customize size, design, and finish to match your personal style and home decor perfectly.
Ready to Start Your Woodworking Journey?
Get access to over 16,000 detailed woodworking plans with step-by-step instructions perfect for beginners. Transform scrap wood into beautiful creations with professional guidance.
Before diving into your first wood project, understanding the basics makes the entire process smoother. You don’t need a fully equipped workshop to create amazing things.
Essential Tools for Beginners
Starting with the right supplies makes your first projects easier and more enjoyable. Most diy wood projects require just a handful of basic tools that won’t break the budget.
Hand saw or circular saw for cutting boards to size
Measuring tape and pencil for accurate measurements
Drill and basic drill bits for making holes
Sandpaper in various grits for smooth finishes
Wood glue and clamps for strong joints
Safety glasses and dust mask for protection
Choosing the Right Wood
Selecting appropriate wood makes a huge difference in how your project turns out. Pine remains the most popular choice for beginners because it’s affordable and easy to work with.
Scrap wood from previous projects or leftover pieces from construction work perfectly for small wood projects. Many hardware stores sell pre-cut boards in standard sizes that eliminate the need for complicated cuts.
Softwoods (Easier to Work)
Pine – budget-friendly and readily available
Cedar – naturally resistant to moisture and insects
Fir – strong and affordable option
Hardwoods (More Durable)
Oak – classic choice for furniture pieces
Maple – smooth surface perfect for cutting boards
Walnut – beautiful dark color for accent pieces
Simple Wood Projects for Home Decor
Decorating your space with handmade wooden pieces adds warmth and personality. These projects require minimal time and create impressive results that look store-bought.
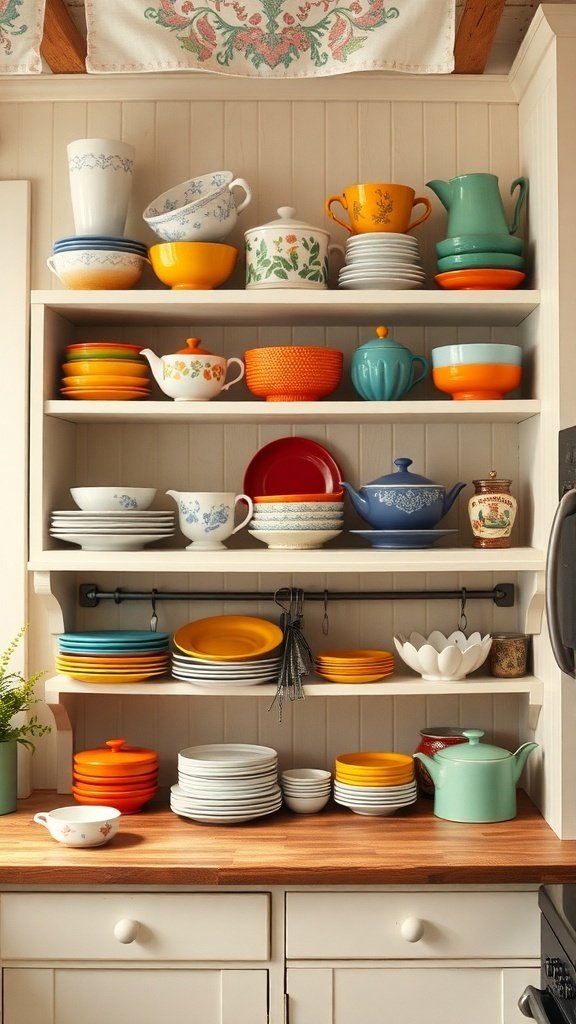
Floating Shelf
A floating shelf provides both function and style to any room in your home. This super easy project takes about two hours and requires just a single board and mounting hardware.
The beauty of a wood wall shelf lies in its simplicity. You can stain or paint it to match your existing decor, or leave it natural for a rustic look.
Creating custom picture frames lets you showcase memories in a personal way. This wood project uses four pieces of wood joined at the corners with simple miter cuts.
Beginners can skip the miter cuts by using butt joints instead. The frame still looks beautiful and holds together perfectly with wood glue and small nails.
Sand the wood smooth before assembly, then add your choice of stain or paint. Insert a piece of glass or acrylic, add your photo, and secure the back with small nails or clips.
Simple Wall Art
Geometric wall art made from scrap wood pieces creates stunning focal points. This diy project lets you experiment with different wood tones and arrangements.
Cut various pieces of scrap wood into similar-sized rectangles or squares. Arrange them in a pleasing pattern on a backing board, playing with different orientations and spacing.
Once satisfied with your design, glue each piece in place. The contrast between different wood species creates natural art that complements any room design.
Master Professional Woodworking Techniques
Learn from expert craftsmen with comprehensive video tutorials that break down every step. Perfect for beginners who want to create furniture-quality projects.
Creating useful items for your home combines practicality with the satisfaction of making something yourself. These projects serve real purposes while showcasing your growing skills.
DIY Cutting Board
A diy cutting board makes an excellent first project because it teaches fundamental woodworking skills. Choose hardwood like maple or walnut for the best durability and food safety.
Cut your board to size, ensuring the grain runs lengthwise for stability. Sand progressively through finer grits until the surface feels completely smooth to touch.
Apply food-safe mineral oil to protect the wood and enhance the grain pattern. This kitchen essential makes a thoughtful gift and serves as a beautiful addition to your own space.
Simple Desk Organizer
Keeping your office or workspace tidy becomes easier with a custom desk organizer. This small wood project uses compartments to hold pens, paper clips, and other supplies.
Design your organizer based on what you need to store. Cut dividers from scrap wood and assemble them into a base using wood glue and small finish nails.
The beauty of this diy wood project lies in complete customization. Make it tall for pens, add shallow sections for paper clips, or include a slot for your phone.
Wooden Serving Tray
A serving tray brings functionality and elegance to entertaining. This project combines a flat base with raised sides and handles for easy carrying.
Cut the base from a single board or join several pieces scrap wood for a more interesting design. Attach side pieces using wood glue and finish nails, then add simple handles made from dowels or cut-out shapes.
Sand everything smooth and apply a food-safe finish. Your handmade tray works perfectly for serving breakfast in bed, carrying drinks to the patio, or displaying decorative items. Discover advanced tray designs and joinery techniques.
Easy Wood Projects for Storage
Storage solutions made from wood add character while organizing your belongings. These practical projects help declutter any space in your home.
Simple Storage Box
A basic storage box teaches essential box-making skills while providing useful organization. This wood project works perfectly for toys, craft supplies, or bathroom essentials.
Cut four side pieces and a bottom from pine boards. Assemble using wood glue and nails, ensuring all corners meet squarely. Add rope handles by drilling holes on opposite sides and knotting the rope inside.
Leave the wood natural for a rustic look, or paint it to match your room decor. These boxes stack beautifully and fit on shelves or under beds for extra storage space.
Wall-Mounted Key Holder
Never lose your keys again with this super easy entryway organizer. A small piece of wood with hooks mounted creates a designated spot for keys and accessories.
Cut a rectangular board to your preferred size and sand all edges smooth. Attach decorative hooks evenly spaced across the board, then mount the entire piece to your wall near the door.
Add a small shelf above the hooks for a mail slot or decorative items. This addition to your entryway keeps important items organized and easily accessible.
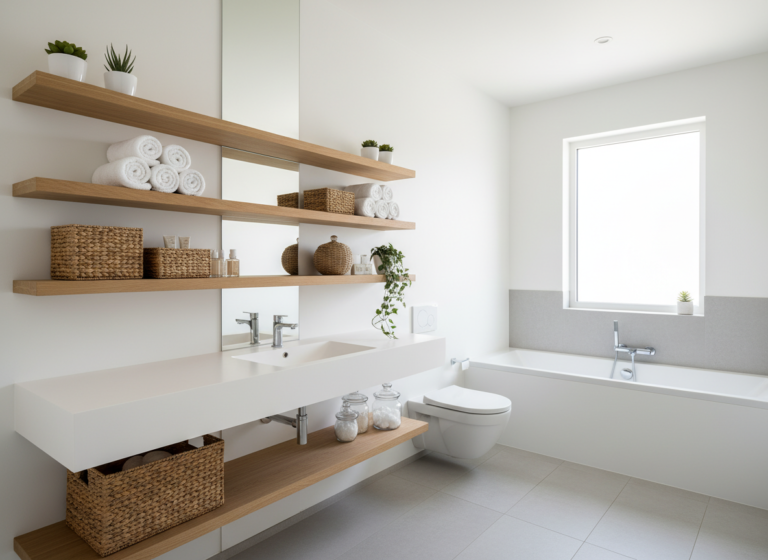
Bathroom Shelf
Extra bathroom storage becomes stylish with a custom wooden shelf. This project works above the toilet, beside the sink, or in any available wall space.
Cut your shelf board to fit your space, considering what you’ll store there. Add decorative brackets or make floating shelf brackets from scrap wood for a seamless look.
Seal the wood with polyurethane to protect it from bathroom moisture. Your new shelf holds towels, toiletries, or decorative elements while maximizing vertical space.
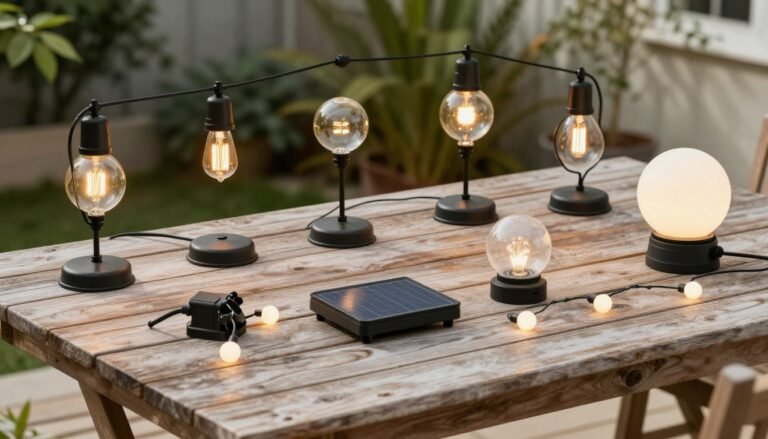
Small Wood Projects for Outdoor Spaces
Taking your woodworking skills outdoors creates functional pieces that enhance your patio, garden, or porch. These projects withstand weather while adding charm to exterior spaces.
Window Box Planter
Window boxes add curb appeal and let you grow flowers or herbs near your home. This diy project uses cedar or redwood for natural weather resistance.
Build a rectangular box sized to fit your window. Drill drainage holes in the bottom to prevent water accumulation. Seal or stain the exterior, leaving the inside untreated for plant safety.
Mount your planter securely beneath windows using sturdy brackets. Fill it with potting soil and your favorite plants for a welcoming addition to your home exterior.
Simple Birdhouse
Building a birdhouse connects you with nature while providing shelter for feathered friends. This classic wood project requires just a few boards and basic assembly.
Cut panels for the front, back, sides, bottom, and roof. Drill an entrance hole in the front panel sized for your target bird species. Assemble with wood glue and outdoor screws.
Add ventilation holes near the top and drainage holes in the bottom. Mount it on a post or hang it from a tree branch away from predators and direct sun.
Garden Tool Organizer
Keep garden tools organized and easily accessible with a wall-mounted storage solution. This project uses scrap wood and creates dedicated spots for each tool.
Build a backing board with horizontal slats or pegs spaced to accommodate your tools. Add hooks, clips, or cut notches to hold specific items securely.
Mount your organizer inside a garage, shed, or on an exterior wall under an overhang. Proper tool storage extends their lifespan and keeps your space tidy.
Build Like a Professional
Transform from beginner to skilled woodworker with comprehensive plans covering furniture, outdoor projects, and everything in between. Start creating heirloom-quality pieces today.
Handmade gifts carry special meaning that store-bought items can’t match. These small wood projects create thoughtful presents for any occasion.
Wooden Coaster Set
Coasters protect furniture while showcasing beautiful wood grain. This super easy project lets you make a complete set in just a couple of hours.
Cut square pieces from hardwood or use different types of scrap wood for variety. Sand all surfaces and edges until smooth, rounding the corners slightly for comfort.
Apply several coats of polyurethane for water resistance. Make a simple holder from additional wood pieces to keep the set together. This practical gift suits any home and shows your craftsmanship.
Personalized Name Sign
Custom name signs add a personal touch to kids’ rooms, offices, or entryway spaces. This diy wood project combines basic cutting with creative lettering.
Cut a board to your desired size and sand it completely smooth. Mark out letters using a stencil or freehand drawing, then paint or rout them into the surface.
Add decorative elements like stars, hearts, or simple designs around the name. Seal with polyurethane and attach hanging hardware to the back. Recipients treasure these thoughtful, customized gifts for years.
Simple Jewelry Box
A handmade jewelry box provides elegant storage for treasured items. This small wood project teaches basic box-making while creating something truly special.
Build a box with a lid using thin boards and precise measurements. Add a small hinge to connect the lid, and include a catch to keep it closed. Line the interior with felt for extra protection.
Divide the interior with compartments using additional pieces scrap wood. Stain or paint the exterior, then add a protective finish. This gift becomes more valuable over time as it stores precious memories.
Small Furniture Wood Projects
Creating small furniture pieces builds confidence for larger projects while adding functional beauty to your home. These projects use basic techniques that beginners can master with patience and attention to detail.
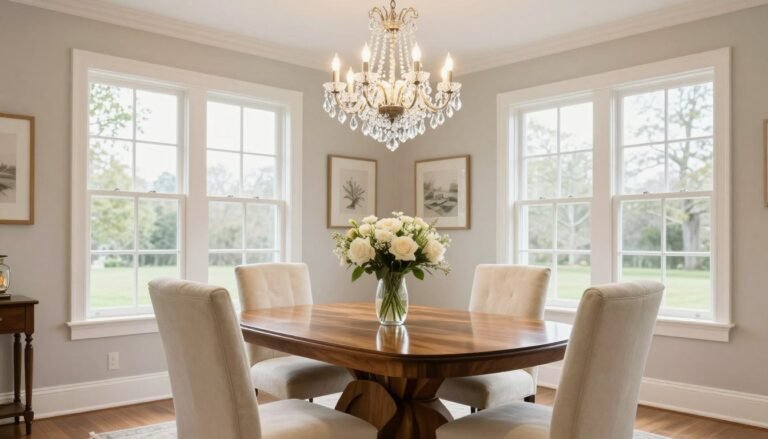
Simple Side Table
A side table serves multiple purposes throughout your home. This wood project creates a functional piece perfect for holding drinks, books, or decorative items.
Build a square or rectangular top from boards joined edge to edge. Construct a simple frame underneath for support, then attach four legs cut to your preferred height.
Sand everything smooth before applying stain or paint. Add a protective topcoat suitable for furniture. Your handmade table rivals store-bought options at a fraction of the cost. Learn advanced joinery techniques for stronger furniture.
Wooden Stool
A basic stool provides extra seating or works as a step stool around your home. This diy project teaches leg attachment and proper support structure.
Cut a round or square seat from thick wood. Drill angled holes for three or four legs, ensuring they splay outward for stability. Insert and glue the legs securely.
Add cross-braces between legs for additional strength. Sand the entire stool and apply your chosen finish. This versatile piece works in the kitchen, bathroom, bedroom, or office.
Book Stand
Display favorite books or hold cookbooks open with a custom book stand. This small wood project combines angled cuts with simple assembly.
Create a triangular support structure with a ledge to hold the book bottom. Add an adjustable lip to prevent pages from closing. Use hinges to make it foldable for easy storage.
Sand smooth and finish with a stain that complements your desk or kitchen decor. This practical piece helps with recipes, reading, or displaying special books as art.
Seasonal Wood Projects for Year-Round Crafting
Celebrating seasons through woodworking creates festive decor that returns year after year. These projects adapt to your holiday decorating style and skill level.
Fall Pumpkin Decorations
Wooden pumpkins create lasting fall decor that won’t rot or require replacement. This super easy project uses scrap wood and basic painting skills.
Cut pumpkin shapes from wood, or make three-dimensional versions by joining several boards. Sand smooth and paint in traditional orange or trendy colors like white or teal.
Add a small piece of branch or wooden dowel painted brown for the stem. Arrange your pumpkins on mantels, porches, or as a dining room centerpiece throughout the fall season.
Holiday Ornaments
Wooden ornaments become family heirlooms passed through generations. This diy project lets you make personalized decorations for your tree or to give as gifts.
Cut simple shapes like stars, trees, or circles from thin wood. Drill a small hole at the top for hanging ribbon or twine. Sand edges smooth and decorate with paint, wood-burning designs, or leave natural.
Seal with polyurethane to protect your work for years of use. Add the date and family names to create treasured keepsakes that tell your story.
Summer Plant Markers
Garden markers identify plants while adding rustic charm to outdoor space. These simple wood projects help organize vegetable gardens and flower beds.
Cut long, narrow pieces from scrap wood, sharpening one end to a point for easy ground insertion. Paint or wood-burn plant names on the top portion that stays visible above soil.
Apply outdoor sealer to protect against weather. These markers last season after season, unlike plastic options that fade and break in sunlight.
DIY Wood Projects to Make with Kids
Introducing kids to woodworking builds confidence, teaches patience, and creates quality time together. These projects use simple techniques that children can participate in safely with adult supervision.
Simple Wooden Toy Car
Building toy cars teaches basic shaping and wheel attachment. This wood project lets kids paint and customize their creation however they imagine.
Cut a simple car body shape from wood using rounded corners for safety. Drill holes for axles and attach wheels using dowels or purchased wooden wheels and axle sets.
Let kids sand the body smooth under supervision, then paint wild designs or realistic car colors. These handmade toys provide hours of imaginative play and pride in their work.
Birdhouse Kit
Pre-cutting pieces for a birdhouse lets kids focus on assembly and decoration. This diy project teaches following instructions and working with tools safely.
Prepare all wood pieces with pilot holes already drilled. Kids can apply glue and help drive screws with adult guidance. They choose paint colors and add decorative touches.
Hanging their completed birdhouse creates excitement about watching for bird families. This project combines craft skills with nature observation throughout the years.
Picture Frame Craft
Making frames for their artwork gives kids ownership over displaying their creations. This small wood project uses pre-cut pieces that children assemble and decorate.
Cut frame pieces with simple joints that kids can glue together. They sand edges smooth and paint the frame in favorite colors. Add their artwork behind glass or acrylic.
These personalized frames make great gifts for grandparents or display children’s evolving art in their room. The framing process teaches them to value their creative work.
Complete Woodworking Toolkit and Plans
Everything you need to start woodworking today. Get comprehensive plans, tool recommendations, safety guides, and lifetime access to new projects added monthly.
Developing good habits early makes every project easier and produces better results. These tips help beginners avoid common mistakes and build skills efficiently.
Measure Twice, Cut Once
This classic woodworking rule saves countless boards and frustration. Always verify measurements before cutting, using a reliable measuring tape and marking clearly with a sharp pencil.
Take your time during the measuring phase. Rushing leads to errors that waste materials and require starting over. Double-checking measurements becomes automatic with practice and saves significant time overall.
Sand Progressively
Starting with coarse sandpaper and moving through finer grits creates the smoothest finish. Begin with 80-grit to remove rough spots, move to 120-grit for general smoothing, and finish with 220-grit for a silky surface.
Sanding Steps
Remove saw marks with coarse grit
Smooth surface with medium grit
Create final finish with fine grit
Wipe away all dust before finishing
Common Sanding Mistakes
Skipping grits leaves visible scratches
Sanding across grain creates damage
Pressing too hard creates dips
Not removing dust between grits
Test Finishes First
Always test stain and finish on scrap wood before applying to your project. Different wood species absorb stain differently, and what looks perfect on one board may appear completely different on another.
Keep test pieces from each wood type you use. Apply your planned finish and let it dry completely to see the true color. This simple step prevents disappointment and wasted work on completed projects.
Work in Good Lighting
Adequate lighting helps you see grain patterns, measure accurately, and work safely. Natural light works best, but good overhead lights or work lamps make any space suitable for woodworking.
Position lights to eliminate shadows on your work area. Being able to see clearly reduces mistakes and helps you notice small issues before they become big problems.
Organize Your Workspace
Keeping tools and supplies organized makes projects flow smoothly. Dedicate specific spots for frequently used items so you can find them instantly without searching.
Clean your work area after each session, putting tools away and sweeping sawdust. A tidy space makes starting your next project easier and maintains tools in good condition.
Basic Finishing Techniques for Wood Projects
The final finish protects your work and enhances natural wood beauty. Understanding different finishing options helps you choose the right approach for each diy wood project.
Staining Wood
Wood stain adds color while allowing grain patterns to show through. Pre-stain conditioner helps softer woods like pine absorb stain evenly without blotchiness.
Apply stain with a brush or cloth, working in the direction of the grain. Wipe away excess after a few minutes to control color intensity. Multiple thin coats produce better results than one thick application.
Let stain dry completely according to manufacturer instructions before applying protective topcoat. This layered approach creates professional-looking finishes on any project.
Clear Protective Finishes
Polyurethane, lacquer, and oil finishes each offer different benefits. Polyurethane provides durable protection for high-use items like cutting boards and furniture. Oil finishes create natural-looking surfaces that develop character over time.
Apply thin coats rather than one thick layer, allowing proper drying time between applications. Sand lightly with fine-grit paper between coats for the smoothest final surface.
Painting Wood
Paint completely covers wood while offering unlimited color options. Prime first for the best coverage and adhesion, especially on raw wood or when covering stained surfaces.
Paint Application Tips
Use quality brushes for smooth application
Apply thin coats instead of thick layers
Sand between coats for professional finish
Protect with clear topcoat when needed
Paint Selection Guide
Latex paint for easy cleanup and low odor
Oil-based for durability and smooth finish
Chalk paint for vintage, distressed look
Spray paint for even coverage on small items
Natural Finishes
Leaving wood natural with just a clear coat showcases its inherent beauty. This approach works beautifully with attractive grain patterns and quality wood species.
Sand to a fine grit, then apply several coats of clear polyurethane or natural oil. The finish protects while enhancing color and grain without altering the wood’s appearance.
Common Problems and Solutions
Every woodworker encounters challenges, especially when starting out. Learning to fix common issues builds problem-solving skills and confidence.
Dealing with Mistakes
Wood putty fixes small gouges, nail holes, and minor surface damage. Choose a color matching your wood or stain, apply it slightly overfilled, then sand flush once dry.
Incorrect cuts require creative thinking. Sometimes you can adjust your design slightly to work with the piece you have. Other times, embracing imperfections adds character to your project.
Fixing Splitting Wood
Pre-drilling holes before inserting screws prevents splitting, especially near board ends. Use a drill bit slightly smaller than your screw shaft for perfect pilot holes.
If wood does split, apply wood glue into the crack and clamp it closed until dry. For larger splits, you may need to add a reinforcing piece on the backside.
Addressing Uneven Surfaces
Cupped or warped boards need flattening before use. A hand plane works well for small areas, while a planer or jointer handles larger pieces more efficiently.
Store wood flat in a climate-controlled space to prevent warping. Let boards acclimate to your workshop for a couple of days before starting your wood project.
What are the easiest small wood projects for absolute beginners?
Start with simple cutting boards, floating shelves, or picture frames. These projects use basic tools and straight cuts while teaching fundamental skills like measuring, cutting, sanding, and finishing. They also produce useful items you’ll actually use or can give as gifts.
How much does it cost to start woodworking as a hobby?
Beginning woodworking costs between $100-300 for essential tools including a hand saw, drill, measuring tape, sandpaper, and safety equipment. Scrap wood for projects costs little or nothing, making this an affordable hobby once you have basic supplies.
Can I make wood projects without power tools?
Absolutely. Hand tools like saws, chisels, and hand planes built furniture for centuries. Working with hand tools takes more time but offers quiet operation, lower costs, and deeper skill development. Many beginners enjoy the meditative quality of hand tool woodworking.
What wood is best for small DIY projects?
Pine works excellently for beginners due to its low cost and ease of cutting. For items requiring durability like cutting boards, choose hardwoods such as maple, oak, or walnut. Cedar and redwood excel for outdoor projects because of their natural weather resistance.
How do I know what size to make my project?
Measure the space where your finished piece will go, then design around those dimensions. For functional items like shelves or organizers, consider what you’ll store there. Looking at similar products online provides good size references for your first projects.
Start Building Your First Project Today
Beginning your woodworking journey opens up endless creative possibilities. Each small wood project you complete builds skills, confidence, and a collection of handmade items that make your home uniquely yours.
The projects shared here offer something for every skill level and interest. Whether you want functional storage solutions, beautiful decor, thoughtful gifts, or outdoor enhancements, woodworking lets you create exactly what you envision.
Remember that every expert woodworker started exactly where you are now. Your first projects may not be perfect, but each one teaches valuable lessons that improve your next creation. The key is simply to start.
Gather a few basic tools and some scrap wood, then choose a simple project that excites you. Work carefully, enjoy the process, and celebrate your progress. The satisfaction of building something with your own hands never gets old.
Woodworking offers a perfect way to disconnect from screens, reduce stress, and engage in meaningful creation. The skills you develop serve you for life, and the items you make carry stories and memories that manufactured products never can.
Transform Your Woodworking Skills Forever
Join thousands of successful woodworkers who started just like you. Get instant access to professional plans, expert guidance, and a supportive community. Your next masterpiece starts today.
Your workshop awaits, whether it’s a garage corner, a basement space, or just a small table. The projects you create will fill your home with warmth, personality, and the unmistakable pride of handcrafted beauty. Pick up that first board and discover the woodworker within you.