Creating beautiful things with your own hands brings unmatched satisfaction. Small wood projects offer the perfect entry point into woodworking without requiring expensive tools or years of experience. Whether you want to personalize your home, craft unique gifts, or simply explore a rewarding hobby, these accessible projects deliver impressive results.
This Website contains affiliate links. That means I may earn a small commission if you purchase through my links, at no extra cost to you.
This guide presents over forty-five beginner-friendly woodworking projects. Each one uses basic materials and common tools. You can complete most in a weekend or less. The projects range from simple decorative pieces to functional items that solve everyday problems around your home.
Starting with wood opens creative possibilities. The material feels forgiving for beginners yet offers enough challenge to build real skills. You will learn fundamental techniques while making items you actually want to keep or share.
Ready to Start Your Woodworking Journey?
Access professional plans and step-by-step tutorials designed specifically for beginners. Get instant access to hundreds of detailed project blueprints.
Why Small Wood Projects Make Perfect Starting Points
Beginning with smaller projects builds confidence without overwhelming you. These manageable creations teach essential skills one step at a time. You master measuring, cutting, sanding, and finishing on pieces that do not waste expensive materials if something goes wrong.
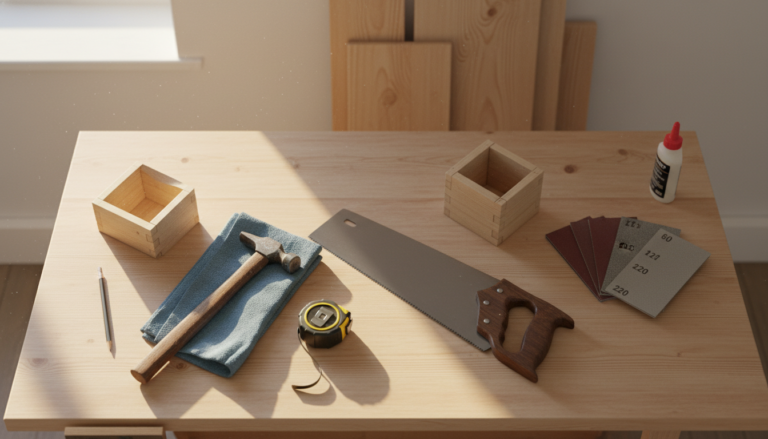
Small woodworking projects require minimal investment. Most use scrap wood or inexpensive boards from hardware stores. You likely already own several necessary tools. A saw, drill, sandpaper, and wood glue handle most basic projects. This accessibility removes barriers that stop many people from trying woodworking.
The quick completion time keeps motivation high. Finishing a project in one afternoon or weekend provides immediate gratification. You see tangible results fast, which encourages tackling the next challenge. This momentum matters more than anything for developing a lasting hobby.
These starter projects also teach you about wood itself. Different species behave uniquely when cut, sanded, or stained. Working with various woods on small scales lets you discover preferences before committing to larger furniture pieces. You learn which woods suit your style and budget.
Essential Projects Every Beginner Should Try
Simple Wooden Picture Frame
Picture frames represent ideal first projects. They teach precise angle cuts and basic joinery. You practice measuring carefully since even small errors show in the final product. The frame construction introduces miter cuts, which appear in many advanced projects later.
Choose a standard photo size like five by seven inches. This decision simplifies the math and ensures you can find glass and backing materials easily. Cut four pieces of molding at forty-five degree angles. Apply wood glue to the mitered corners and secure with small nails or clamps while drying.
Sand all surfaces smooth before finishing. Apply stain or paint according to your preference. The frame becomes a functional piece of art that showcases both your photo and craftsmanship. Make several in different sizes to practice and create a gallery wall.
Basic Floating Shelf
Floating shelves add storage and style to any room. This project teaches you to work with different wood dimensions and introduces wall mounting techniques. The minimal design looks sophisticated while remaining simple to construct.
Start with a board cut to your desired length. Sand all edges until smooth. Apply your chosen finish, whether natural oil, stain, or paint. Install hidden brackets or a French cleat system for mounting. The shelf should appear to float without visible support hardware.
Position shelves strategically to display plants, books, or decorative objects. Group multiple shelves at varying heights for visual interest. This project scales easily from small bathroom shelves to longer living room displays. Each one builds your confidence with power tools and finishing techniques.
Master These Projects with Expert Guidance
Follow detailed video tutorials that walk you through each step. Learn professional techniques from experienced woodworkers who remember what being a beginner feels like.
Coasters make excellent practice pieces for woodworking fundamentals. You can complete a set quickly and experiment with different finishes. These small items also serve as perfect handmade gifts that people actually use.
Cut wood into uniform squares or circles measuring about four inches across. Sand thoroughly to prevent splinters and create smooth surfaces. Apply several coats of water-resistant finish since coasters encounter moisture regularly. Consider adding felt pads to the bottom to protect furniture surfaces.
Try different wood species for visual variety in a set. Mix light and dark woods for contrast. You could also experiment with wood burning designs or simple carved patterns. Each coaster becomes a tiny canvas for creativity while serving a practical purpose.
Simple Wooden Box
Building a basic box teaches fundamental joinery skills. This project introduces dadoes, rabbets, or simple butt joints depending on your tool availability. The box construction process appears in countless furniture pieces, making these skills transferable to bigger projects.
Cut six pieces of wood for the top, bottom, and four sides. Choose a joinery method that matches your skill level and tools. Butt joints work fine for beginners, secured with glue and nails. More advanced builders might try rabbet joints for stronger corners.
Sand all pieces before assembly to reach tight corners easier. Glue joints and reinforce with fasteners as needed. Add a simple hinged lid or sliding top. Finish the box with stain, paint, or natural oil. Use it for storage, gift giving, or as a decorative accent piece.
Small Wood Projects for Home Organization
Organization projects combine function with style. These woodworking ideas solve real problems around your home while developing your skills. Each piece you create reduces clutter and adds character to your space.
Wall-Mounted Key Holder
A key holder near your entryway prevents the daily search for missing keys. This simple project takes minimal time but delivers maximum utility. Mount a piece of decorative wood to the wall and add hooks or knobs for hanging keys.
Choose wood with interesting grain or character for visual appeal. Cut to desired length and sand smooth. Drill pilot holes for wall mounting and hook installation. Add a small shelf on top for mail or sunglasses. Finish with protective coating and mount near your door.
Personalize with family name, house numbers, or carved designs. Consider adding small labeled hooks for each family member. This project makes a thoughtful housewarming gift that new homeowners appreciate.
Wooden Desk Organizer
Desktop organizers corral pens, paperclips, and other office supplies. Build compartments sized for your specific needs. This project teaches precision cutting and careful assembly of multiple small parts.
Design compartments for different items – tall sections for pens, shallow areas for paperclips, wider spaces for notepads. Cut dividers and a base from thin plywood or solid wood. Glue pieces together creating separate sections. Sand thoroughly since you will handle this piece daily.
Apply a finish that complements your desk. Natural wood tones work well in most office settings. Add felt to the bottom to prevent desk scratches. The organizer keeps your workspace tidy while showcasing your growing woodworking abilities.
Entryway Coat Rack
A simple coat rack welcomes guests and keeps jackets organized. This project scales from small wall-mounted versions to freestanding floor models. Either style teaches important mounting and stability principles.
For a wall-mounted design, use a board at least four feet long. Sand smooth and apply finish. Mount sturdy coat hooks spaced evenly. Ensure mounting hardware can support the weight of multiple coats. For added function, include a shelf above for hats or a lower shelf for shoes.
Freestanding versions require a stable base and vertical support. Cut a base wide enough to prevent tipping. Attach a vertical post securely. Add crossbars or hooks at appropriate heights. Weight the base if needed for additional stability. This version works well in apartments where wall mounting is not allowed.
Build Professional-Looking Organization Systems
Get detailed blueprints for organization projects with precise measurements and cutting lists. Save time and avoid costly mistakes with professional plans.
Decorative pieces let creativity shine while practicing woodworking fundamentals. These projects focus on aesthetics and personal expression. They transform plain wood into conversation pieces for your home.
Wooden Wall Art
Create unique wall art from wood scraps or reclaimed materials. Geometric patterns, abstract designs, or nature-inspired shapes all work beautifully. This project encourages experimentation without strict rules or measurements.
Gather wood pieces in various sizes and tones. Arrange them in pleasing patterns before securing. You might create a gradient effect from light to dark woods, geometric shapes, or organic flowing designs. Glue pieces to a backing board or directly to each other.
Sand edges for a refined look or leave them rough for rustic charm. Apply finish that enhances natural wood tones or paint sections for color contrast. Mount the finished piece with picture hanging hardware. These custom art pieces cost a fraction of store-bought alternatives.
Rustic Candle Holders
Wooden candle holders bring warmth to any room. Make them from solid blocks, branches, or reclaimed wood. The natural material complements candlelight beautifully. This project requires basic drilling and finishing skills.
Cut wood to desired height for your candle size. Drill holes sized to hold standard candles securely but not too tight. Sand smooth to prevent splinters. Apply fire-resistant finish or leave natural. Consider making sets of varying heights for visual interest.
Use interesting wood pieces with knots, bark, or unique grain. These imperfections become features in rustic designs. Group multiple candle holders on a table or mantel. Always supervise burning candles and keep holders away from flammable materials.
Small Wooden Plant Stand
Plant stands elevate greenery literally and visually. These small platforms showcase favorite plants while adding levels to room design. The project teaches leg attachment and stability considerations important for larger furniture later.
Design a simple square or round top sized for your plant pot. Cut four legs to identical lengths for stability. Attach legs to the top using screws, dowels, or corner brackets. Add crossbars between legs for extra strength and visual interest.
Sand all surfaces smooth. Apply water-resistant finish since plant stands encounter moisture from watering. Adjust height based on where you plan to use the stand. Low stands work near windows while taller versions create floor-level focal points.
Wooden Serving Tray
A serving tray combines beauty and function. Use it for breakfast in bed, outdoor dining, or decorative display. This project teaches you to work with larger flat surfaces and add handles or edges.
Cut a base from plywood or glued boards. Add side rails to contain items and provide finished edges. Attach handles on opposite ends for easy carrying. Handles can be cut from wood, shaped rope, or drawer pulls.
Sand thoroughly since this piece contacts food and gets handled frequently. Apply food-safe finish for protection. Consider adding rubber feet to the bottom for surface protection. Personalize with carved initials, painted designs, or contrasting wood inlays.
Practical Wood Projects for Your Kitchen
Kitchen projects serve daily purposes while showcasing woodworking skills. These items endure frequent use and washing. They require food-safe finishes and durable construction. Each completed piece makes cooking more enjoyable.
Custom Cutting Board
Cutting boards represent classic woodworking projects. They teach edge-gluing techniques and introduce food-safe finishing requirements. A well-made board lasts for years with proper care.
Select hardwoods like maple, walnut, or cherry for durability. Cut strips to identical widths and lengths. Apply wood glue to edges and clamp tightly until dry. This creates a larger board from smaller pieces while creating attractive striped patterns.
Sand progressively through finer grits until silky smooth. Round over corners and edges slightly for comfort and safety. Apply multiple coats of food-safe mineral oil or board cream. This finishing process seals the wood and prevents staining. Re-oil regularly to maintain protection and appearance.
Wooden Spoon or Spatula
Carving kitchen utensils connects you to traditional crafts. These small projects develop knife skills and wood shaping abilities. The process feels meditative and produces unique functional art.
Start with a hardwood blank slightly larger than your final utensil. Draw the desired shape on the wood. Use a coping saw or bandsaw to cut the basic outline. Refine the shape with carving knives, rasps, and sandpaper. Pay special attention to the handle for comfortable grip.
Sand until completely smooth without splinters or rough spots. Apply food-safe finish. Wooden utensils should never go in dishwashers. Hand wash and dry immediately, then re-oil occasionally. Each utensil develops character with use.
Create Kitchen Items You’ll Use Every Day
Learn proper techniques for food-safe finishing and durable construction. Access detailed plans for cutting boards, utensils, and kitchen storage solutions.
Organize kitchen tools with custom holders designed for your specific collection. These projects use basic box construction with added slots or compartments. They keep counters tidy and knives safely stored.
For knife blocks, drill angled holes or cut slots sized for your knife collection. Space openings to prevent blade contact. Sand interiors smooth to avoid blade damage. Apply food-safe finish to all surfaces since moisture may enter slots.
Utensil holders use similar construction without precise slots. Create an open box tall enough for spatulas and spoons. Divide the interior into sections if desired. Weight the base for stability when removing utensils. These holders keep tools accessible while freeing drawer space.
Recipe Stand or Book Holder
A recipe stand props cookbooks or tablets at readable angles while protecting them from spills. This simple project uses angled cuts and teaches you to create functional tilted surfaces.
Cut a base, back support, and lip to hold materials in place. The back should angle between thirty and forty-five degrees for comfortable viewing. Attach pieces securely with glue and screws. Sand all edges smooth.
Finish with food-safe products since kitchen environments involve moisture and occasional splashes. Consider adding adjustable angle options for different book sizes. Some designs incorporate a small drawer underneath for storing recipe cards.
Small Wood Projects for Outdoor Spaces
Outdoor projects introduce weather-resistant wood selection and finishing. These pieces endure sun, rain, and temperature changes. You learn to build for durability while creating functional garden accessories.
Simple Bird House
Bird houses welcome feathered friends to your yard. This project teaches basic box construction with specific requirements for entrance hole size and ventilation. Different hole diameters attract various bird species.
Cut front, back, sides, bottom, and roof pieces from weather-resistant wood like cedar. Drill an entrance hole sized for your target bird species. Add small ventilation holes near the roof. Include drainage holes in the floor. Create a hinged or removable side for annual cleaning.
Do not paint interiors but protect exteriors with non-toxic finish. Mount the house securely at appropriate heights for the bird species. Face entrance away from prevailing winds. Clean thoroughly each fall to prepare for next season.
Planter Box
Wooden planter boxes add growing space and structure to gardens or patios. These containers suit vegetables, flowers, or herbs. The project teaches box construction and introduces considerations for water drainage and soil containment.
Build rectangular boxes from rot-resistant lumber like cedar or pressure-treated pine. Size boxes based on available space and plants you want to grow. Drill multiple drainage holes in the bottom. Line interiors with landscape fabric to prevent soil loss while allowing drainage.
Add legs or feet to lift boxes off ground for better drainage and easier access. Consider building matching sets at varying heights for visual interest. Apply exterior wood finish or let wood weather naturally to silver-gray. Fill with quality soil and plant your garden.
Garden Tool Organizer
Keep gardening tools accessible and organized with a simple wall-mounted rack. This project prevents tools from cluttering your shed or garage floor. You can customize spacing for your specific tool collection.
Cut a backing board and attach it securely to wall studs. Add hooks, pegs, or notched holders for different tools. Space them to prevent overcrowding. Include sections for long-handled tools like shovels, small hand tools, and accessories like gloves.
Use weather-resistant wood and finish if mounting in uncovered areas. Consider adding a small shelf on top for seed packets or labels. This organization system extends tool life by keeping them dry and prevents injury from tools left on floors.
Build Beautiful Outdoor Projects That Last
Discover weather-resistant construction techniques and wood selection guidance. Get plans for birdhouses, planters, furniture, and garden accessories.
Small furniture pieces bridge the gap between simple projects and full-scale furniture building. These accent items add function and style to rooms. Each one teaches important furniture construction principles on a manageable scale.
Small Side Table
A compact side table provides surface space beside chairs or beds. This project introduces leg attachment methods and teaches you to build stable furniture. The skills transfer directly to larger table projects later.
Design a simple square or round top sized appropriately for your space. Cut four identical legs ensuring perfect length for stability. Attach legs using corner brackets, apron rails, or mortise-and-tenon joints depending on your skill level. Add a lower shelf for extra storage and structural support.
Sand all surfaces thoroughly. Apply finish that matches your decor. Consider contrasting top and leg colors for visual interest. The completed table holds lamps, books, drinks, or decorative items. Build multiple tables for consistent room design.
Wooden Step Stool
Step stools help reach high shelves safely. This functional project must support weight securely. You learn to build with strength and stability as primary concerns.
Cut two side pieces that angle from front to back. Add steps between sides using strong joinery. Glue and screw all joints for maximum strength. Ensure steps sit level when the stool stands on flat ground. Add non-slip material to step surfaces for safety.
Sand thoroughly to prevent splinters. Apply durable finish that withstands frequent use. Test weight capacity before regular use. Keep the stool compact for easy storage in kitchens, bathrooms, or closets. This practical piece earns its keep in any home.
Magazine or Book Rack
Display reading materials attractively with a wooden rack. This project uses angled construction to hold magazines upright. It keeps current reading accessible while reducing clutter.
Cut sides, back, bottom, and dividers to create compartments. Angle the back slightly so materials lean without falling. Add dividers to create separate sections for different publications. Assemble with glue and finishing nails or screws.
Sand smooth and finish to match furniture. The rack works beside chairs, beds, or in bathrooms. Scale dimensions based on magazine size and quantity. Build matching racks for different rooms to maintain consistent style throughout your home.
Fun Wood Projects to Make With Kids
Woodworking with kids builds skills and creates memories. Choose projects matching their age and attention span. Supervise carefully and teach proper tool safety. These shared experiences develop confidence and craftsmanship in young builders.
Simple Toolbox
A personal toolbox gives kids ownership of their tools and projects. This basic box construction teaches measuring, cutting, and assembly. They gain pride from building something useful for future projects.
Cut sides, ends, and bottom from lightweight wood. Add a handle across the top for carrying. Assemble with wood glue and nails that kids can hammer under supervision. Let them sand smooth and choose paint colors or decorate with stickers.
Fill the completed toolbox with kid-appropriate tools like plastic safety glasses, tape measure, pencil, and small hammer. This personal kit encourages continued interest in building. They learn to care for tools and keep them organized.
Wooden Toy Car or Boat
Simple vehicles let kids imagination drive the play. These projects use basic shapes and require minimal tools. Children help sand, paint, and personalize their creations.
Cut simple car or boat shapes from thick wood. Sand all edges round and smooth to eliminate sharp corners. Drill holes for dowel axles on cars. Let kids paint and decorate however they choose. Add wooden wheels or leave boats as solid blocks for bath time.
Finish with non-toxic paint and sealers. These handmade toys withstand rough play better than plastic alternatives. Kids value items they helped create more than store-bought versions. Make a collection of vehicles for an entire fleet.
Teach Kids Valuable Skills Through Woodworking
Find age-appropriate project plans with complete safety guidelines. Build confidence and create lasting memories with family-friendly woodworking activities.
Personalized signs mark bedrooms or playhouses. This project teaches letter tracing, painting, or wood burning. Kids develop fine motor skills while creating custom decor.
Cut a board to desired size and sand smooth. Help kids trace or print their name on the wood. They can paint letters, use letter stencils, or you can help with basic wood burning for older children. Add decorative elements like stars, sports equipment, or favorite animals.
Finish with protective coating. Attach picture hanging hardware to the back. The completed sign identifies their space with pride. Make signs for whole family members or friends as gifts. These personalized pieces often become treasured keepsakes saved for years.
Introducing More Advanced Woodworking Techniques
As comfort grows with basic projects, intermediate techniques expand possibilities. These skills take time to master but open doors to furniture-quality work. Practice each method on scrap wood before applying to actual projects.
Basic Joinery Methods
Strong joints create durable projects. Beyond simple butt joints, learn dadoes, rabbets, and mortise-and-tenon connections. Each joint type suits specific applications and offers different strength characteristics.
Dadoes create grooves across wood grain to accept shelves or dividers. Cut them with a router or table saw using multiple passes. Rabbets remove material from board edges to create overlapping corners. These joints hide end grain for cleaner appearance.
Mortise-and-tenon joints provide exceptional strength for furniture. Cut rectangular holes (mortises) in one piece and matching projections (tenons) on another. This traditional joinery requires precision but creates heirloom-quality connections. Start with loose tenon joinery using a router for easier execution.
Wood Finishing Techniques
Proper finishing protects wood and enhances natural beauty. Learn to apply stains, oils, waxes, and topcoats effectively. Each finish type offers different appearance and protection levels.
Sand progressively through grits from coarse to fine before finishing. Remove all dust thoroughly. Apply stain evenly with cloth or brush, wiping excess quickly. Let dry completely between coats. Seal with polyurethane, lacquer, or natural oils depending on project use and desired sheen.
Experiment with techniques like distressing, whitewashing, or two-tone finishes. These treatments add character to projects. Practice on scrap pieces until achieving desired results. Proper finishing transforms good projects into great ones that last for years.
Master Professional Woodworking Techniques
Learn advanced joinery, finishing methods, and furniture-building skills. Progress from beginner to confident woodworker with comprehensive instruction.
Power tools increase efficiency and precision. A circular saw, drill, and orbital sander handle most projects. Add a router, miter saw, or table saw as skills develop. Each tool requires specific safety knowledge and practice.
Start with basic tools and master them thoroughly. Read manuals completely before first use. Always wear safety glasses and hearing protection. Keep work areas clean and well-lit. Secure workpieces properly before cutting. Never remove safety guards or bypass protective features.
Practice fundamental techniques like straight cuts, angle cuts, and hole drilling. Learn proper body positioning and hand placement for safety and control. As confidence builds, tackle more complex operations. Quality tools maintained properly last decades and make woodworking more enjoyable.
Essential Tips for Woodworking Success
Success in woodworking comes from preparation and patience. These fundamental principles apply to every project regardless of complexity. Develop good habits early for consistent quality results.
Measure Twice, Cut Once
This classic rule prevents waste and frustration. Take time to verify measurements before making cuts. Mark cut lines clearly with sharp pencils. Double-check that measurements match your plan exactly.
Use quality measuring tools and keep them calibrated. A reliable tape measure and combination square are essential. For repetitive cuts, create templates or stops to ensure consistency across multiple pieces.
Choose the Right Wood
Different projects require different wood types. Softwoods like pine work well for painted projects and practice pieces. Hardwoods like oak, maple, or walnut suit furniture and items requiring durability.
Consider grain direction, wood movement, and moisture content. Select boards with minimal warping, checking, or excessive knots unless character marks enhance your design. Buy slightly more material than calculated to account for mistakes.
Sand Progressively
Never skip sanding grits. Start with coarser paper to remove material and tool marks. Progress through medium to fine grits for smooth surfaces. Each grit removes scratches from the previous one.
Sand with the grain to avoid cross-grain scratches that show through finish. Use sanding blocks for flat surfaces to prevent uneven dips. Change sandpaper frequently as it dulls quickly.
Test Finishes First
Apply stains and finishes to scrap wood from your project before coating the actual piece. Woods accept stains differently. Testing reveals true color and allows adjustments before permanent application.
Practice application techniques on scraps too. Learn how much stain to apply, how long to let it sit, and how to avoid runs or blotches. This testing prevents disappointing results on finished projects.
Maintain Your Tools
Clean tools after each use and store them properly. Sharp blades and bits produce cleaner cuts with less effort. Dull tools increase accident risk as you force them through material.
Learn basic sharpening for chisels, plane blades, and saw blades. Keep power tool cords untangled and check for damage regularly. Apply appropriate lubricants to moving parts. Well-maintained tools perform better and last longer.
Work Safely Always
Safety cannot be compromised. Wear eye protection every time you work with wood. Use hearing protection around power tools. Keep first aid supplies accessible. Know where your circuit breakers are located.
Never work when tired, rushed, or distracted. Most accidents happen during moments of inattention. Keep fingers away from blade paths. Use push sticks and feather boards to keep hands safe around cutting tools. Respect every tool’s potential danger.
Build Your Skills with Confidence
Access comprehensive safety guides, tool tutorials, and troubleshooting resources. Learn from experienced woodworkers who emphasize safety and quality craftsmanship.
Small wood projects provide the perfect foundation for lifelong woodworking enjoyment. Each completed piece builds skills while creating functional or decorative items for your home. The satisfaction of making something with your own hands never diminishes.
Start with simple projects that match your current skill level. Master basic techniques before attempting complex joinery or large furniture. Every expert woodworker began as a nervous beginner. Progress comes through consistent practice and willingness to learn from mistakes.
Gather essential tools gradually as budget allows. Begin with hand tools and basic power equipment. Quality matters more than quantity when building your workshop. A few well-maintained tools serve better than many cheap ones.
Connect with other woodworkers through online communities, local clubs, or classes. Experienced builders share knowledge generously. You gain insights that prevent common mistakes and learn techniques that books cannot fully convey. The woodworking community welcomes newcomers enthusiastically.
Remember that woodworking combines creativity, problem-solving, and physical skills. Each project teaches something new. Some attempts will disappoint while others exceed expectations. Both outcomes contribute to growth. The process matters as much as finished products.
Your first projects need not be perfect. They simply need to be started. Choose something that excites you from this guide. Gather materials and dedicate a weekend to bringing your vision to life. The wood waits patiently for your creative touch.
Transform Your Woodworking Dreams Into Reality
Stop planning and start building with professional guidance designed for your success. Access thousands of detailed plans, video tutorials, and expert support to accelerate your woodworking journey.
The projects you build today become tomorrow’s treasured possessions. Handmade items carry stories and memories that manufactured goods never achieve. Your home fills with pieces that reflect your personality and skills. Friends and family appreciate gifts made with care and attention.
Small wood projects opened doors to new hobbies for countless people. They might lead you to furniture building, wood carving, instrument making, or any number of specialized crafts. Or you might simply enjoy making occasional projects for home and gifts. Either path brings fulfillment.
Take that first step today. Select a project, gather materials, and begin creating. Your woodworking journey starts with a single cut. The skills you develop and items you build will bring satisfaction for years to come. The workshop awaits your arrival.
Working with limited square footage doesn’t mean sacrificing style or functionality. Small bathrooms present unique design opportunities that challenge creativity while…
Starting your woodworking adventure doesn’t require fancy equipment or years of experience. Simple wood projects for beginners can transform your creative…