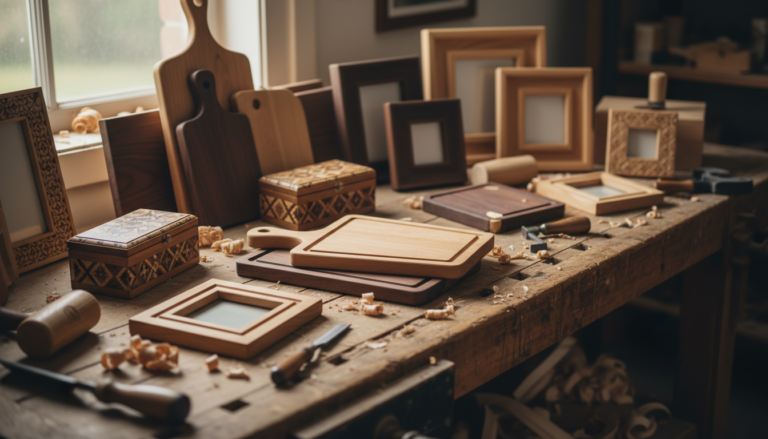
Creating your own furniture brings unique satisfaction that store-bought pieces simply cannot match. Every diy wood projects furniture build tells a story of creativity and craftsmanship. Whether you need a simple shelf for your entryway or an entire dining table set, woodworking offers endless possibilities.
This Website contains affiliate links. That means I may earn a small commission if you purchase through my links, at no extra cost to you.
Building custom pieces saves money while letting you design exactly what fits your space. Your bedroom might need a specific size nightstand. Your kitchen could use storage that matches your style perfectly. DIY projects put you in complete control.
This guide walks you through dozens of furniture projects suitable for every skill level. You will find beginner-friendly builds requiring minimal tools alongside more challenging designs for experienced woodworkers. Each project includes clear steps to help you succeed.
Why Choose DIY Wood Projects Furniture
Store-bought furniture often costs hundreds or thousands of dollars. A simple wood coffee table might retail for five hundred dollars or more. Building the same piece yourself typically costs a fraction of that amount. You invest in materials rather than markup and branding.
Custom sizing solves common furniture problems. Standard pieces rarely fit perfectly in every space. Your entryway might be too narrow for typical benches. Your office may need a desk with exact dimensions to maximize floor space. Building your own eliminates these compromises.
Quality control represents another major advantage. You select every board and choose exactly how to construct each joint. Mass-produced furniture often uses particle board or cheap materials hidden beneath veneer. Your DIY builds use solid wood that lasts for years.
Significant cost savings compared to retail prices
Superior material quality and construction
Personalized style matching your home perfectly
Skill development and creative satisfaction
Common Project Categories
Storage solutions including shelves and cabinets
Seating from simple benches to dining chairs
Tables for every room and purpose
Bedroom furniture like nightstands and bed frames
Decorative pieces including plant stands
Ready to Start Building Custom Furniture?
Access comprehensive woodworking plans with detailed measurements, cutting diagrams, and step-by-step photo instructions. Build professional-quality furniture even as a beginner.
Starting your woodworking journey does not require an expensive workshop. Many beginner projects need just a handful of basic tools. A drill, saw, measuring tape, and sandpaper handle most simple builds. You can expand your tool collection gradually as you tackle more complex projects.
Basic Tool Kit for Beginners
Your first projects require these fundamental tools. A cordless drill handles both drilling pilot holes and driving screws efficiently. Choose one with variable speed control and at least eighteen volts of power. This single tool proves invaluable across dozens of projects.
A circular saw or miter saw cuts boards to size quickly and accurately. Circular saws offer more versatility and lower cost for beginners. Miter saws provide cleaner cuts at precise angles. Either option works well depending on your budget and project types.
Measuring tools ensure accuracy throughout every build. A twenty-five foot tape measure reaches across large boards and assembled pieces. A combination square checks corners and marks cut lines. A level keeps shelves straight and tables even.
Power Tools
Cordless drill and driver
Circular saw or miter saw
Orbital sander for smooth finishes
Jigsaw for curved cuts
Hand Tools
Tape measure and combination square
Level for checking alignment
Clamps to hold pieces during assembly
Screwdrivers and hammer
Choosing the Right Wood
Wood selection impacts both project cost and final appearance. Pine remains the most budget-friendly option for beginners. This softwood cuts easily and costs significantly less than hardwoods. Many successful projects use standard pine boards from home improvement stores.
Hardwoods like oak, maple, and walnut offer superior durability and beautiful grain patterns. These materials work wonderfully for furniture that sees heavy use. A dining table built from oak will serve your family for generations. The higher cost reflects exceptional quality and longevity.
Plywood provides stability for larger panels and shelving. Cabinet-grade plywood features attractive veneer on both sides. This material resists warping better than solid boards across wide spans. Many storage projects combine plywood panels with solid wood trim.
Starting with simple projects builds confidence and fundamental skills. These beginner builds require minimal tools and woodworking experience. Each project teaches essential techniques you will use throughout your DIY journey. Success with these pieces motivates you to tackle increasingly complex designs.
Simple Wall Shelf
A basic wall shelf makes an ideal first project. This build introduces you to measuring, cutting, drilling, and finishing wood. The simple design requires just one board cut into three pieces. Two vertical sides support one horizontal shelf creating storage space in minutes.
Choose a pine board about eight inches wide and six feet long. Cut two pieces at twelve inches each for the sides. The remaining board becomes your shelf. Sand all edges smooth to prevent splinters. Drill pilot holes before assembling with wood screws.
Mounting brackets or French cleats attach your shelf securely to the wall. This project works perfectly in any room needing extra storage. Your entryway gains a spot for keys and mail. A bathroom shelf holds towels and toiletries.
Materials Needed
One 1×8 pine board (6 feet)
Wood screws (1.25 inch)
Sandpaper (120 and 220 grit)
Wood finish or paint
Wall mounting hardware
Time and Cost
This simple shelf project takes about two hours from start to finish. Most of that time goes to sanding and applying finish. The actual construction requires only thirty minutes.
Total material cost runs under twenty dollars at most home improvement stores. The board costs around ten dollars. Screws and sandpaper add minimal expense.
Skill Level
Absolute beginners succeed with this project. You need no prior woodworking experience. The design forgives small mistakes and teaches fundamental techniques.
This build helps you practice measuring accurately, cutting straight lines, and assembling pieces squarely. These skills transfer to every future project.
Basic Wooden Bench
A simple bench provides seating anywhere in your home. This project expands on shelf-building skills by adding legs and structural considerations. The straightforward design creates sturdy seating using basic joints and screws. No complex joinery knowledge required.
Cut four legs from two-by-four lumber at sixteen inches each. The seat uses a two-by-twelve board cut to your desired length. Three feet creates comfortable seating for two people. Support rails connect the legs and provide stability.
Assemble the legs in pairs first, connecting them with rails cut from two-by-four lumber. Space the leg pairs based on your seat length minus four inches. This leaves two inches of overhang on each end. Attach the seat board across the top of both leg assemblies.
This bench works beautifully in an entryway for removing shoes. Place one at the foot of your bed for folding clothes. The garage gains a convenient spot for setting down bags. You can build several in a weekend.
Build Professional-Quality Furniture From Day One
Skip the trial-and-error phase with proven blueprints designed for beginners. Every plan includes exact measurements, material lists, and detailed assembly instructions with photos.
A wood plant stand elevates greenery while adding visual interest to any room. This project introduces angled cuts and basic design principles. The simple construction requires just a few boards cut and assembled into an attractive display piece.
The basic design features a square top platform supported by four angled legs. Cut the platform from a twelve-inch square of plywood or solid boards. Legs angle outward from the top, creating a stable base wider than the platform. This design prevents tipping while creating an appealing silhouette.
Most plant stands measure between twelve and thirty inches tall. Lower stands work well for floor placement near windows. Taller versions create dramatic displays in corners or beside furniture. You can easily build multiple stands at different heights.
Finish your wood plant stand with exterior-grade sealant if plants might drip water. Indoor plants on saucers need only standard wood finish. Natural stains highlight the wood grain beautifully. Paint creates a bold statement piece.
Intermediate Storage Solutions
Storage furniture combines functionality with attractive design. These intermediate projects require more planning and slightly advanced techniques. You will work with larger panels, create compartments, and possibly add doors or drawers. The results provide valuable organization throughout your home.
Bookshelf with Adjustable Shelves
A custom bookshelf solves storage challenges while displaying your collection beautifully. This project teaches you to work with larger panels and create adjustable shelf systems. The design flexibility allows you to size the piece perfectly for your available space.
Standard bookshelves measure around thirty inches wide and seventy inches tall. This size provides substantial storage without overwhelming most rooms. Depth typically runs ten to twelve inches to accommodate standard book sizes. Adjust these dimensions freely to match your specific needs.
Build the frame using solid boards for the sides, top, and bottom. Plywood makes an excellent back panel that squares the assembly. Shelf pin holes drilled at regular intervals allow repositioning shelves as your needs change. This adjustability proves invaluable over the years.
The shelf construction utilizes dados or simple butt joints reinforced with screws. Face frames around the front edges create a polished appearance while hiding plywood edges. This bookshelf project typically requires one weekend to complete from cutting to finishing.
A freestanding kitchen cabinet provides storage exactly where you need it. This intermediate project introduces cabinet construction techniques including face frames and door mounting. The finished piece adds both storage and counter space to your kitchen.
Design your cabinet to fill a specific gap or create a new work station. Common dimensions include twenty-four inches deep and thirty-six inches tall. Width varies based on your available floor space and storage needs. Taller cabinets reaching counter height work wonderfully as coffee stations or baking centers.
The cabinet box uses plywood for all four sides plus top and bottom panels. A solid wood face frame attaches to the front, covering plywood edges and providing door mounting surfaces. Interior shelves rest on cleats or shelf pins for adjustability.
Door construction offers several approaches. Simple frame-and-panel doors suit most skill levels and look professional. Flat panel doors from plywood work well for modern aesthetics. Whichever style you choose, proper hinge installation ensures smooth operation for years.
Wall-Mounted Coat Rack with Shelf
An entryway coat rack combines hooks for hanging items with a shelf above for storage. This project enhances your entrance organization while remaining simple enough for intermediate builders. The wall-mounted design saves valuable floor space in narrow entryways.
The basic structure features a horizontal board with decorative hooks installed along the bottom edge. A shelf above the hooks provides space for keys, mail, or decorative items. The sides can remain open or include decorative end panels for a more finished look.
Select a board approximately six inches wide and as long as your entryway allows. Forty-eight inches works well for most spaces. Mount four to six decorative hooks evenly spaced along the board. These hooks hold coats, bags, and dog leashes conveniently.
The shelf above the hooks can match the bottom board width or extend slightly deeper. Mount the entire assembly to wall studs using heavy-duty screws. This ensures the coat rack supports the weight of multiple winter coats and bags without sagging or pulling away from the wall.
Master Storage Furniture Construction
Learn professional cabinet-making techniques through detailed video tutorials and comprehensive plans. Build storage solutions that rival expensive custom cabinetry at a fraction of the cost.
The living room deserves furniture that reflects your style perfectly. These projects create focal pieces that define your space. From coffee tables to entertainment centers, custom builds transform generic rooms into personalized sanctuaries. Each piece combines form and function beautifully.
Coffee Table with Lower Shelf
A coffee table anchors your living room seating area. This project creates a sturdy surface for drinks and books while providing storage on a lower shelf. The design accommodates various wood species and finish options to match your existing décor.
Standard coffee table dimensions measure forty-eight inches long, twenty-four inches wide, and eighteen inches tall. These proportions work well for most seating arrangements. Adjust the size to fit your specific room and furniture layout. Smaller spaces might prefer a thirty-six inch length.
Build the table frame using two-by-four lumber for maximum strength. Attach four legs to a rectangular frame that forms the lower shelf support. The tabletop uses boards glued edge-to-edge or plywood with solid wood edging. A second shelf fits between the legs at the bottom.
Joinery options range from simple pocket holes to more advanced mortise and tenon joints. Beginners succeed with pocket hole construction using a jig. This method creates strong connections while remaining completely hidden. The entire table requires approximately fifteen board feet of lumber.
A custom TV stand organizes entertainment equipment while hiding unsightly cables. This intermediate project incorporates open shelving for components and closed storage for media. Back panel cutouts route cables neatly out of sight.
Size your TV stand based on your television width. The stand should extend at least six inches beyond the TV on each side for visual balance. Height typically ranges from twenty to thirty inches to position screens at comfortable viewing level while seated.
The basic design features a cabinet box with adjustable shelves and optional doors. Cut openings in the back panel behind each shelf to route power cables and HDMI connections. Drill additional holes for cable management as needed. This attention to detail keeps your entertainment center looking tidy.
Open shelving in the center accommodates cable boxes and gaming consoles that require ventilation. Side cabinets with doors hide DVD collections or gaming accessories. Adjustable shelves adapt as your equipment changes over the years.
Side Table with Drawer
A side table beside your sofa or favorite chair provides convenient storage and surface space. This project introduces basic drawer construction and sliding mechanisms. The compact design fits easily into tight spaces while remaining highly functional.
Standard side table dimensions measure about eighteen inches square and twenty-four inches tall. This height aligns with typical sofa arm height. The tabletop surface holds lamps, drinks, and books comfortably. A single drawer provides hidden storage for remotes and reading glasses.
Build the table frame from solid wood or a combination of plywood and hardwood trim. The drawer box uses thinner material like half-inch plywood with a solid wood front. Simple drawer slides purchased at hardware stores ensure smooth operation. Install them carefully following manufacturer instructions.
Drawer construction requires precise measurements and square assembly. The drawer must slide smoothly without binding or gaps. Take time measuring the opening and building the drawer box slightly smaller to accommodate the slide hardware. This attention to detail separates amateur work from professional results.
Create a Complete Living Room Furniture Set
Build matching coffee tables, side tables, and media centers with coordinated designs. Our comprehensive plan collection ensures consistent styling throughout your space while teaching advanced techniques.
Custom bedroom furniture creates a personal retreat perfectly suited to your needs. These projects range from simple nightstands to full bed frames. Building your own bedroom pieces ensures exact sizing for your space while achieving the aesthetic you envision. Quality construction results in furniture that serves you for decades.
Platform Bed Frame
A platform bed eliminates the need for a box spring while providing substantial support. This intermediate project creates a stunning bedroom centerpiece. The simple design emphasizes clean lines and solid construction. You can customize dimensions to fit any mattress size perfectly.
A queen-size platform bed requires a frame measuring sixty inches wide and eighty inches long. Add two inches to each dimension for the mattress to rest inside the frame slightly. The height depends on personal preference but typically ranges from twelve to eighteen inches including legs.
Build the outer frame from two-by-six boards for strength. Interior support slats run perpendicular to the mattress direction, spaced about four inches apart. These slats distribute weight evenly and provide excellent ventilation. The entire structure assembles using bolts and screws for easy disassembly if you move.
Leg options include simple four-by-four posts or tapered designs for visual interest. Attach legs securely to the frame corners and center points for maximum support. A well-built platform bed easily supports over one thousand pounds including mattress, bedding, and occupants.
A bedside nightstand keeps essentials within reach while you rest. This project builds upon drawer construction skills learned in earlier builds. The compact design fits easily in small bedrooms while providing surprising storage capacity. Include shelves, drawers, or a combination based on your needs.
Standard nightstand dimensions measure about twenty inches wide, eighteen inches deep, and twenty-four inches tall. This size accommodates a lamp, book, and glass of water on top while fitting comfortably beside most beds. Adjust height to align with your mattress top for easy access.
The simplest design features one or two shelves in an open box construction. Add a drawer for hidden storage of personal items. A cabinet door transforms the nightstand into closed storage perfect for a cleaner bedroom appearance. Choose the configuration that serves your lifestyle best.
Match your nightstand to existing bedroom furniture by selecting complementary wood species and finish. Oak stained dark brown coordinates with traditional bedroom sets. Natural maple suits modern Scandinavian aesthetics. Building two matching nightstands creates symmetry in your bedroom design.
Dresser with Multiple Drawers
A full dresser represents an advanced woodworking project requiring precision and patience. This build teaches drawer construction at scale while creating essential bedroom storage. The finished piece provides years of reliable service while showcasing your woodworking skills impressively.
A standard six-drawer dresser measures approximately sixty inches wide, twenty inches deep, and thirty-six inches tall. This provides generous clothing storage for one person. Drawer sizes vary with smaller drawers at top for accessories and deeper bottom drawers for bulkier items.
Cabinet construction mirrors techniques used in kitchen projects. Build a solid plywood box with face frames and then add drawers fitted with quality slides. Each drawer requires precise construction to operate smoothly over thousands of opening cycles. Invest time measuring and cutting accurately.
Drawer fronts offer an opportunity for decorative touches. Shaker-style panels create timeless appeal. Flat fronts suit modern interiors. Hardware selection dramatically impacts the finished appearance. Brushed nickel pulls complement most wood finishes beautifully while bronze hardware creates vintage charm.
Build Complete Bedroom Furniture Sets
Create matching bed frames, nightstands, and dressers with coordinated designs. Our master bedroom collection includes full-size plans for every piece plus finishing guides to ensure consistent results.
Dining room furniture brings family and friends together. These substantial projects create gathering spaces for meals and memories. A handmade dining table becomes an heirloom piece passed down through generations. The investment of time and effort pays dividends in both function and sentiment.
Farmhouse Dining Table
A farmhouse-style dining table combines rustic charm with sturdy construction. This advanced project creates a stunning centerpiece capable of seating six to eight people comfortably. The traditional design features a thick plank top and substantial base that projects strength and hospitality.
Standard dining table height measures thirty inches from floor to tabletop. Length varies based on seating needs and room size. A six-foot table comfortably seats six people. Eight feet accommodates eight diners. Width typically ranges from thirty-six to forty-two inches allowing serving dishes down the center.
Build the tabletop by gluing individual boards edge-to-edge creating a wide panel. Select boards carefully for matching color and grain patterns. Alternate growth ring direction to minimize warping as the wood expands and contracts with seasonal humidity changes. Clamp the boards tightly while glue dries overnight.
The base design affects both aesthetics and legroom. Simple trestle bases look beautiful while maximizing knee space. Four-leg designs with aprons provide excellent stability. Whichever style you choose, ensure the base supports the heavy tabletop securely. A dining table withstands years of daily use plus enthusiastic holiday meals.
Finishing a dining table requires durability and food-safe products. Polyurethane provides excellent protection against spills and heat. Oil finishes create beautiful depth while requiring more maintenance. Apply multiple coats with thorough drying time between applications. The finish protects your investment for years.
Benches provide flexible seating solutions for dining rooms. This project creates comfortable seating that tucks completely under the table when not in use. Benches accommodate more people than individual chairs in the same floor space. They work especially well for families with young children.
Size dining benches slightly shorter than your table length for visual balance. A six-foot table pairs well with a five-foot bench. Height should match your dining chair seats approximately eighteen inches from the floor. Width of twelve to fourteen inches provides comfortable seating depth.
The basic construction mirrors simple bench projects but with refined details suitable for dining rooms. Solid wood seats one and a half inches thick provide durability and comfort. Legs can remain simple or incorporate decorative elements matching your table design. Add a subtle back rest for extra comfort during long meals.
Kitchen Island Cart
A mobile kitchen island adds valuable counter space and storage. This project creates a versatile piece that moves wherever needed. Locking wheels provide stability during food preparation. The open or closed storage below organizes cookware and small appliances conveniently.
Design your kitchen cart based on available floor space and usage needs. Common dimensions measure thirty-six inches wide, twenty-four inches deep, and thirty-six inches tall matching standard counter height. Smaller carts work well in compact kitchens while larger versions provide substantial workspace.
The top surface requires durable material resistant to moisture and knife marks. Butcher block made from edge-grain hardwood creates an excellent work surface. Sealed with food-safe mineral oil, this surface withstands years of meal preparation. Alternatively, install a granite remnant for a premium look.
Heavy-duty locking casters support the weight while allowing mobility. Install them at all four corners using substantial mounting hardware. Choose casters rated for at least twice your expected cart weight including contents. This ensures smooth rolling and secure positioning during use.
Create Your Perfect Dining Space
Build tables, benches, and storage pieces that transform your dining room. Access detailed plans with multiple design options, joinery techniques, and finishing instructions for professional results.
Outdoor furniture extends your living space into yards and patios. These projects withstand weather exposure while providing comfortable seating and dining areas. Select appropriate wood species and finishes to ensure longevity. Cedar and redwood resist rot naturally making them ideal for outdoor use.
Adirondack Chair
The classic Adirondack chair offers comfortable outdoor seating with iconic styling. This intermediate project creates a beloved backyard staple. The angled back and wide armrests provide exceptional relaxation. Build several chairs to create complete conversation areas around fire pits or pools.
Adirondack chairs feature compound angles requiring careful planning and cutting. The seat slopes backward while the back reclines at a specific angle creating ergonomic comfort. Templates and detailed plans simplify the process significantly. Take time laying out angles accurately before cutting.
Build outdoor chairs from cedar, redwood, or pressure-treated pine. Cedar offers natural beauty and weather resistance without chemical treatment. Redwood provides similar benefits with a distinctive color. Pressure-treated lumber costs less but requires time to dry before finishing.
Finishing outdoor furniture protects against sun and moisture damage. Exterior-grade polyurethane provides maximum protection lasting several years between applications. Natural oil finishes enhance wood beauty while requiring annual reapplication. Some builders prefer letting cedar weather naturally to an attractive silver-gray patina.
An outdoor dining table creates space for al fresco meals and gatherings. This project builds a weather-resistant table suitable for covered porches or open patios. Size appropriately for your available space and typical guest count. Construction techniques mirror indoor dining tables with material selections optimized for outdoor exposure.
Standard patio table height matches indoor dining at thirty inches tall. Dimensions vary widely based on needs. A four-foot square table seats four people comfortably. Rectangular tables six feet long accommodate six diners. Consider adding an umbrella hole in the center for shade during sunny meals.
Simple plank-style tops suit outdoor aesthetics beautifully while shedding water effectively. Space boards slightly apart rather than tight joints. This allows water drainage and accommodates wood movement. The gaps also prevent water pooling that leads to rot over time.
Home Office Furniture
Custom office furniture supports productivity while reflecting personal style. These projects create functional workspaces sized perfectly for your room and workflow. A handmade desk fits your exact needs in ways mass-produced options cannot match. Storage pieces organize supplies keeping your workspace efficient.
Computer Desk with Cable Management
A custom computer desk accommodates modern technology while maintaining a clean appearance. This intermediate project incorporates cable routing, equipment storage, and ergonomic dimensions. The result supports hours of comfortable work while looking beautiful in your office or bedroom.
Proper desk height measures twenty-nine to thirty inches allowing comfortable typing posture. Width depends on equipment needs and available space. Sixty inches provides room for a monitor, keyboard, and workspace. Depth of thirty inches accommodates monitors and documents comfortably.
Include cable management features during planning stages. Drill holes through the desktop for monitor and charging cables. Create a cable channel along the back edge hiding power strips and excess cable length. These details maintain the clean aesthetic essential in productive workspaces.
Consider adding a keyboard tray if you work extensively on a computer. This positions typing surfaces lower than the desktop improving ergonomics significantly. Alternatively, ensure adequate legroom beneath the desk and comfortable chair height for extended work sessions.
A wall-mounted desk maximizes floor space in small offices or bedrooms. This space-saving design folds up when not needed or remains permanently mounted. The floating appearance creates a modern aesthetic while providing a functional workspace. Strong mounting ensures stability during use.
Design wall-mounted desks between forty-eight and sixty inches wide for comfortable work surfaces. Depth ranges from eighteen to twenty-four inches providing adequate space without protruding excessively into the room. Mount the desk at standard height or adjust for personal preference.
Secure mounting requires attaching the desk to wall studs with heavy-duty brackets. Distribute weight across multiple attachment points for stability. The desk must support your body weight leaning forward during work plus the weight of equipment and materials. Never compromise on mounting strength.
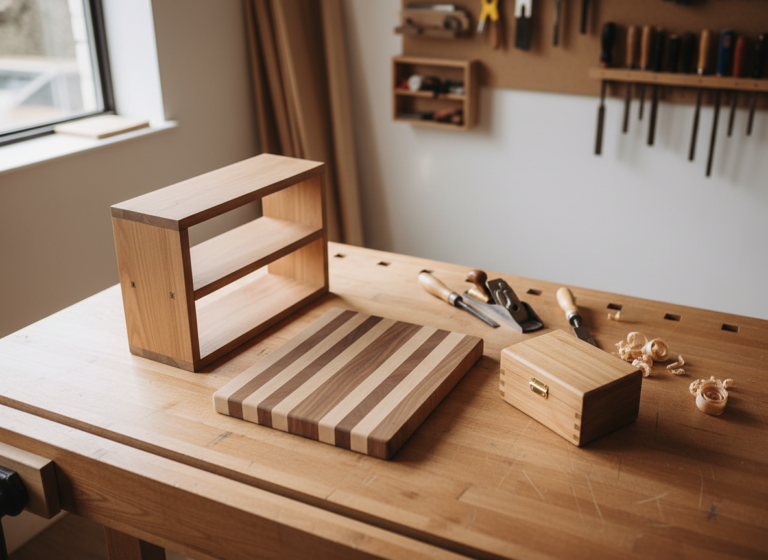
Small Projects Using Scrap Wood
Scrap wood from previous projects becomes raw material for smaller builds. These quick projects use leftover pieces creating useful items from waste. Building small gifts and decorative pieces develops skills while minimizing material costs. Every woodworker should maintain a scrap bin for these opportunities.
Wooden Serving Tray
A serving tray makes a beautiful gift requiring minimal materials. This beginner project assembles a simple frame with a bottom panel. Add handles for easy carrying. The entire build takes just a few hours producing a functional piece perfect for serving breakfast in bed or organizing coffee table items.
Size serving trays based on intended use. A breakfast tray measures approximately eighteen by twelve inches. Larger versions sixteen by twenty-four inches work well for entertaining. Depth of two inches contains dishes securely while keeping the tray lightweight.
Build the frame from hardwood scraps for durability and beauty. The bottom can be thin plywood or slats of solid wood creating a rustic appearance. Attach rope, leather straps, or carved wooden handles to both ends. Sand thoroughly and finish with food-safe mineral oil or polyurethane.
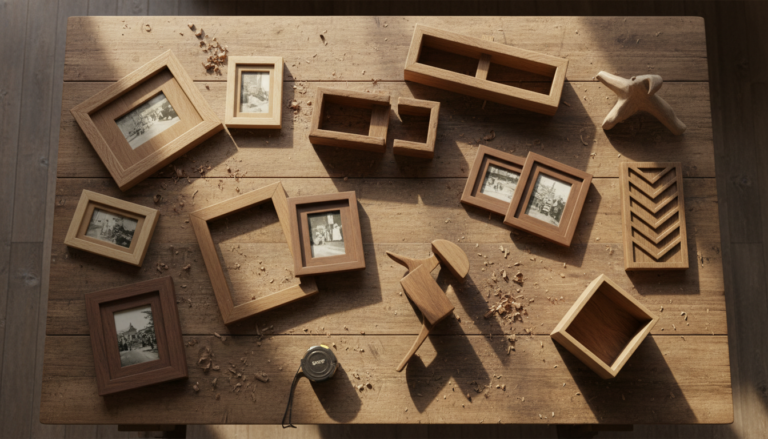
Picture Frames
Custom picture frames showcase favorite photos while using small wood pieces. This project teaches miter cuts and precision joinery. Build frames in any size matching your artwork or photographs exactly. Create matching sets for gallery walls or unique sizes for special pieces.
The basic frame consists of four pieces mitered at forty-five degrees forming corners. Cut a rabbet along the inside back edge to hold glass and artwork. Assemble corners with glue and small nails or specialized frame joining hardware. The precision required develops valuable skills.
Finishing options range from natural wood with clear coating to painted colors matching room décor. Walnut and cherry create beautiful dark frames. Maple accepts stain well for customized colors. Add decorative molding profiles for visual interest.
Never Waste Another Scrap
Discover 100+ small project ideas designed specifically for scrap wood and leftover materials. Turn waste into beautiful gifts, organizers, and decorative pieces with our comprehensive scrap project guide.
Proper finishing protects your projects while enhancing natural beauty. The finish you select impacts both appearance and durability. Different techniques suit various wood species and usage requirements. Master these fundamental finishing skills to achieve professional results consistently.
Sanding for Smooth Surfaces
Thorough sanding separates amateur work from professional results. This crucial step removes tool marks and prepares wood to accept finish evenly. Progress through increasingly fine sandpaper grits for best results. Never skip grits or rush this process.
Start with eighty-grit sandpaper removing major imperfections and smoothing rough areas. Progress to one-hundred-twenty grit for general smoothing. Finish with one-hundred-eighty or two-hundred-twenty grit creating silky surfaces. Sand with the grain direction to avoid visible scratches.
Remove all sanding dust completely before applying finish. Compressed air blows dust from crevices and joints. Tack cloths pick up fine particles from surfaces. Any remaining dust creates rough spots in your finished piece.
Staining Wood
Stain enhances grain patterns while changing wood color. This optional step allows matching existing furniture or achieving specific aesthetics. Test stains on scrap pieces before committing to your project. Different wood species absorb stain differently affecting final color.
Apply stain evenly with brushes or rags following manufacturer instructions. Work quickly to avoid lap marks where wet and dry areas meet. Wipe excess stain after the recommended time. Multiple coats deepen color intensity. Allow complete drying between coats.
Pre-stain wood conditioner helps softwoods like pine absorb stain evenly. Without conditioner, these woods often develop blotchy appearances. Hardwoods typically do not require conditioning. Always test your complete finishing process on scrap wood matching your project.
Protective Top Coats
Top coat finishes protect wood from moisture, scratches, and daily wear. Polyurethane offers excellent durability for heavily used furniture. Oil-based versions provide warm amber tones. Water-based polyurethane dries clear maintaining natural wood color.
Apply polyurethane in thin coats using quality brushes or foam applicators. Three coats provide substantial protection for most furniture. Sand lightly between coats with very fine sandpaper creating mechanical adhesion. Remove sanding dust thoroughly before applying subsequent coats.
Alternative finishes include tung oil, Danish oil, and paste wax. These penetrating finishes enhance wood beauty while providing moderate protection. They require more frequent reapplication than polyurethane but offer easier touch-up repairs. Select finishes based on your specific needs and maintenance preferences.
Building furniture yourself delivers substantial financial benefits. Material costs represent a fraction of retail furniture prices. You invest in quality wood rather than marketing and retail markup. The savings grow more impressive with larger projects like dining tables and bed frames.
Comparing DIY Costs to Retail Prices
A solid wood coffee table retails for five hundred to one thousand dollars typically. Building the same table yourself costs approximately one hundred fifty dollars in materials. You save several hundred dollars while creating a superior piece using better materials.
Bedroom dressers demonstrate even more dramatic savings. Quality retail dressers easily exceed fifteen hundred dollars. DIY construction using hardwood plywood and solid wood trim costs around three hundred dollars. The price difference funds several additional projects.
Project
Retail Price
DIY Materials
Savings
Coffee Table
$600
$150
$450
Bookshelf
$400
$120
$280
Dining Table
$1,200
$350
$850
Platform Bed
$900
$200
$700
Dresser
$1,500
$300
$1,200
These savings multiply when furnishing entire rooms. A complete bedroom set including bed, dresser, and two nightstands saves thousands of dollars. The quality exceeds most retail furniture in this price range dramatically. Your DIY pieces use solid wood construction rather than particle board.
Long-term Value
Handmade furniture lasts significantly longer than mass-produced alternatives. Solid wood construction withstands decades of use. Joints properly assembled remain tight through years of service. Quality finishes protect surfaces maintaining beauty over time.
Repair and refinishing extend furniture life indefinitely. Damaged finishes sand away and reapply easily. Loose joints receive fresh glue and clamps. This maintainability proves impossible with particle board furniture that deteriorates permanently.
The skills you develop building furniture provide ongoing value. Each project teaches techniques applicable to future builds. Your capabilities grow with experience enabling increasingly complex and impressive projects. This knowledge serves you for life.
Calculate Your Furniture Savings
Access our complete project cost calculator and materials guide. See exactly how much you will save on every piece while learning optimal material selection for your budget.
Every woodworker makes mistakes during their learning journey. Recognizing common errors helps you avoid frustration and wasted materials. These lessons typically come from experience but learning them upfront saves time and money. Apply these insights to improve your results immediately.
Measurement and Cutting Errors
Inaccurate measurements cause most beginner mistakes. The old adage measure twice cut once holds profound wisdom. A single cutting error wastes material and delays projects significantly. Develop careful measuring habits from your first project forward.
Mark cut lines clearly using sharp pencils and straightedges. Double-check measurements before cutting expensive boards. Remember that saw blades remove material equal to their thickness. Account for this kerf when cutting multiple pieces from one board. Small measurement errors compound across large projects.
Cutting mistakes often result from inadequate support or rushing. Support long boards fully preventing binding that pulls cuts off-line. Take time positioning materials properly before starting your saw. Smooth steady cuts produce better results than hurried attempts.
Poor Joint Assembly
Weak joints compromise furniture strength and longevity. Learning proper joining techniques separates temporary constructions from heirloom pieces. Understanding which joints suit specific applications takes time and practice. Start with simple joints and progress as skills develop.
Pocket hole joints work excellently for many applications despite their simplicity. Position screws correctly and drill pilot holes at proper angles. This joint provides surprising strength when executed properly. More advanced joints like mortise-and-tenon require patience and precision.
Glue application affects joint strength substantially. Apply even coatings to both surfaces for maximum bond strength. Clamp joints firmly while glue dries removing any gaps. Excess glue squeezed from joints indicates adequate application. Wipe away squeeze-out before it hardens.
Inadequate Sanding
Rushing through sanding shows immediately in finished projects. Rough surfaces feel unpleasant and look amateurish. Thorough sanding requires time and patience but transforms projects completely. This step truly cannot be skipped or rushed.
Progress through sandpaper grits systematically never skipping steps. Each grit removes scratches from the previous coarser paper. Jumping from eighty grit directly to two-hundred grit leaves visible scratches under finish. The extra time spent sanding properly pays dividends in final appearance.
Sand all surfaces equally including hidden areas. Undersides and interior surfaces deserve attention ensuring splinter-free furniture. Pay special attention to edges and corners where rough spots appear commonly. Run your hand across all surfaces feeling for imperfections.
Proper tool maintenance ensures accuracy and safety while extending equipment life. Well-maintained tools perform better producing superior results. Develop regular maintenance habits protecting your investment. Clean tools after each use preventing buildup that affects performance.
Blade and Bit Maintenance
Sharp saw blades and drill bits cut cleanly with less effort. Dull blades require excessive force increasing danger while producing poor results. Inspect cutting edges regularly replacing or sharpening as needed. This simple practice dramatically improves your woodworking experience.
Clean saw blades after use removing pitch and resin buildup. Specialized blade cleaners dissolve stubborn residue quickly. Store blades properly preventing damage to teeth. Carbide-tipped blades last through many sharpenings when properly maintained.
Drill bits dull gradually requiring periodic replacement. Keep sharp bits separated from dull ones avoiding confusion during projects. Titanium-coated bits last longer than standard steel versions. Purchase quality bits initially rather than repeatedly replacing cheap ones.
Power Tool Care
Power tools require regular cleaning and lubrication. Sawdust accumulates inside motors reducing cooling efficiency. Blow out dust using compressed air after every few uses. Check power cords for damage replacing worn cords immediately for safety.
Store power tools in cases or designated spaces protecting them from moisture and damage. Battery-powered tools should have charged batteries ready for use. Remove batteries from tools during extended storage preventing corrosion.
Start Your DIY Furniture Journey Today
Building your own furniture transforms houses into personalized homes. Each completed project brings satisfaction that purchased pieces cannot match. You create exactly what your space needs while developing valuable skills. The journey from beginner to accomplished woodworker happens one project at a time.
Start with simple projects building confidence and fundamental techniques. A basic shelf or small bench provides the perfect introduction. Success with these builds motivates tackling increasingly complex furniture. Within months you will construct pieces rivaling expensive retail furniture.
The diy wood projects furniture community welcomes newcomers enthusiastically. Countless resources support your learning including detailed plans, video tutorials, and online forums. You never work alone in this creative pursuit. Others share their knowledge freely helping you avoid common pitfalls.
Your first project might feel challenging but persevere through initial uncertainty. Every experienced woodworker started exactly where you stand now. They developed skills through practice and patience. You possess the same capability to create beautiful functional furniture.
Quality plans eliminate guesswork providing clear roadmaps to success. Detailed measurements, material lists, and assembly instructions guide you through each step. Professional blueprints help beginners achieve results matching experienced craftspeople. This support accelerates your learning dramatically.
Access the Complete DIY Furniture Plan Library
Join thousands of successful DIY builders who transformed their homes with custom furniture. Get instant access to over 500 detailed woodworking plans covering every room and skill level. Each plan includes materials lists, cut diagrams, assembly instructions, and finishing guides. Start building professional-quality furniture this weekend.
The investment you make in tools and materials pays returns for years. Unlike retail furniture that depreciates immediately, your handmade pieces gain sentimental value over time. Children remember watching you build their bedroom furniture. Family gatherings around your handmade dining table create lasting memories.
Custom furniture fits your space perfectly solving problems that standard pieces cannot address. That awkward corner finally gets the perfect bookshelf. Your narrow entryway receives a bench sized exactly right. You design solutions tailored to your specific needs and preferences.
Begin planning your first project today. Select something matching your current skill level and available tools. Gather materials and set aside dedicated time for building. The sense of accomplishment completing your first furniture piece will inspire many more projects ahead.
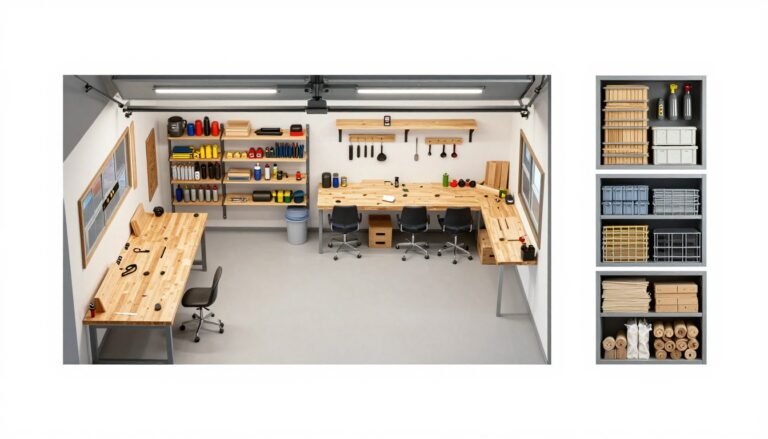
A well-designed garage workshop can transform your DIY projects from frustrating to fulfilling. Whether you’re a weekend woodworker, an automotive enthusiast,…
Creating beautiful things with your own hands brings unmatched satisfaction. Small wood projects offer the perfect entry point into woodworking without…
Turning your woodworking hobby into a profitable business starts with choosing the right projects. The wood market offers incredible opportunities for…