Starting a homestead on a small piece of land presents unique challenges. Every square foot matters when you dream of growing your own food, raising animals, and building a self-sufficient life. The difference between a struggling homestead and a productive one often comes down to a single factor: layout design.
This Website contains affiliate links. That means I may earn a small commission if you purchase through my links, at no extra cost to you.
Many beginning homesteaders make costly mistakes in their first year. They place the chicken coop too far from the house. They forget about water access when planning the garden. They create bottlenecks that make daily chores take twice as long. These errors waste time, money, and energy.
A well-designed small homestead layout maximizes production while minimizing labor. It creates efficient pathways between work areas. It positions elements to support each other naturally. Most importantly, it evolves with your family’s changing needs over time.
This guide walks you through proven strategies for designing your homestead layout. You will learn how to zone your property effectively. You will discover space-saving techniques that increase production. You will avoid the common pitfalls that derail new homesteaders.
Ready to Design Your Dream Homestead?
Get access to professional homestead planning blueprints that have helped thousands create productive, efficient layouts from day one. Stop guessing and start with a proven system.
Understanding Your Space: Making Every Acre Count on a Small Homestead
Small homesteads typically range from one to five acres. This land offers tremendous potential when you use it wisely. The key lies in understanding what you can realistically accomplish within your boundaries.
A single acre can support a family garden, small chicken flock, fruit trees, and storage buildings. Two acres add room for larger livestock like goats or sheep. Three to five acres permit more ambitious projects including ponds, expanded gardens, and additional animals.
Assessing Your Property’s Natural Features
Walk your land before you place anything permanent. Notice where water naturally flows during rain. Identify the areas that receive full sun versus partial shade. Look for natural windbreaks and existing vegetation that you can incorporate into your design.
Soil quality varies across your property. Some areas drain quickly while others stay wet. Test different spots to determine the best locations for gardens versus animal housing. Rocky or sloped areas might work better for orchards than annual vegetables.
Calculating Realistic Production Goals
New homesteaders often overestimate what they can manage. Start with smaller areas that you can maintain well. A productive quarter-acre garden beats a weedy half-acre plot every time.
Consider your available time for daily and weekly tasks. Chickens need daily feeding and egg collection. Gardens require regular watering and weeding during the growing season. Animals need consistent care regardless of your schedule or weather conditions.
One-Acre Homestead Capacity
A well-designed single acre can support substantial food production when you maximize vertical space and practice intensive methods.
Large vegetable garden producing year-round food
Small flock of 6-12 laying chickens
15-20 fruit trees and berry bushes
Herb garden and medicinal plants
Composting system and storage buildings
Three-Acre Homestead Potential
Additional acreage expands your options significantly, allowing for diverse production systems and greater self-sufficiency.
Expanded gardens with crop rotation areas
Multiple animal species including goats or sheep
Larger orchard with 30-40 fruit trees
Small pasture for rotational grazing
Workshop, greenhouse, and storage facilities
Five-Acre Homestead Opportunities
Five acres provides room for comprehensive homesteading including diverse production areas and natural spaces.
Multiple garden zones for different crop types
Larger livestock like cattle or pigs
Extensive orchard and food forest areas
Pond for water storage and fish production
Dedicated areas for equipment and processing
Urban Lot Homesteading
Even small urban properties can produce significant food with creative design and intensive growing methods.
Intensive raised bed vegetable production
Small chicken coop with 3-6 birds
Vertical gardens and container growing
Dwarf fruit trees and espalier techniques
Compact composting and rainwater collection
Your homestead layout should reflect your family’s priorities. Some households prioritize vegetable production. Others focus on animal husbandry. Still others want a balance of many small enterprises. Design your space around what matters most to you.
Professional Layout Design Tools
Access proven design templates that help you visualize and plan your perfect homestead layout. These professional tools eliminate guesswork and prevent expensive mistakes before you break ground.
Essential Zoning Principles for Efficient Homestead Layout Design
Zoning divides your homestead into functional areas based on how frequently you access them. This permaculture concept saves countless steps and creates natural work flow patterns throughout your property.
Zone Zero represents your home itself. Zone One includes areas you visit daily. Zone Two contains spaces you tend several times weekly. Zone Three holds elements requiring less frequent attention. Zone Four encompasses wild or minimally managed areas.
Zone One: Daily Access Areas
Place your most-used elements closest to your home. The kitchen garden with herbs and salad greens belongs right outside your door. Your chicken coop should require only a short walk for morning feeding and egg collection.
Composting bins fit well in Zone One since you add kitchen scraps daily. Small tool sheds or potting areas near the house reduce wasted motion. Consider sight lines from your windows so you can monitor animals and gardens from inside.
Zone Two: Regular Maintenance Spaces
Your main vegetable garden typically falls in Zone Two. You visit it regularly but not necessarily every single day. Larger chicken coops or small animal shelters work well here if you keep a smaller daily egg-collecting coop closer to the house.
Tool storage and work areas fit naturally in this zone. You need access but not immediate proximity. Greenhouses and cold frames belong here where you can tend seedlings and extend your growing season without walking excessive distances.
Zone Three: Weekly Management Areas
Larger livestock requiring less frequent handling thrive in Zone Three. Cattle, sheep, or pigs on pasture need periodic checks but not daily intensive care. Orchards and food forests also belong in this zone since established fruit trees need minimal intervention.
Larger storage buildings and equipment sheds make sense farther from the house. Hay storage, tractor parking, and bulk feed storage can occupy this area. Access roads should connect these spaces efficiently to prevent unnecessary maneuvering.
Creating Productive Transitions Between Zones
The spaces between zones offer valuable opportunities. Fence lines can support climbing crops like beans or grapes. Pathways between areas can incorporate herbs or flowers. Swales along contour lines move water from one zone to another while supporting diverse plantings.
Benefits of Proper Zoning
Reduces daily walking distance by 60-70 percent
Minimizes time spent on routine chores
Creates logical workflow patterns
Allows better monitoring of frequently used areas
Reduces fatigue and increases enjoyment
Enables easier winter access to essential elements
Review your zoning decisions after living on your homestead for one full year. You will discover which elements you access more or less than expected. Adjust placements to match your actual usage patterns rather than theoretical ideals.
Master Professional Zoning Techniques
Learn the exact zoning strategies that professional homestead designers use to create efficient, productive layouts. Get step-by-step guidance for placing every element in the optimal location.
Maximizing Garden Space: Intensive Growing Strategies for Small Homesteads
Garden layout determines how much food you produce per square foot. Traditional row planting wastes valuable space. Intensive methods can triple or quadruple production in the same area.
Raised beds allow closer plant spacing because you never walk on growing soil. Paths stay separate from growing areas. This arrangement prevents soil compaction and improves drainage. Plants grow larger root systems in loose, well-aerated soil.
Designing Productive Garden Beds
Build beds four feet wide maximum. This width allows you to reach the center from either side without stepping inside. Length can vary based on available space, but eight to twelve feet works well for most situations.
Orient beds to maximize sun exposure. In most locations, running beds north to south provides even light distribution. Place taller crops on the north end so they do not shade shorter plants. Leave adequate path width between beds for wheelbarrow access.
Vertical Growing Techniques
Think upward to multiply growing space. Trellises, cages, and stakes allow vining crops to climb instead of sprawl. Cucumbers, beans, peas, and tomatoes all benefit from vertical support. This approach also improves air circulation and reduces disease problems.
Sturdy cattle panels make excellent permanent trellis systems. Arch them over paths to create productive tunnels. These structures can support heavy crops like winter squash while providing shaded pathways underneath for heat-sensitive greens.
Succession Planting and Crop Rotation
Plant new crops every two to three weeks rather than all at once. This strategy provides continuous harvests instead of overwhelming gluts. Short-season crops like lettuce and radishes can produce three to four plantings in one season.
Rotate crop families through different beds each year. This practice prevents soil-borne disease buildup and balances nutrient demands. Heavy feeders like tomatoes follow light feeders like beans. Root crops follow leaf crops in a logical succession.
Growing Method
Space Required
Production Level
Best For
Traditional Rows
High – wide paths needed
Moderate per square foot
Large acreage, mechanical cultivation
Raised Beds
Medium – efficient use
High per square foot
Small homesteads, intensive production
Square Foot Gardening
Low – very compact
Very high per square foot
Limited space, urban lots
Vertical Growing
Minimal ground space
Excellent for vining crops
Maximizing limited area
Container Gardens
Very flexible placement
Moderate per container
Patios, balconies, poor soil areas
Incorporating Perennial Vegetables
Dedicate part of your garden to perennial crops that produce year after year. Asparagus, rhubarb, and artichokes provide harvests with minimal annual effort. Perennial herbs like oregano, thyme, and sage supply fresh flavors continuously.
Position perennials along garden edges where they will not interfere with annual bed preparation. These plants often grow larger over time, so allow adequate room for mature size. Good soil preparation matters especially for perennials since you cannot easily amend soil once they are established.
Optimize Your Garden Productivity
Discover advanced intensive growing techniques that maximize harvests in minimal space. Learn exactly how to plan, plant, and maintain highly productive gardens that feed your family year-round.
Integrating Livestock into Your Small Homestead Layout
Animals add fertility, protein, and resilience to your homestead system. Careful placement ensures they enhance rather than complicate your operations. Consider access to water, shelter from weather, and proximity to feed storage when positioning animal areas.
Start with chickens if you are new to livestock. They require less space and infrastructure than larger animals. A small flock provides eggs, meat, pest control, and valuable fertilizer for gardens. Their manageable size makes them ideal for learning basic animal husbandry.
Chicken Coop Placement Strategies
Position your chicken coop within easy walking distance of your home. Daily egg collection and feeding happen more reliably when the coop sits conveniently. However, avoid placing it directly beside your house since chickens create dust and attract predators.
Provide adequate run space attached to the coop. Chickens need room to scratch, dust bathe, and forage. A minimum of ten square feet per bird in the run prevents overcrowding and behavioral problems. Add shade structures since chickens suffer in intense summer heat.
Rotating Livestock for Soil Building
Move chickens through garden beds during off-season periods. They eat pest insects, consume weed seeds, and deposit fertilizer directly where you need it. Temporary fencing creates flexible paddocks that shift as areas are prepared and planted.
Larger animals like goats or sheep can graze areas between garden zones. Rotational grazing prevents overgrazing while building soil health. Animals fertilize pasture naturally while controlling weeds and brush. This approach reduces feed costs and improves land quality simultaneously.
Planning for Multiple Animal Species
Different animals serve different purposes on your homestead. Chickens control insects and produce eggs. Goats provide milk and manage brush. Ducks excel at slug control in gardens. Rabbits convert garden waste into meat and manure efficiently.
Separate incompatible species to prevent stress and disease transmission. Chickens and ducks can share space if water access accommodates both species. Goats need separate housing from chickens since their larger size and different dietary needs create conflicts.
Small Homestead Livestock Options
Laying hens for daily egg production
Meat chickens for seasonal processing
Ducks for eggs and pest control
Rabbits for efficient meat production
Dairy goats for milk and cheese
Sheep for wool, meat, and grazing
Quail for small-space egg and meat
Bees for pollination and honey
Managing Manure and Bedding
Animal waste becomes valuable garden fertilizer when composted properly. Locate your composting system between animal areas and gardens for efficient material flow. Deep bedding systems in coops and barns create rich compost with minimal effort.
Plan adequate storage for bedding materials like straw or wood shavings. Dry storage near animal housing saves steps and protects materials from weather. Calculate annual bedding needs and secure sources before winter when supplies become scarce.
Master Livestock Integration
Learn professional strategies for integrating multiple animal species into your homestead layout. Avoid common mistakes and create systems that make animal care easier while maximizing production.
Water Management Systems for Sustainable Homestead Design
Water determines the success or failure of your homestead. Gardens need consistent moisture. Animals require daily access to clean water. Planning your water infrastructure before other elements prevents expensive retrofitting later.
Map water sources across your property. Wells, springs, ponds, and municipal connections each offer different advantages. Gravity-fed systems reduce energy costs. Backup sources provide security during equipment failures or drought conditions.
Rainwater Collection and Storage
Roof area on your home and outbuildings captures substantial water during rain events. A single inch of rain on a thousand square foot roof yields over six hundred gallons of water. Storage tanks or cisterns hold this resource for dry periods.
Position storage tanks to enable gravity flow to gardens when possible. Elevating tanks creates water pressure without pumps. Connect multiple tanks in series to increase capacity. Filter systems remove debris and make water suitable for different uses.
Irrigation Planning and Layout
Drip irrigation delivers water directly to plant roots with minimal waste. Initial installation requires time and investment but pays dividends through water savings and improved plant health. Design systems in zones to match different crop water needs.
Run main water lines along garden edges or paths where they remain accessible for repairs. Use quality components that resist sun damage and freezing. Install shutoff valves at strategic points to control water flow to different areas independently.
Creating Water Features That Work
Ponds serve multiple functions on homesteads. They store water for irrigation and livestock. They moderate temperature extremes and increase humidity. They support fish production and attract beneficial wildlife. Strategic pond placement maximizes these benefits.
Locate ponds in natural low spots where water collects. Ensure adequate depth to prevent complete freezing in winter. Position ponds uphill from gardens to allow gravity irrigation. Size ponds based on your property’s water yield and intended uses.
Water System Priorities
Reliable drinking water for family and animals
Garden irrigation during dry periods
Fire suppression capability
Livestock watering access
Greenhouse and nursery needs
Processing and cleaning areas
Conservation Techniques
Mulching to reduce evaporation losses
Drip irrigation instead of sprinklers
Rainwater capture and storage
Greywater systems for appropriate uses
Drought-tolerant plant selection
Proper soil building for water retention
Common Mistakes
Undersizing storage capacity
Poor gravity flow planning
Inadequate filtration systems
No backup water source
Ignoring seasonal variations
Cheap components that fail quickly
Managing Water in Different Seasons
Winter presents unique challenges in cold climates. Protect pipes and tanks from freezing. Provide heated waterers for animals. Ensure access to water sources even during heavy snow. Summer demands increase during hot, dry weather when plants and animals need more water.
Plan for the worst-case scenario regarding water availability. Drought years test every homestead’s resilience. Adequate storage, efficient use, and backup sources make the difference between thriving and merely surviving during challenging periods.
Design Complete Homestead Systems
Get comprehensive guidance for integrating water, food production, and animal systems into one cohesive homestead design. Learn how professional homesteaders create resilient, productive properties.
Fruit Production Areas: Orchards and Perennial Systems
Fruit trees and berry bushes provide years of production from a single planting. Unlike annual gardens, these perennial systems require careful initial placement since moving established trees proves difficult. Consider mature sizes, pollination needs, and harvest accessibility when planning fruit areas.
Dwarf and semi-dwarf fruit trees fit better on small homesteads than standard varieties. These smaller trees reach productive maturity faster. They allow easier pruning and harvesting from ground level. You can plant more varieties in the same space, extending your harvest season.
Orchard Layout and Spacing
Space trees based on their mature size and root system. Dwarf apples need eight to ten feet between trees. Semi-dwarf varieties require twelve to fifteen feet. Standard trees demand twenty to twenty-five feet of spacing. Research specific variety requirements before planting.
Arrange trees in rows or guilds depending on your available space and aesthetic preferences. Row planting simplifies mowing and maintenance. Guild planting creates polyculture systems with supporting plants around each tree. Both approaches work well when designed thoughtfully.
Integrating Berry Production
Berry bushes fill spaces between tree rows productively. Blueberries prefer acidic soil and can grow in areas unsuitable for other crops. Raspberries and blackberries produce abundantly but spread aggressively, so contain them with barriers or dedicated patches.
Strawberries make excellent groundcover beneath fruit trees once trees establish. They suppress weeds, retain soil moisture, and produce bonus harvests. Rotate strawberry plantings every few years to maintain productivity and prevent disease buildup.
Pollination and Variety Selection
Most fruit trees require cross-pollination from compatible varieties. Plan to include at least two varieties of apples, pears, or cherries that bloom simultaneously. Self-fertile varieties like some peaches and plums offer more flexibility but still benefit from cross-pollination.
Choose varieties with staggered harvest times to extend your season. Early, mid-season, and late varieties prevent overwhelming gluts while providing fresh fruit over many weeks. Consider storage qualities and preservation methods when selecting varieties.
Fruit Type
Space Needed
Years to Production
Pollination Needs
Dwarf Apple
8-10 feet spacing
2-3 years
Needs compatible variety
Dwarf Pear
10-12 feet spacing
3-4 years
Needs compatible variety
Peach
12-15 feet spacing
2-3 years
Most self-fertile
Cherry (dwarf)
10-12 feet spacing
3-5 years
Varies by variety
Blueberries
4-5 feet spacing
2-3 years
Benefits from multiple varieties
Raspberries
2-3 feet in row
1-2 years
Self-fertile
Underplanting and Companion Species
Use the space beneath fruit trees productively while they mature. Nitrogen-fixing plants like clover or vetch improve soil while suppressing weeds. Herbs like comfrey accumulate nutrients and provide mulch material. Flowers attract pollinators and beneficial insects.
Avoid planting heavy feeders directly beneath trees since competition for nutrients harms both plants. Instead, create mutually beneficial relationships where companion plants support tree health through improved soil, pest control, or pollinator attraction.
Maximize Fruit Tree Placement
Learn exactly how to design productive orchards and fruit systems that thrive in small spaces. Get variety recommendations, spacing guides, and companion planting strategies that maximize harvests year after year.
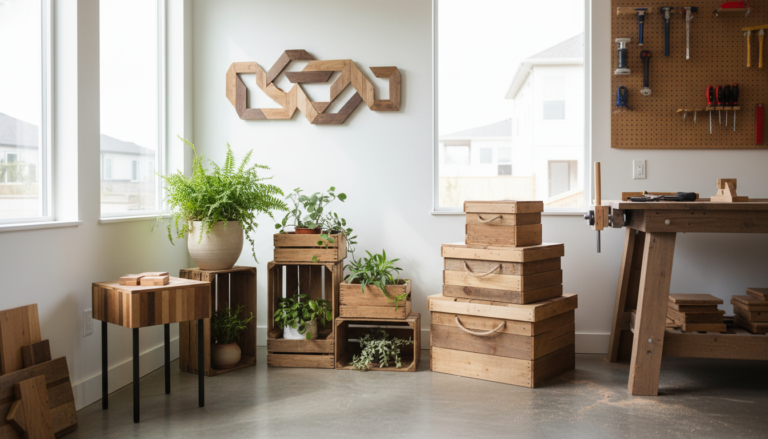
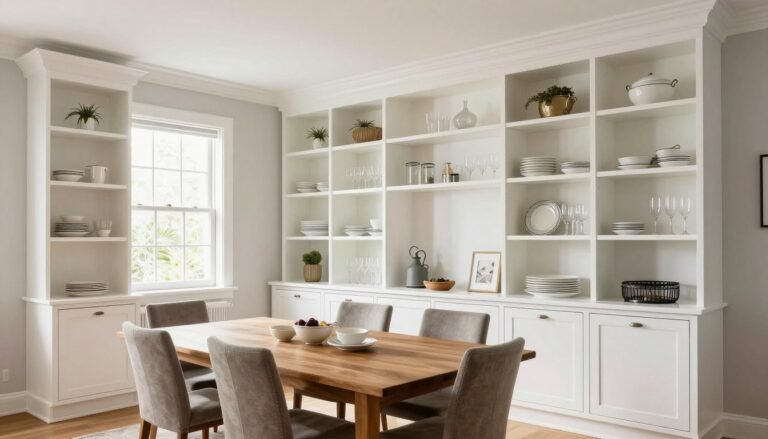
Infrastructure Placement: Buildings, Storage, and Work Areas
Supporting structures enable efficient homestead operations. Sheds, greenhouses, workshops, and storage buildings require thoughtful placement. Consider access, utilities, and workflow when positioning these elements.
Group related functions together. Tool storage near gardens reduces wasted motion. Feed storage beside animal areas simplifies daily chores. Processing spaces between production areas and homes create logical workflows for harvest handling.
Essential Storage Structures
Every homestead needs adequate storage for tools, equipment, feed, and harvest. Dry, secure storage protects valuable resources from weather and pests. Plan storage capacity generously since homesteads accumulate tools and materials as they develop.
Locate hay and feed storage with vehicle access for deliveries. Elevated floors prevent moisture damage and rodent problems. Good ventilation preserves quality. Separate storage for different feed types prevents contamination and simplifies inventory management.
Greenhouse and Season Extension
Greenhouses extend growing seasons and protect tender plants. Position them to receive maximum sun exposure, typically with the long axis running east-west. Ensure easy access from your home for frequent monitoring and adjustment.
Connect greenhouses to water and electricity if possible. Automated venting systems and drip irrigation reduce daily labor while improving plant health. Insulated north walls and thermal mass improve heat retention during cold nights.
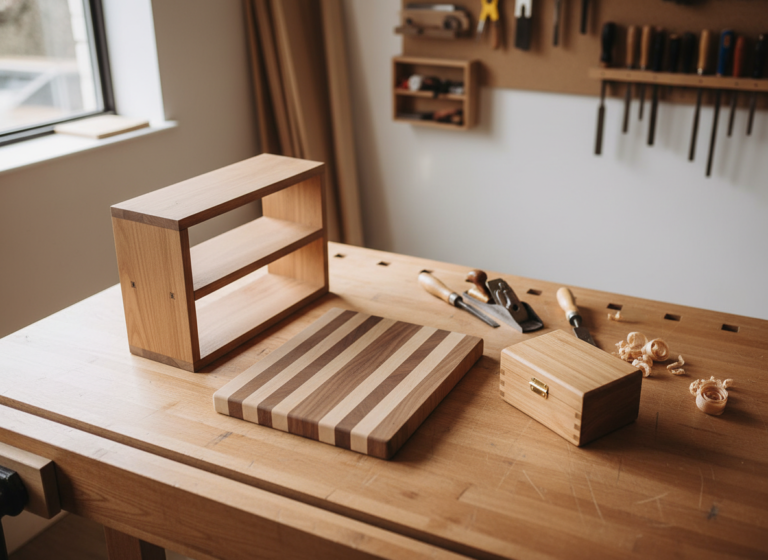
Workshop and Processing Areas
Dedicated work spaces increase efficiency and safety. Equipment repair, harvest processing, and craft projects all benefit from proper facilities. Provide adequate lighting, power, and workspace suited to your common tasks.
Position processing areas between gardens and homes to reduce harvest transport distance. Include space for equipment like canning supplies, dehydrators, or freezers. Good ventilation matters especially for spaces used during hot summer harvest periods.
Critical Infrastructure Elements
Tool shed accessible from main work areas
Covered storage for equipment protection
Greenhouse for seedlings and season extension
Workshop with power and good lighting
Harvest processing and preservation area
Secure feed and grain storage
Compost area with adequate capacity
Firewood storage if heating with wood
Vehicle parking and equipment shelter
Root cellar or cool storage space
Planning Tip
Build infrastructure in stages as needs emerge and budget allows. Start with basic tool storage and expand over time. Temporary solutions often work well until you determine exact requirements through experience.
Pathways and Access Routes
Clear pathways between structures prevent mud, reduce wear on grass, and improve safety. Hard surfaces like gravel or wood chips work well for frequently traveled routes. Wider paths accommodate wheelbarrows, carts, and equipment movement.
Design paths wide enough for your largest regular equipment. A riding mower or small tractor requires more room than a wheelbarrow. Plan for vehicle access to areas needing material deliveries or hauling. Gate openings should accommodate your equipment.
Successful homesteads function efficiently across all seasons. Winter snow, spring mud, summer heat, and fall harvests each present unique challenges. Design your layout to handle these seasonal variations without major disruptions.
Winter access determines which paths you maintain and where you locate frequently used elements. Chickens still need daily feeding when snow is three feet deep. Water systems must remain functional despite freezing temperatures. Plan accordingly when positioning essential infrastructure.
Cold Weather Considerations
Shorter winter days mean less time for outdoor work. Group essential tasks close together to minimize time spent in harsh weather. Provide shelter from prevailing winds for animal housing and frequently accessed areas.
Snow accumulation impacts different areas of your property. South-facing slopes and areas near buildings clear faster. Northern exposures and low spots may remain frozen longer. Account for these patterns when planning access routes and locating critical infrastructure.
Managing Spring Conditions
Spring mud season creates challenging conditions in many regions. Frozen ground thaws and creates temporary wetlands in low areas. High-traffic paths need hard surfaces or elevated walkways to remain usable during this transition period.
Drainage patterns become obvious during spring. Water flows reveal themselves as snow melts and spring rains fall. Observe these patterns and adjust plans to work with natural water movement rather than fighting it constantly.
Summer Heat and Production
Peak production occurs during summer months. Gardens produce heavily. Animals require more water. Preservation activities intensify as harvests arrive. Design your layout to handle this busy period efficiently.
Shade becomes valuable during hot weather. Trees, structures, or shade cloth protect animals, workers, and heat-sensitive plants. Position shaded areas strategically near workspaces and animal housing. Cool morning hours offer the best time for intensive work in hot climates.
Fall Preparation and Storage
Autumn brings harvest intensity and winter preparation simultaneously. Root crops need harvesting and storage. Canning and preservation fill kitchens. Animals require increased feed as pasture quality declines. Garden beds need cover crops or mulching for winter protection.
Storage capacity becomes critical during fall. Root cellars, pantries, freezers, and dry storage all fill with preserved food. Plan adequate space for your anticipated harvest before planting season begins. Running out of storage space wastes production and creates frustration.
Spring Tasks
Garden bed preparation and planting
Fence and structure repairs
Equipment maintenance and preparation
Compost spreading and soil building
Baby animal care and breeding
Orchard pruning and care
Summer Activities
Daily garden watering and weeding
Continuous harvest and preservation
Animal pasture rotation
Hay cutting and storage
Pest and disease monitoring
Equipment operation and field work
Fall Preparation
Final harvests and storage
Garden cleanup and cover crops
Building winterization projects
Firewood processing and stacking
Water system freeze protection
Feed and supply stockpiling
Plan Your Year-Round Success
Get comprehensive seasonal planning guides that help you prepare for every season’s unique challenges. Learn how to create layouts that function efficiently year-round, not just during ideal weather.
Common Homestead Layout Mistakes and How to Avoid Them
Learning from others’ mistakes saves time, money, and frustration. Many homesteaders repeat the same layout errors. Understanding these pitfalls helps you design more effectively from the start.
The most expensive mistakes involve permanent placements that cannot be easily changed. Buildings, ponds, and established orchards require major effort to relocate. Take time planning these elements before committing to specific locations.
Overbuilding Too Quickly
New homesteaders often install extensive infrastructure before understanding actual needs. Large barns sit empty. Elaborate gardens exceed available maintenance time. Expensive equipment gathers dust. Start smaller than you think necessary and expand based on demonstrated need.
Live on your property through all four seasons before finalizing major projects. You will discover microclimates, drainage patterns, and usage patterns that are not obvious initially. This knowledge prevents costly mistakes and improves final designs.
Ignoring Water Flow and Drainage
Poor drainage creates muddy messes and foundation problems. Water naturally flows to low points. Building in these areas invites flooding and moisture damage. Observe your land during heavy rain before placing structures or gardens.
Swales and berms redirect water productively rather than fighting natural drainage. These earthworks slow water movement, increase infiltration, and prevent erosion. Properly designed water management improves the entire property while reducing maintenance problems.
Inadequate Fencing and Predator Protection
Predators pose constant threats to small livestock. Inadequate fencing results in losses that devastate small flocks. Invest in quality fencing from the beginning rather than upgrading after predators strike. Electric fencing adds affordable protection when installed properly.
Plan fence lines carefully since moving them later proves time-consuming. Consider future expansion when setting initial boundaries. Gates should accommodate your largest equipment and create logical access patterns between different areas.
Poor Access and Pathway Planning
Insufficient pathway width creates frustration when moving materials or equipment. Narrow gates force awkward maneuvering. Muddy paths between buildings waste time and energy. Invest in proper access infrastructure early rather than tolerating poor conditions indefinitely.
Think about how you will move feed, harvest, manure, and supplies around your property. Equipment paths should flow logically from storage to use areas. Delivery vehicles need adequate room to turn around and access loading points.
Successful Layout Characteristics
Logical workflow patterns reducing daily steps
Adequate spacing for mature plant and animal sizes
Flexible design allowing future modifications
Multiple water sources and backup systems
Proper drainage and water management
Convenient access to all frequently used areas
Appropriate sun exposure for gardens and animals
Secure fencing and predator protection
Staged development matching capacity and budget
Integration of systems creating synergies
Common Layout Problems
Excessive distances between related functions
Insufficient space for mature sizes
Rigid design preventing future changes
Single point of failure in water or power
Poor drainage causing mud and flooding
Difficult access requiring excessive effort
Shade or sun exposure problems
Inadequate predator protection
Overwhelming initial construction
Isolated elements missing beneficial connections
Neglecting Soil Quality and Building
Soil determines production capacity more than any other factor. Poor soil creates endless struggles while great soil makes growing easy. Test soil across your property before finalizing garden and orchard locations. Some areas may require extensive amendment while others are naturally fertile.
Build soil continuously through composting, cover cropping, and animal integration. Design systems that make soil building convenient rather than burdensome. Compost production should flow naturally from kitchen, garden, and animal wastes to growing areas needing fertility.
Avoid These Expensive Layout Errors
Learn exactly which layout mistakes cost homesteaders thousands in corrections and lost production. Get proven strategies that help you avoid these errors and build right the first time.
Acre-Specific Layout Examples for Different Property Sizes
Different acreages require different approaches. A one-acre homestead demands intensive methods while a five-acre property allows more extensive systems. Understanding these distinctions helps you design appropriately for your available land.
One-Acre Homestead Layout
One acre provides substantial homesteading potential with careful design. Dedicate roughly one-quarter acre to intensive vegetable gardens using raised beds and vertical growing. Another quarter acre accommodates fruit trees, berry bushes, and perennial crops.
Reserve space for a chicken coop and small run supporting twelve to twenty birds. Include composting systems, tool storage, and a small greenhouse or cold frames. The remaining area holds your home, driveway, and basic infrastructure.
Two to Three-Acre Homestead Design
Additional acreage enables expanded production and greater diversity. Increase garden space to half an acre while adding dedicated areas for different crop types. Separate zones for annual vegetables, perennial crops, and cutting flowers improve organization.
Add small livestock like goats or sheep on one to two acres of pasture with rotational grazing. Expand poultry numbers or add different species like ducks or turkeys. Larger storage buildings and workshop space become practical. A small pond might fit into the plan.
Five-Acre Homestead Possibilities
Five acres supports comprehensive homesteading with room for most elements small-scale farmers desire. Full-sized orchards with thirty to fifty trees become viable. Multiple garden areas allow proper crop rotation and cover cropping. Larger livestock including cattle or pigs fit into the design.
Dedicate specific areas to different functions. Production zones separate from living areas create better organization. Equipment storage, processing buildings, and dedicated work spaces improve efficiency. Natural areas provide wildlife habitat and resources like firewood.
Property Size
Garden Area
Animal Capacity
Fruit Production
1 Acre
Quarter acre intensive beds
12-20 chickens, possibly rabbits
10-15 dwarf trees, berry bushes
2 Acres
Half acre mixed gardens
20+ chickens, 2-4 goats or sheep
20-25 trees, expanded berries
3 Acres
Three-quarter acre diverse zones
Multiple poultry types, 4-6 goats/sheep
25-30 trees, food forest areas
5 Acres
1+ acre with rotation areas
Diverse livestock including cattle/pigs
30-50 trees, extensive perennials
Adapting Layouts to Your Specific Situation
Every property presents unique conditions. Slope, soil, climate, and existing features all influence optimal layouts. Use examples as starting points rather than rigid templates. Adapt ideas to match your land’s characteristics and your family’s priorities.
Draw multiple layout versions before committing to final plans. Consider different arrangements for major elements. Test ideas on paper where changes cost nothing. This planning time prevents expensive corrections later when moving established elements.
Putting It All Together: Creating Your Master Homestead Plan
Successful homestead layouts emerge from thoughtful planning and gradual implementation. You now understand the key principles governing effective design. The next step involves applying this knowledge to your specific property.
Starting Your Planning Process
Begin with accurate property measurements and a base map. Graph paper works well for initial sketches. Mark existing features including buildings, trees, slopes, and water sources. Note sun exposure patterns and prevailing wind directions. This base information guides all subsequent decisions.
List your homestead goals in priority order. Some families prioritize food production while others emphasize livestock or self-sufficiency. Your design should reflect your actual priorities rather than someone else’s vision. Be honest about available time, physical capability, and financial resources.
Phasing Your Implementation
Develop a multi-year implementation timeline. Year one might focus on basic infrastructure and initial gardens. Year two adds animals and expands production areas. Year three develops orchards and longer-term systems. This staged approach prevents overwhelm while building skills progressively.
Front-load permanent elements in your timeline. Buildings, ponds, and major earthworks should happen early since they are difficult to modify later. Temporary solutions work fine for elements still under evaluation. You can always upgrade after determining exact requirements through experience.
Remaining Flexible and Adaptive
The best homestead layouts evolve over time based on real-world experience. Your initial plan provides direction but should not constrain beneficial changes. Review and revise annually as you learn what works on your specific property with your particular situation.
Keep detailed records of what you plant, build, and modify each year. Photos document progress and problems. Notes capture lessons learned while details remain fresh. This documentation improves future decisions and prevents repeating mistakes.
Final Planning Wisdom
Perfect planning matters less than starting and learning. Your homestead will teach you more than any book or guide. Begin with solid principles, implement thoughtfully, observe results carefully, and adjust accordingly. This iterative process creates homesteads uniquely suited to their land and people.
Building Community Connections
Other homesteaders offer valuable knowledge and support. Local networks provide sources for materials, animals, and shared equipment. Join homesteading groups online and in your area. Visit established homesteads to see different layout approaches in action. Learn from both successes and failures others have experienced.
Share your own journey as you progress. Document challenges and solutions. Your experiences will help others following similar paths. The homesteading community thrives through mutual support and knowledge sharing. Contribute to this tradition while benefiting from accumulated wisdom.
Start Your Homestead Transformation Today
Get the complete homestead planning system that guides you step-by-step from empty land to thriving, productive property. Stop feeling overwhelmed and start building your dream homestead with proven strategies and professional support.
Conclusion: Your Journey to a Well-Designed Homestead
A thoughtfully designed small homestead layout transforms limited space into abundant production. The principles covered in this guide provide the foundation for creating your own efficient, productive property. Proper zoning reduces labor while increasing yields. Smart infrastructure placement creates natural workflows. Integrated systems generate synergies that benefit the entire homestead.
Remember that homesteading is a journey rather than a destination. Your first layout attempts will contain mistakes. Every season teaches new lessons. The key is beginning with solid principles, implementing gradually, and adjusting based on experience. Over time, your homestead will evolve into a finely tuned system perfectly suited to your land and lifestyle.
Your homestead layout represents the physical manifestation of your values and vision. Whether you manage one acre or five, the space holds tremendous potential. Maximize that potential through careful planning, consistent effort, and willingness to learn. The reward is a resilient, productive property that feeds your family while connecting you deeply to the land.
Start where you are with what you have. Make your first marks on paper or ground. Learn from each season’s successes and challenges. Build steadily toward the homestead you envision. With thoughtful layout design and persistent effort, you will create a thriving small homestead that serves your family for generations to come.