Starting your woodworking journey doesn’t require years of experience or expensive power tools. Whether you want to refresh your living room or create functional pieces for your house, simple projects offer the perfect way to build skills and confidence.
This Website contains affiliate links. That means I may earn a small commission if you purchase through my links, at no extra cost to you.
Woodworking transforms raw materials into beautiful, functional items. The satisfaction of completing your first project stays with you forever.
This guide showcases accessible projects anyone can tackle. From floating shelves to plant stands, each idea includes clear guidance about tools, materials, and techniques.
Ready to Start Building?
Access thousands of detailed woodworking plans with step-by-step instructions, complete materials lists, and professional blueprints designed for beginners.
Essential Tools for Easy Woodworking Projects
You don’t need an entire shop to begin. A basic tool collection handles most beginner projects effectively.

Must-Have Power Tools
Power tools speed up work and improve accuracy. A cordless drill serves as your most versatile tool for drilling holes and driving screws.
A circular saw cuts lumber quickly and precisely. Many DIY projects require only these two power tools to complete.
Consider adding a power sander later. It saves time and creates smoother finishes than hand sanding.
Hand Tools That Matter
Quality hand tools remain essential. A tape measure, combination square, and pencil help you measure and mark accurately.
Clamps hold pieces together during assembly. Wood glue creates strong bonds between joined pieces.
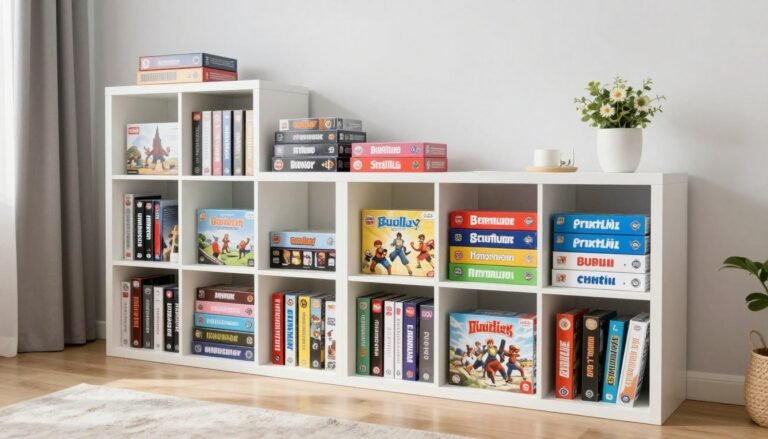
DIY Floating Shelves for Any Room
Floating shelves create storage and display space without visible brackets. This project teaches fundamental skills while producing professional results.

Materials and Cut List
Pine boards work beautifully for floating shelves. Choose boards based on your desired shelf length and depth.
Standard sizes include 24 to 48 inches long and 8 to 12 inches deep. Thicker boards create a more substantial look.
- Select straight, knot-free pine boards
- Purchase shelf brackets or floating shelf hardware
- Get wood stain or paint in your preferred color
- Obtain sandpaper in various grits
- Secure wall anchors appropriate for your wall type
Construction Steps
Cut your boards to the desired length using a circular saw. Sand all surfaces starting with coarser grit and finishing with fine sandpaper.
Apply your chosen finish. Stain highlights natural wood grain while paint provides unlimited color options.
Install mounting hardware following manufacturer instructions. Use a level to ensure perfectly straight shelves.

Installation Tips
Finding wall studs provides the strongest support. Mark stud locations carefully before drilling.
Pre-drill holes to prevent wood splitting. Test fit everything before final assembly.

Finishing Options
Clear polyurethane protects natural wood beauty. Oil-based stains penetrate deeply for rich color.
Water-based products dry faster and clean up easily. Experiment on scrap pieces first.

Styling Your Shelves
Group items in odd numbers for visual appeal. Mix heights and textures to create interest.
Leave some empty space. Overcrowding makes shelves look cluttered rather than curated.
Build a Stylish Plant Stand
Plant stands elevate greenery while adding architectural interest. This simple design requires minimal wood and basic tools.

Design Variations
Single-tier stands work perfectly for statement plants. Multi-tier designs accommodate entire plant collections.
Ladder-style stands lean against walls. Freestanding designs fit anywhere in your room.
- Measure your plant pots before cutting
- Consider ceiling height for tall plants
- Plan for water drainage and protection
- Choose wood that complements your decor
- Add wheels for easy repositioning
Simple Assembly Process
Cut four legs to identical lengths. Precise measurements ensure a stable stand.
Create shelf supports using shorter pieces. Attach them to legs using wood screws and glue for strength.
Sand all edges smooth. Plants deserve beautiful homes without splinters or rough spots.
Wood Selection Guide
Pine offers affordability and easy workability. Cedar resists moisture naturally, perfect for plant stands.
Hardwoods like oak provide durability and rich grain patterns. Your choice affects both appearance and longevity.

Stability Considerations
Wider leg placement creates a more stable base. Calculate proper angles for angled leg designs.
Cross-bracing adds strength to taller stands. Test stability before adding plants and water.

Create Your First Workbench
Every woodworker needs a solid work surface. A basic workbench provides the foundation for future projects.

Start with a simple design. Four legs, a top, and a lower shelf create functional workspace.
Standard workbench height measures 34 to 36 inches. This size accommodates most tasks comfortably.
Building Strong Joints
Pocket hole screws create quick, strong connections. A pocket hole jig guides your drill at the correct angle.
Lap joints offer traditional strength. They require more precision but result in beautiful connections.
Wood glue doubles joint strength. Apply it generously and clamp pieces while drying.
Master Essential Woodworking Techniques
Learn professional joinery methods, tool techniques, and finishing skills with comprehensive video tutorials and detailed blueprints for every project type.
DIY Kitchen Island on a Budget
A kitchen island adds valuable workspace and storage. Building your own costs a fraction of commercial options.

Base your design on kitchen dimensions. Measure carefully to ensure adequate clearance around the island.
Standard islands measure 36 inches tall. Width and length depend on your available space.
Storage Solutions
Open shelving provides easy access to frequently used items. Deep shelves accommodate large pots and appliances.
Add cabinet doors for concealed storage. Simple frame-and-panel designs look professional and remain beginner-friendly.
- Include electrical outlets if possible
- Design for your specific storage needs
- Consider seating overhang dimensions
- Choose durable countertop materials
- Add wheels for a mobile island option
Countertop Choices
Butcher block creates warm, natural surfaces. It requires regular oiling but develops beautiful patina over time.

Base Construction
Frame construction uses 2×4 lumber for strength. Wrap the frame with plywood or tongue-and-groove boards.

Paint and Finish Ideas
White or gray paint complements most kitchen designs. Distressed finishes add farmhouse charm.
Natural wood bases pair beautifully with painted upper cabinets. Contrasting colors create visual interest.
Island Dimensions Guide
Minimum clearance around islands should be 36 inches. Allow 42 to 48 inches for high-traffic kitchens.
Seating requires 24 inches of width per person. Overhang should extend 12 to 15 inches for knee room.
Building Sequence
Construct the base frame first. Add shelving before attaching the countertop.
Install any electrical components before finishing. Complete all painting before final assembly.
Finishing Touches
Hardware choices dramatically impact the final look. Oil-rubbed bronze creates traditional appeal.
Brushed nickel offers modern elegance. Match hardware to existing kitchen fixtures for cohesion.
Simple Table Projects for Beginners
Tables represent classic woodworking projects. Start with basic designs and progress to more complex pieces.

Coffee Table Basics
Coffee tables typically measure 16 to 18 inches tall. This height works well with standard sofa seating.
Table length should be two-thirds of your sofa length. Width varies based on available space and design preferences.
Four-leg designs offer simplicity and stability. Trestle bases create visual interest and provide stretching room underneath.
Side Table Construction
Side tables complement sofas and chairs perfectly. Standard height matches arm height, usually 24 to 27 inches.
Small footprints fit tight spaces. Square designs measuring 18 to 24 inches work in most rooms.
- Choose proportions that suit your furniture
- Sand tabletops extra smooth for comfort
- Apply durable finishes for daily use
- Consider lower shelves for storage
- Test stability before finishing

Versatile Shelving Systems
Custom shelves maximize storage while reflecting personal style. Design systems that grow with your needs.

Planning Your System
Measure wall space carefully. Account for baseboards, outlets, and windows in your design.
Standard shelf depth ranges from 10 to 12 inches. Deeper shelves accommodate larger items but protrude more into the room.
Space shelves 10 to 12 inches apart for books. Adjust spacing for decorative items and different object sizes.
Support Options
Bracket systems allow adjustable shelf heights. This flexibility accommodates changing storage needs.
Fixed shelves create cleaner lines. They work well when you know exact spacing requirements.
French cleats provide strong support for heavy loads. They’re perfect for garage and shop shelving.

Load Capacity
Calculate weight before installation. Books weigh significantly more than decorative items.
Increase support for heavier loads. Add center brackets on shelves longer than 36 inches.
Choose appropriate wall anchors for your wall type. Hollow walls require different hardware than solid walls.
Easy Outdoor Woodworking Projects
Outdoor projects enhance yards and gardens. Weather-resistant materials ensure long-lasting results.

Raised Garden Bed Construction
Raised garden beds improve soil drainage and reduce back strain. Standard beds measure 4 feet wide and 8 feet long.
Height varies from 6 to 24 inches. Taller beds reduce bending but require more soil.
Cedar resists rot naturally. Untreated pine works but deteriorates faster in outdoor conditions.
- Use galvanized or stainless steel fasteners
- Line interiors with landscape fabric
- Add corner posts for extra strength
- Consider multiple beds for crop rotation
- Include bottom barriers against burrowing pests
Planter Box Designs
Planter boxes dress up patios and decks. Design sizes appropriate for your plant choices.
Drainage holes prevent waterlogged soil. Elevate boxes slightly for proper water runoff.

Simple Outdoor Bench
Garden benches provide seating and focal points. Basic designs require only straight cuts and simple joinery.
Standard bench height measures 18 inches. Seat depth should be at least 15 inches for comfort.
Apply exterior-grade finish or leave wood natural to weather. Both approaches work well outdoors.

Weather-Resistant Woods
Cedar and redwood contain natural oils that resist decay. They cost more but last significantly longer.
Pressure-treated pine offers affordability. Ensure it’s rated for ground contact when building raised beds.

Exterior Finishes
Exterior stains penetrate wood while providing UV protection. They need reapplication every few years.
Clear sealers maintain natural wood appearance. Proper preparation ensures maximum finish longevity.

Outdoor Assembly
Use waterproof wood glue for outdoor projects. It creates bonds that withstand moisture and temperature changes.
Pre-drill all screw holes to prevent splitting. Countersink screws slightly below the surface.
Practical Storage Projects
Custom storage solves organizational challenges. Build pieces that fit your exact requirements.

Coat Rack Creation
Wall-mounted coat racks save floor space. Simple designs use a board with decorative hooks.
Space hooks 6 to 8 inches apart. Mount the rack 5 feet from the floor for easy access.
Add a shelf above for hats and accessories. Include a bottom shelf for shoes or bags.
Tool Organizer Systems
Keeping tools organized improves efficiency. Wall-mounted systems maximize vertical space in shops and garages.
French cleat systems allow reconfiguration as needs change. Individual tool holders attach to the cleat strips.
- Group similar tools together
- Create dedicated spaces for each tool
- Include drawer space for small items
- Add labels for quick identification
- Position frequently used tools within easy reach

Entryway Organizer
Entryway organizers contain daily clutter. Combine hooks, shelves, and small compartments in one piece.
Include a mail slot or basket. Add key hooks at eye level for convenience.
Design units to fit your wall space. Narrow designs work in tight entryways while wider pieces suit spacious foyers.
Shop Organization Ideas
Lumber racks store materials vertically. This approach uses minimal floor space while keeping wood accessible.

Small Parts Storage
Build drawer units for screws, nails, and hardware. Shallow drawers prevent items from getting lost in deep containers.

Home Office Desk Builds
Custom desks fit your workspace perfectly. Design around your specific work requirements and equipment.

Desk Size Planning
Standard desk height measures 29 to 30 inches. This dimension accommodates most office chairs comfortably.
Depth should be at least 24 inches for monitor placement. Add depth if you need extra workspace.
Length depends on your equipment and activities. Measure your devices before cutting materials.
Simple Desk Designs
Sawhorse desks offer ultimate simplicity. Two sawhorses support a solid top for quick assembly.
Four-leg designs provide stability and classic appearance. Add a drawer or shelf for storage.
Wall-mounted desks save floor space in small rooms. Fold-down designs work in multipurpose areas.
Desktop Materials
Solid wood tops offer beauty and durability. Butcher block provides substantial thickness and strength.
Plywood works well with edge banding. It costs less than solid wood while remaining stable.
Cable Management
Drill holes for cable pass-through. Position them toward the back of the desk surface.
Add cable trays underneath to organize wires. This approach keeps cords hidden and manageable.
Finish Options
Desk surfaces need durable finishes. Polyurethane provides excellent protection against daily wear.
Multiple thin coats work better than single thick applications. Sand lightly between coats for smoothness.
Decorative Woodworking Ideas
Decorative projects add personality to spaces. Small items make excellent gifts and help develop skills.

Picture Frame Construction
Custom frames showcase photos and artwork beautifully. Miter cuts create professional corner joints.
A miter box guides hand saws at precise 45-degree angles. This tool costs little but produces accurate cuts.
Measure artwork carefully before cutting. Frames should be slightly larger than the pieces they hold.
Wooden Box Projects
Boxes organize small items while displaying craftsmanship. Basic designs teach essential joinery techniques.
Keepsake boxes make thoughtful gifts. Size them for jewelry, photos, or treasured mementos.
- Practice joints on scrap wood first
- Select attractive woods for visible surfaces
- Add felt lining for a refined look
- Consider hinged lids versus removable tops
- Include small feet to elevate boxes

Wall Art Ideas
Geometric wood wall art creates modern focal points. Cut triangles or hexagons from contrasting woods.
Arrange pieces in patterns before mounting. Adhesive or small nails secure lightweight assemblies.
Stain individual pieces different shades for depth. Natural wood variations add interest without staining.
Essential Tips for Success
Following best practices improves results and ensures safety. These guidelines apply to all woodworking projects.

Measuring and Cutting Accurately
Measure twice, cut once. This old saying prevents costly mistakes and material waste.
Use sharp pencils for marking. Thick marker lines create confusion about exact cut locations.
Make test cuts on scrap pieces. This practice verifies measurements before cutting expensive wood.
Sanding for Smooth Finishes
Start with coarser grit and progress to finer grits. This progression removes scratches efficiently.
Sand with the grain direction. Cross-grain scratches show through stains and clear finishes.
Remove all dust before applying finish. Tack cloths pick up fine particles regular cloths miss.
Safety First
Always wear safety glasses when cutting or sanding. Wood chips and dust pose eye injury risks.
Use hearing protection with power tools. Long-term exposure causes permanent hearing damage.

Tool Maintenance
Keep cutting edges sharp. Dull tools require excessive force and create dangerous situations.
Clean tools after each use. Removing sawdust and pitch extends tool life significantly.

Choosing the Right Wood
Pine works well for painted projects. Its soft texture accepts paint beautifully.
Oak offers strength and distinctive grain. This hardwood costs more but creates heirloom-quality pieces.
Poplar provides affordable hardwood. It paints well and machines easily for beginners.
Build with Confidence
Access a complete library of woodworking plans with detailed cut lists, assembly instructions, and finishing guides. Start creating professional-quality projects today.
Wood Finishing Fundamentals
Proper finishing protects wood and enhances appearance. Master basic techniques for professional results.

Staining Wood
Test stain colors on scrap wood first. The same stain looks different on various wood types.
Apply stain with the grain using a brush or cloth. Work in sections to maintain wet edges.
Wipe excess stain after the recommended time. Too much stain creates blotchy, uneven color.
Applying Protective Coats
Polyurethane provides durable protection. Oil-based versions offer maximum durability while water-based options dry faster.
Apply thin coats rather than thick applications. Multiple thin layers prevent drips and sags.
Sand lightly between coats with fine-grit paper. This step helps subsequent coats adhere properly.
- Work in well-ventilated areas
- Allow adequate drying time between coats
- Use appropriate brushes for different finishes
- Store finish products properly
- Clean brushes immediately after use

Planning Your Next Project
Successful projects begin with thorough planning. Consider these factors before starting construction.

Creating Cut Lists
List every piece you’ll need with dimensions. Include a few extra pieces for inevitable mistakes.
Calculate total material requirements from your cut list. This prevents mid-project lumber store trips.
Arrange cuts to minimize waste. Plan cuts on paper before sawing expensive wood.
Budget Considerations
Wood prices vary significantly by type. Research costs before finalizing your design.
Factor in hardware, finish, and consumable supplies. These items add up quickly on larger projects.
Consider tool purchases or rentals. Sometimes buying a tool costs less than project delays.
Time Management
Estimate realistic completion times. Most projects take longer than initial expectations.
Break large projects into manageable phases. Completing sections maintains motivation through long builds.

Workspace Setup
Arrange tools and materials before starting. Efficient layouts reduce wasted motion and time.
Ensure adequate lighting in your work area. Good visibility prevents mistakes and improves safety.

Taking Skills to the Next Level
Once you’ve mastered basics, challenge yourself with slightly more complex projects. These ideas build on fundamental skills.

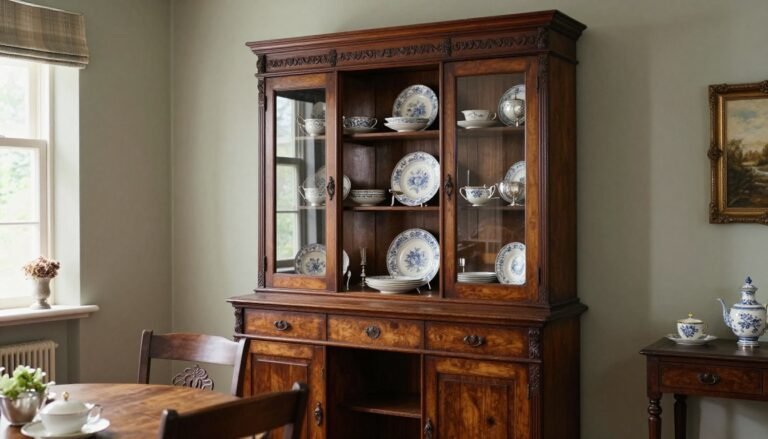
Bookshelf Construction
Bookshelves require precise measurements and strong joinery. Sagging shelves result from inadequate support or poor design.
Use dado joints for fixed shelves. These grooves provide superior strength compared to simple butt joints.
Add a back panel for rigidity. Even thin plywood significantly increases overall stability.
Storage Cabinet Project
Cabinets introduce door installation and hardware mounting. These skills apply to countless future projects.
Face-frame construction simplifies door fitting. The frame provides mounting surfaces and hides plywood edges.
Self-closing hinges make doors feel more professional. They’re barely more expensive than standard hinges.

Joinery Techniques
Dado joints create strong shelf supports. A router or table saw cuts these grooves accurately.
Practice on scrap wood before cutting project pieces. Joint-making requires precision and confidence.

Door Installation
Measure door openings carefully before cutting doors. Leave small gaps for proper clearance.
Install hinges precisely for smooth operation. Misaligned hinges cause binding and uneven gaps.

Professional Finishing
Sand cabinet interiors before assembly. Reaching inside corners becomes difficult after construction.
Apply finish to doors separately from the cabinet body. This approach ensures even coverage.
Console Table Design
Console tables fit narrow spaces like entryways and hallways. Their slim profiles challenge construction skills.
Taper legs for elegant appearance. This detail elevates simple designs dramatically.
Include a lower shelf for functionality. The shelf also adds structural bracing between legs.
Solving Common Woodworking Problems
Every woodworker encounters challenges. Learning to troubleshoot issues builds confidence and skills.

Dealing with Wood Movement
Wood expands and contracts with humidity changes. This movement can’t be prevented, only accommodated.
Allow for movement in your designs. Fixed connections across grain direction lead to cracks and splits.
Use appropriate joinery for panel assemblies. Floating panels in frames prevent splitting during seasonal changes.
Fixing Mistakes
Small gaps accept wood filler effectively. Choose filler that matches your final finish color.
Sand flush after filler dries completely. Stainable fillers exist but rarely match surrounding wood perfectly.
Embrace imperfections in early projects. They represent learning opportunities rather than failures.
- Keep extra wood for remake pieces
- Learn from each mistake
- Document successful techniques
- Join woodworking communities for advice
- Practice new skills on scrap wood
Start Your Woodworking Journey Today
Easy woodworking projects provide the perfect entry into this rewarding craft. Each completed piece builds skills and confidence for more ambitious builds.

Start with simple designs that match your current skill level. Success breeds enthusiasm for tackling more complex projects.
Gather essential tools gradually. Quality tools last decades when properly maintained.
Remember that every expert woodworker started as a beginner. Your first projects won’t be perfect, and that’s completely normal.
The woodworking community welcomes newcomers enthusiastically. Online forums and local clubs provide support and inspiration.
Transform Your Space with Custom Woodworking
Get instant access to over 16,000 detailed woodworking plans with cut lists, materials lists, step-by-step instructions, and 3D diagrams. Build anything from simple shelves to complex furniture with professional guidance.
Your living room awaits that perfect custom shelf. Your kitchen needs the island you’ve imagined. Your entryway deserves beautiful, functional storage.
These easy woodworking projects give you the power to create exactly what you envision. No more settling for mass-produced furniture that doesn’t quite fit.
Pick up your tools and start building. The satisfaction of creating something with your own hands awaits.


